Year of Bread: Bacon Cornbread

bacon cornbread sliceIf you love bacon, this bacon cornbread is your new best friend. Because — bacon! It’s arguably an ingredient that can do no wrong in the culinary pop culture. Bacon-wrapped scallops, bacon-wrapped hot dogs, bacon burgers, bacon ice cream (that one might have been a misstep)– is there no food frontier that bacon hasn’t paid a visit? In any case, this cornbread does not skimp on bacon whatsoever. Let me tell you how it goes down:

  1. Fry bacon in a skillet, reserve rendered bacon fat.
  2.  While batter is in progress, heat a healthy (haha) dose of fat in a cake pan in the oven.
  3. Pour batter over the sizzling hot bacon grease into the cake pan.
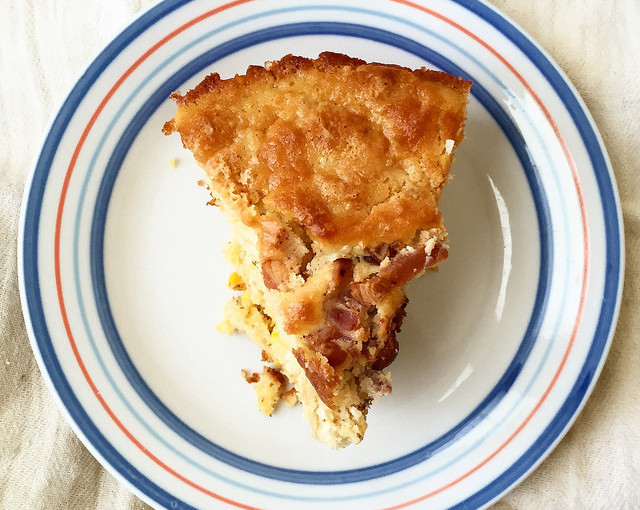
  4. You didn’t think it would end there, did you? As soon as the batter fills the pan, the bacon fat begins oozing up the sides of the pan, pooling along the edge of the batter, baking into a slightly crispy, bacony crust.
  5. Sprinkle crumbled bacon on top of batter, because any attempt at salvaging the nutritional quality of this particular cornbread died when you poured the batter directly into a pool of crackling hot bacon fat.

Reinhart’s bacon cornbread rivals his brioche recipe in terms of unrestrained, fully saturated decadence among the recipes in The Bread Baker’s Apprentice.  I would absolutely recommend this recipe to anyone tasked with bringing cornbread to a potluck or BBQ, as a way to make everyone involved hate and love you simultaneously. Even without the bacon the cornbread itself is a solid dish– dense, rich, and buttery. Realistically, this is not a bread recipe, but rather a savory sort of dessert in the brownie family. You could probably serve it for dessert with a scoop of vanilla and no one would question your decision. In the future, for non-special occasions, I’d probably reduce to just a crumble of bacon on top, and decrease the sugar and butter content overall.

17100984501_14cd8b52b3_z

Insanely Bacon Cornbread Recipe

Yield 1 (thick) 10-inch round loaf of bacon cornbread. Based on original recipe from Peter Reinhart’s The Bread Baker’s Apprentice.

Ingredients 

  • 1 cup coarse cornmeal
  • 2 cups buttermilk (or 2 cups milk – 2 T, + 2 T vinegar)
  • 8 ounces of bacon
  • 1 3/4 cups (8oz) AP flour
  • 1 1/2 Tbsp baking powder
  • 1/2 tsp baking soda
  • 1 tsp salt
  • 1/4 cup brown sugar
  • 1/4 cup sugar
  • 3 large eggs
  • 2 Tbsp honey
  • 2 Tbsp unsalted butter, melted
  • 1 1/2 cup fresh corn kernels
  • 2 Tbsp bacon fat or vegetable oil

Procedure

  1. The night before (or in the morning, if you’re baking for dinner), soak the cornmeal in the buttermilk. Cover and leave at room temperature for at least 6 hours.
  2. When you’re ready to bake, preheat the oven to 350F. Fry the bacon until crisp, then remove to a plate lined with a paper towel to cool. Reserve the fat if you are using it to grease the bread pan! Or just reserve it for other things. Fry your turkey burgers in bacon fat to make them more delicious.
  3. Combine the dry ingredients (flour, baking powder, baking soda, salt and sugars) in a mixing bowl.
  4. In a separate bowl, dissolve the honey in the melted butter, then beat in the eggs one at a time (make sure the melted butter isn’t TOO hot at this point, or you’ll cook them. Add the cornmeal-buttermilk mixture.
  5. Add the wet mixture to the dry ingredients and stir with a large spoon until batter is smooth and well-blended. Stir in the corn kernels until evenly distributed (You could also stir in some crumbled bacon at this point, if you’d like to skip the bacon topping).
  6. Place 2 Tbsp of rendered bacon fat in a 10-in round cake pan (or 9×13 baking pan), and place the pan in the oven for 5 minutes. Remove very carefully and roll the pan around a bit to make sure that the fat covers the pan and gets into any corners. If you’re not down for the bacon fat-puddle that is about to happen, skip this step and grease the pan with butter, vegetable oil, or a very thin layer of bacon fat, applied with a paper towel or pastry brush.
  7. Sprinkle crumbled bacon pieces on the top.
  8. Bake for 30-40 minutes, or until a toothpick inserted in the center comes out clean. Allow bread to cool for at least 15 minutes before slicing it into squares, wedges, or just eating it straight from the pan. bacon cornbread in pan

Year of Bread: Ciabatta

ciabatta - folded

Looks like it’s time to get back to multi-day recipes again! Ciabatta has long been a favorite of mine — it’s tender and floury and makes a solid canvas for all sorts of dipping, topping, and filling combos. Reinhart gives several suggestions for flavoring the dough, I decided to make one plain ciabatta and one mushroom ciabatta. I like this recipe so much that I’m included an abbreviated version of Peter Reinhart’s original recipe — for more notes and variations, I absolutely recommend checking out his books!

The Process

Ciabatta dough is quite loose and wet compared to many bread doughs, and it seems to take a delicate touch to keep it from falling apart or losing its shape as it comes together. While most recipes I’ve tried thus far don’t have the bread takes shape or come out of the mixing bowl until the last stages, this one comes out almost immediately and gets squished into a rough rectangle and stretched repeatedly.

ciabatta doughsA huge amount of flour goes into the stretching and shaping process of this floppy dough. This shouldn’t come as a surprise — even store-bought ciabatta is usually dusted with a healthy coating of flour. Some of the mushrooms are incorporated with the other ingredients, but the majority are folded into the “completed” dough during the folding process.

mushroom ciabatta

Baking

Ciabatta is baked on the baking stone (or a preheated cookie sheet), slid from a cutting board or pizza peel directly into the oven. From terrible past experiences, the best tip I know for doing this is to liberally coat the cutting board under the bread with semolina flour or cornmeal — otherwise your dough will not transfer smoothly into the oven, losing precious heat and probably misshaping your poor loaf.

I was successful this time though, and my loaves baked up beautifully in about 15 minutes. The indentations in the plain loaf were a result of my failing to stretch the dough immediately before sliding it into the oven, and attempting to rectify the situation slightly afterwards. Oops.

16094234804_c95ea507ed_z

Results

The bread was delicious — it was moist and tender, with a soft wheaty taste. The mushroom version was especially moist and flavorful, although I might want to play with the mushrooms types a bit in the future.

The crumb wasn’t quite right, however. A trademark of good ciabatta is the presence nice big holes in the crumb, and mine was pretty tight and uniform. The loaves turned out tasty enough that I don’t mind the texture “issue,” but I did have the chance to make the same recipe again over the weekend. This time I kept the dough much wetter, and while the sticky dough was a little more difficult to handle, the texture of the crumb was much better. All goes to show that practice does make perfect!

ciabatta crumb

Peter Reinhart’s Mushroom Ciabatta Recipe

Makes two 1-pound loaves

  • 3.25 cups (22.75 oz) poolish* (must prepare the day before!)
  • 3 cups (13.5 oz) unbleached bread flour
  • 1 3/4 tsp salt
  • 1 1/5 tsp instant yeast
  • 6 tablespoons water
  • 1/2 cup olive oil
  • 5 dried porcini mushrooms, broken into pieces
  • 6 tablespoons warm water
  • 1 pound fresh button or shiitake mushrooms (I used shiitake)
  • 4 cloves garlic, pressed or minced
  • Salt and pepper

*How to Make a Poolish: The day before you bake your bread, mix 11.25 ounces bread flour, 12 oz water and 1/4 tsp instant yeast until flour is fully hydrated. Let sit at room temperature for 3-4 hours until the mixture is nice and bubbly, then immediately refrigerate until the next day.

  1. Remove the poolish from the refrigerator for at least an hour to bring it to room temp. While the poolish is warming up, prep the mushrooms.
    1. Soak the dried mushrooms in the warm water for at least 30 minutes. Drain and set aside.
    2. Sautee the fresh mushrooms and garlic with 1/4 cup olive oil until soft. Strain off pan juices and add to dried mushrooms. Salt and pepper rest of the mushrooms to taste.
  2. Mix flour, salt and yeast together in a large bowl. Add poolish, water and 1/4 cup olive oil and mix until the ingredients form a sticky ball. Add dried mushrooms and pan juices. If you’re mixing by hand, go ahead and get your hands dirty for this one — dip you hand in a bowl of water and use it to knead the dough in the bowl, rotating the bowl with your other hand (don’t worry if this sounds confusing, it makes more sense in action). The dough should be very sticky but have a smooth consistency, and while it will stick to the bottom of the bowl, it should clear the sides of the bowl pretty well by the time it’s done.
  3. To prepare the dough for resting, sprinkle a cookie sheet liberally with flour to make a bed  8 inches square. Scrape the dough onto the bed of flour, then use the “stretch and fold” method, incorporating half the fresh mushrooms into the dough as you fold it.
    1. Stretch and Fold:  Dust the dough liberally with flour, then pat into a rectangle. Wait 2 minutes for dough to relax, then pull the short ends of the rectangle outward until dough is about twice as long. Fold the dough into thirds, then press back into a rectangle. Mist with spray oil and dust with flour.
  4. Cover the dough and let rest (it may puff up, but probably won’t rise very much) for 30 minutes, then repeat stretch and fold movement again, incorporating the rest of the fresh mushrooms into the dough. Cover and let ferment for 1 1/2-2 hours.
  5. Set up a couche (clean, floured kitchen towel) for two loaves. Carefully divide the dough into two equal pieces and use the stretch and fold method to give the dough its final shape (a rough rectangle). Mist the dough with spray oil and dust with flour, then cover with a towel and let rise for 45-60 minutes. The dough should swell noticeably.
  6. While the dough is rising, preheat the oven to 500F, making sure to place an empty metal or cast iron pan on the lowest rack. If you’re using a pizza stone like I did, make sure to stick that in the oven during preheating too!
  7. When the oven and the dough are ready, carefully lift the loaves one at a time onto a pizza peel or wooden cutting board that has been very liberally dusted in semolina flour or cornmeal. As you set them down, stretch them to be 9-12 inches long. They might spring back a bit, but that’s okay.
  8. Pour a cup of hot water into the steam pan right before you close the oven. It will, as the name suggests, immediately steam up the oven. Now for the fussy part: wait 30 seconds, then open the oven and spritz or sprinkle a bit of water on the sides of the oven. Do this two more times, then close the oven and turn the temperature down to 450F.
  9. Back for 15-20 minutes, until light golden (They will register 205F inside). The loaves will be hard at first, but will soften once they cool down. Cool for at least 45 minutes before slicing and eating!


Year of Bread: Salami and Gouda Casatiello

casatiello from above

This Week: More Butter, More Eggs, More Flavor

Last week I mentioned that I wanted to try adding some savory tidbits to the basic brioche recipe, and this week’s bread ended up being, more or less, just that. Casatiello is an Italian version of brioche — lots of eggs, butter and milk in the dough — that includes bits of meat and cheese. I’m usually pretty wary of bread stuffed with exotic and/or chunky ingredients, since they tend to interfere with the formation of a nice crust, in my experience. But I’m baking everything in The Bread Baker’s Apprentice, so I can’t say no to this one!

salami and cheese

How the Dough Shaped Up

I used a full fat gouda and red-wine salami from Trader Joe’s– I’m sure I could have upped the ante with fancier ingredients, but since they’re just playing a supporting role in the bread, I kept things simple. Reinhart instructs that any salty, dry meat and any cheese that melts to a gooey consistency (read: fondue-worthy) can be used in place of salami and gouda.

Because it’s not quite as butter-loaded up as brioche, casatiello dough was a lot easier to work with, but it was still very wet and tacky. The sponge was very thin. Reinhart described it as “pancake batter,” but I’d say this was more like crepe batter if we’re going to be detail-oriented here. The dough came together really nicely. I mixed it up in a single bowl, and it had a relatively quick cycle of proofing compared to some of the loaves I’ve tried (I went from pulling ingredients out of the cupboard to pulling the finished loaf out of the oven in about five hours).

casatiellosponge

Casatiello Flavoring Notes for Next Time

Next time I make this bread, I’ll probably tweak a few things. I’ll cut the cheese into larger pieces, to make sure that the bread has nice gooey pockets of cheesey goodness here and there. The cheese was almost too well distributed and the texture didn’t really come out as much as I would have liked, especially once the bread was cool. I’ll also cut the salami into slightly smaller pieces. Although the pictures in the book show big hunks of salami scattered throughout the bread, an inevitable side effect is that poorly-placed hunks of meat tend to make slicing the bread into cohesive slices a bit tricky.

This would make an awesome savory muffin for brunch — the base reminded me a lot of Craftsman and Wolves’ egg-hearted Rebel Within, so maybe a casatiello muffin would make for the beginnings a good knockoff version. I think playing around with more ingredients would be fun, too — maybe salami and sun-dried tomato? Gruyere and black pepper? Olives? Roasted garlic cloves? With such a tender, buttery base, it seems like it would be hard to go wrong no matter what I threw in there.

casatiello-slice

Year of Bread: Butter-loaded Brioche

large briocheFor a while there it felt like brioche was one of those culinary buzzwords that you couldn’t get away from. Brioche burger buns, brioche French Toast, brioche croutons- while none of them are bad ideas (unless you consult your cardiologist), sometimes it felt like restaurants with heavy-handed inclusion of brioche on the menu might be covering up a lack of creativity or desire to cater to the “more decadence is better” crowd. Nevertheless, brioche is a good shorthand for “we’re not fucking around with health food around here.”

brioche dough - mixing

Reinhart includes 3 basic brioche formulas– Rich Man’s Brioche, Middle-Class Brioche, and Poor Man’s Brioche. Did you know that Marie Antoinette’s famous (and probably wrongly-attributed) reaction to the plight of the French poor was actually “Let them eat brioche”?  Quite befitting of a French queen’s table, the Rich Man’s brioche contains an unreal 70% butter to flour ratio, which sounds practically like a pie crust baked into a loaf.

Bread for the Bourgeois

I went with the Middle-Class recipe, which requires a relatively measly 50% butter. As if a full stick of butter wasn’t enough enrichment, I also added 3 eggs and a bit of milk (whole, of course). Because it’s so fat-laden, this dough didn’t require as much intensive kneading as leaner breads (yay!). It was, however, incredibly fickle in the face of any amount of heat.

16299139049_72eaef63cd_kThe consistency was almost to the point of being a really thick pancake batter rather than a dough. As such, the dough requires a deep chilling before shaping. I spread it out on my trusty SilPat and stuck it in the fridge for about 4 hours before taking it out for a quick shaping into boules. It was nearly impossible to shape well, so I just rolled it into neat balls and hoped that was sufficient shaping. And here’s where I messed up — I read the instructions incorrectly and stuck the dough BACK in the fridge for a few hours to chill it up again, where I should have left it out to proof and go right into the oven. Gah.

Mistakes are Fixable!

Luckily, when I realized this 2 hours later, I pulled my dough out to proof for 2 hours. It didn’t rise as vigorously as a French loaf would have, but it still expanded a bit. When it hit the hot oven, though, my little boules grew substantially. Yay! Success after all.

16483671411_0ce234cd91_zAs enticing as hot-out-of-the-oven brioche sounds, I found that the petites tasted better the next morning — a little less of a face-punching butter taste and more of a rich, balanced bread taste. You don’t really need to put anything on this bread, especially not butter– although something like jam or apple butter would probably cut the richness of the bread nicely.

Flavor Intensifies: What I’d Add Next Time

brioche-above

I’d love to try this another time with something mixed into the dough. Maybe a brown butter brioche for extra nuttiness, or a bit of orange extract in the butter to give it a bit more complexity? Chocolate swirl, caramel, or bacon bits would also be pretty awesome, but wouldn’t do anything to help the hearty-healthiness of brioche. But if you’re eating brioche, maybe you should accept the fact that your diet has been déraillé.

Next time I’ll be making a cousin of brioche, the Casatiello, which is like brioche but has cheese and meat baked in! 

Year of Bread: The Best Bagels I’ve Ever Had

bagel-dough-ballsI have made this recipe before, back when I discovered a version on my favorite blog for foodgawking, Smitten Kitchen. They were and still are the best bagels I’ve ever had. They’re chewy on the outside, fluffy and soft on the inside, and have an amazing flavor that pairs wonderfully with anything you smear (or schmear) on them.

Slow, Slow Rise

bagel-dough-risen Unsurprisingly, Reinhart recommends a slow fermentation for bagels. I think this is actually a benefit rather than an impediment, because it makes it easy (relatively speaking) to have fresh, hot bagels for breakfast without having to wake up crazy early to make them. I made the dough and shaped the bagels the night before baking, which runs about the same way as making a loaf of French bread, except with the added step of separating and shaping the bagels at the end. The shaped, slightly-proofed bagels just chill  in the fridge overnight and come out right before they’re ready for boiling and baking.

Bagels Fresh Out of the…Pot?

bagel-dough-rounds
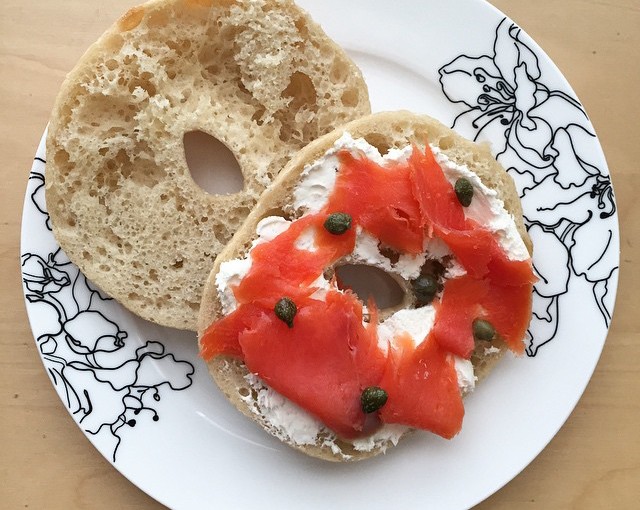
The idea of intentionally putting dough in water is kind of weird to me. Boiling water seems so violent, and bread dough can be such a delicate substance. In the end, I find it easier to think of bagels as weird giant noodles during the boiling stage. In fact, the method used here actually has a lot in common with another favorite carb of mine: ramen. As with ramen noodles, a good bagel should be nice and chewy. Adding something to make the water more alkaline helps the dough take on a chewier consistency.  I added a tablespoon of baking soda to a big pot of water after it came to a boil. Science! The dough rings are boiled a few at a time, for a minute or two on each side, then pulled out and put back onto the baking sheet to get ready for the oven.

Topping It Off

bagels-coolingThis time I went with pretty simple toppings and didn’t do any dough mix-ins, because I was too lazy to do more prep than that. Marla Bakery here in SF has amazing salted bagels, so I followed suit and sprinkled a few of mine with sea salt. The sea salt stuck fine, but the bagels I topped with sesame seeds as well ended up  mostly naked as soon as I started handling them at all. There’s gotta be a way to give the seeds more sticking power– maybe a light egg white wash or something to “glue” them down a bit? I ended up just scooping the fallen seeds off the cutting board and sprinkling the on cream cheese when I ate one, but  the sesame seed ones were my favorite. They had a nuttiness and texture that really leveled up the flavor of the bagel overall.

Text[ural] Analysis

bagel-crossFresh out of the oven these bagels were absolutely delicious, with a nice chewy exterior and a soft, fluffy center. But I did feel that they baked up a little less impressively than they did the last time I baked them. Some of them were very bubbly/porous inside. A lot of them seemed to flatten out a bit more than usual. I think this might have been a result of letting them sit out on the counter too long this morning before I boiled them (waiting for the oven to heat up and the water to boil). This also made them very soft and flexible, which is not the greatest when you’re trying to peel them off the waxed (and oiled) paper that they spent the night on. Next time I will most definitely use well-sprayed parchment paper AND leave the bagels in the fridge until a minute or two before they go into the pot. Long story short: a quick warm up is good, but getting back to room temperature seems bad.

Breakfast is Served

bagel-lox-closeBack in college my roommate and I used to have bagel breakfast days, usually soon after a Costco run that resulted in a fresh haul of groceries. We loaded them up with cream cheese, tomatoes and lox. It was our decadent weekend breakfast of choice. I topped this weekend’s bagels with a similar spread of cream cheese, lox and a sprinkling of capers– maybe not creative or original, but pretty damn tasty all the same.