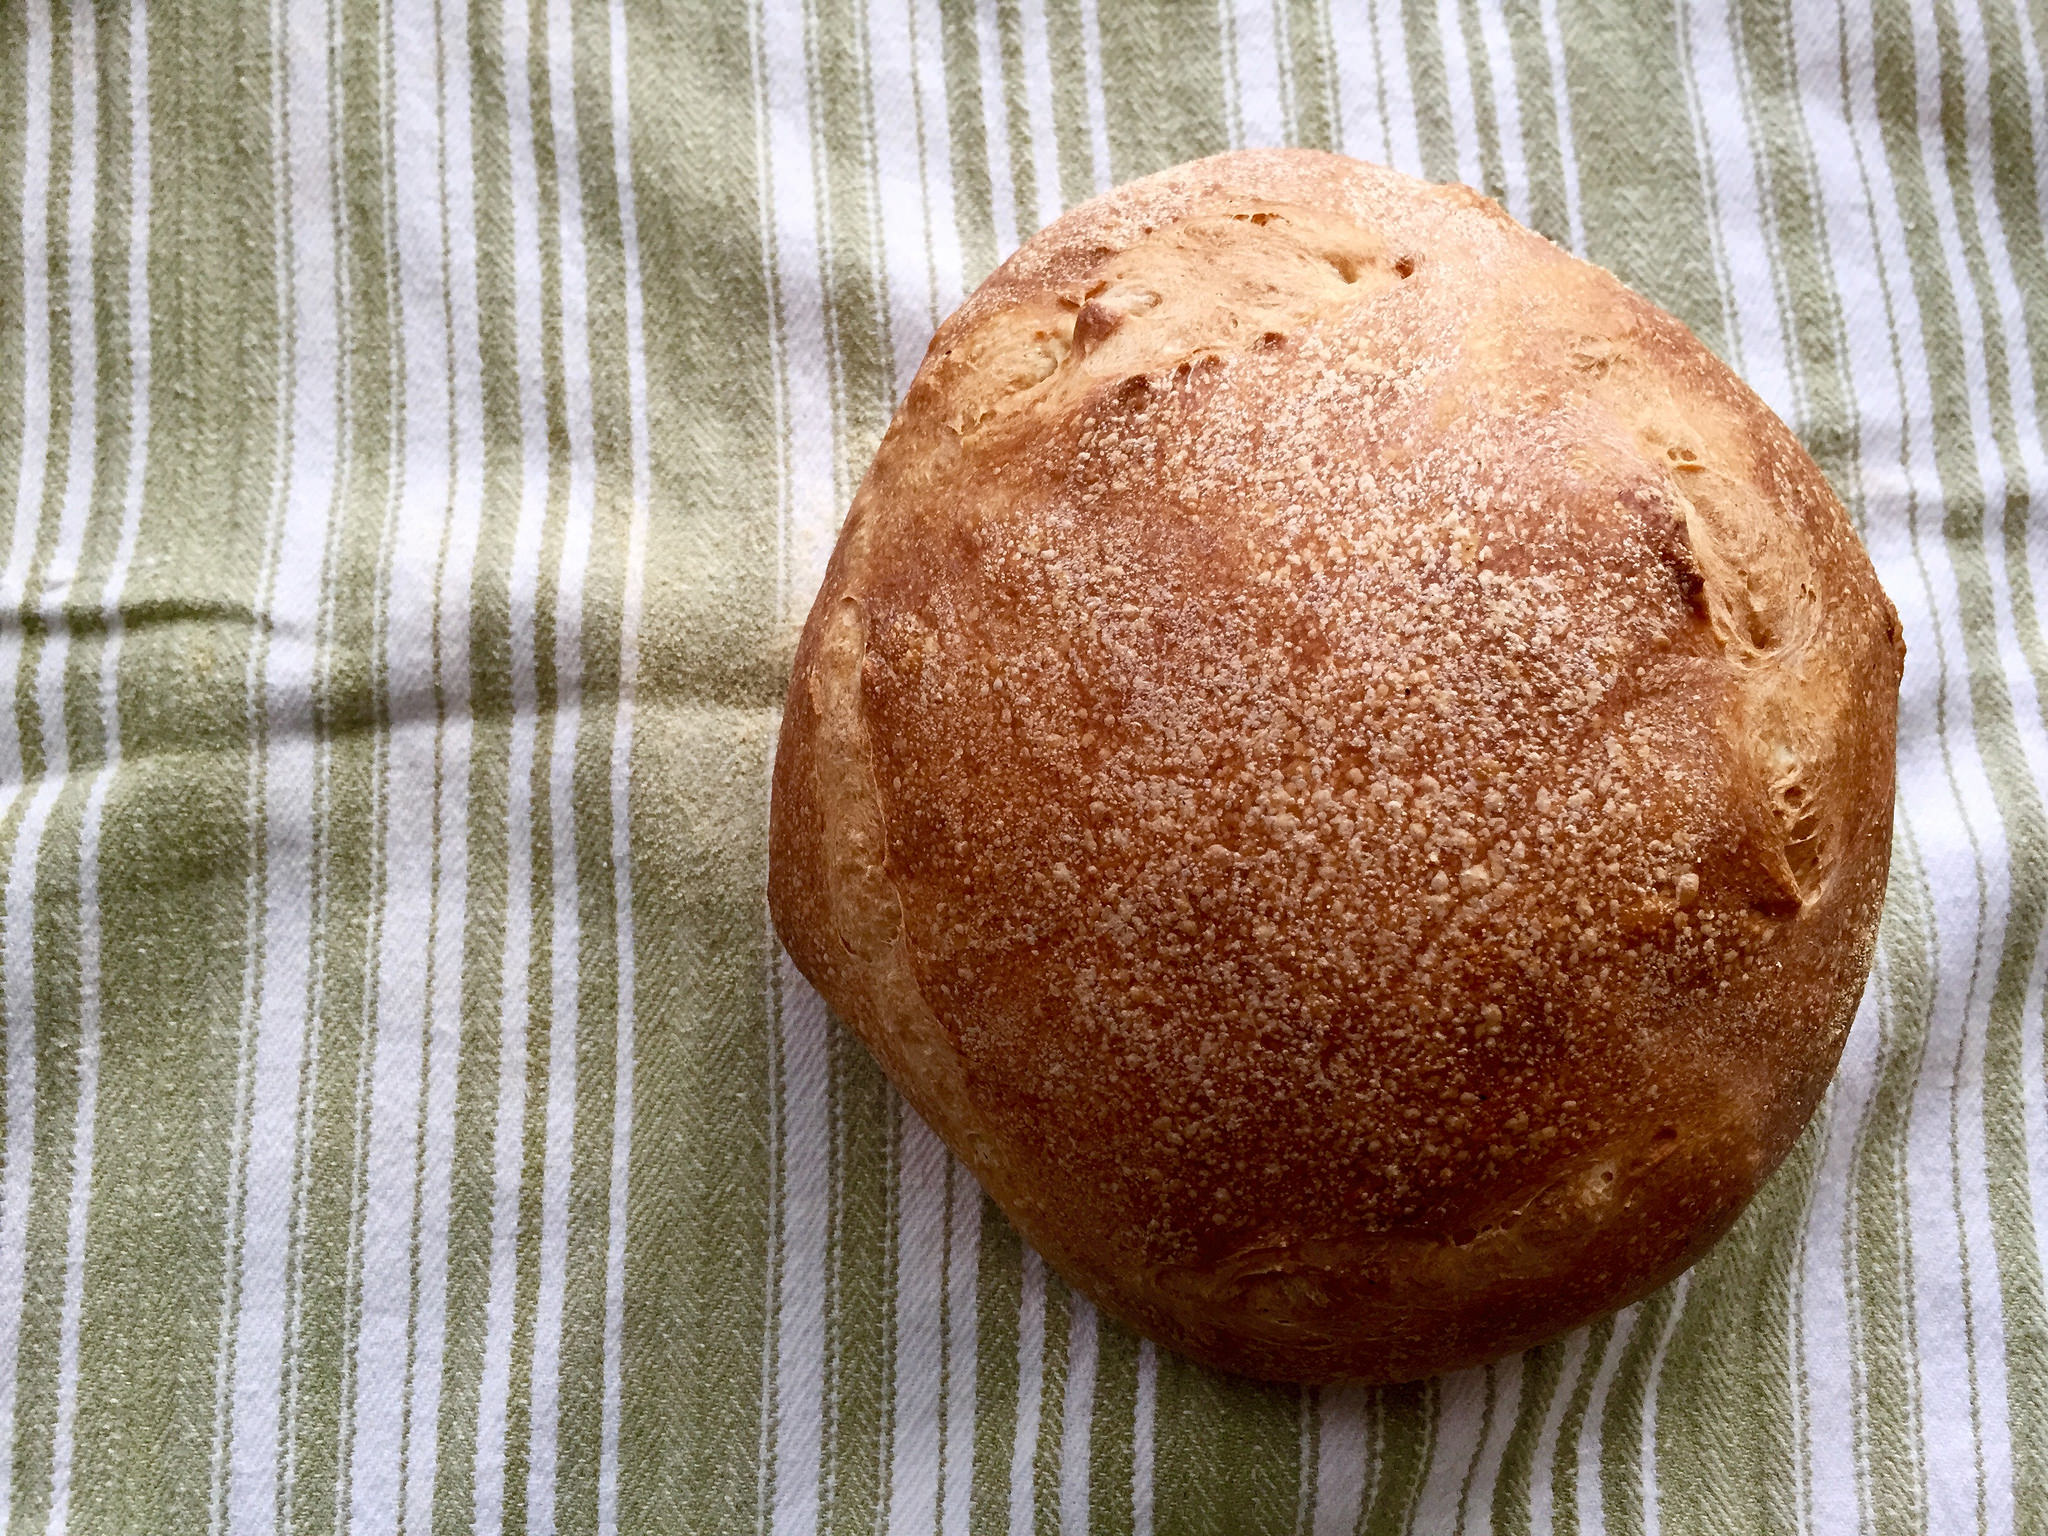
italian bread

Year of Bread: Italian Bread

Italian Bread vs. French Bread

What’s the difference between Italian Bread and French Bread, you say? That’s a good question. They’re not that different, but the nuts and bolts of it is that Italian bread uses a biga instead of pâte fermentée as a starter, and that Italian bread has just a bit of sugar and fat in it, unlike the bare-bones lean dough of French bread. Those changes mean that Italian bread ends up with a softer crust and a slightly sweeter taste than its Gallic counterpart.

italian bread biga

Baking with Biga

When it comes to baking bread, there are many different incarnations of the preferment. The pâte fermentée and the poolish are two I’ve used frequently in the past. Italian bread uses a biga, which is a relatively dry, bland starter. A biga, which is Italian in origin, doesn’t include salt. This means that less yeast is required to make it rise. Frankly, I’m not sure how much the ultimate taste is affected by different

Frankly, I’m not sure how much the ultimate taste is affected by different starters if all other variables are equal. Many of Reinhart’s recipes offer alternate instructions for using different starters for the same bread. Your choice might end up being based on tradition, and how much time you want to spend on a loaf of bread. Dry starters like biga require a bit more hands on time ( kneading), whereas wetter ones like soakers might require only a quick stir.

A New Ingredient (or not): Diastatic Barley Malt Powder

Diastatic barley malt powder is an ingredient recommended by Reinhart as “yeast food.” It essentially accelerates the yeast’s growth and makes the dough have a richer taste and color in the end. Unfortunately, even in San Francisco, where you can find many strange and wonderful ingredients to cook with, I had a hard time finding this particular addition to my baking collection. Next time I’ll plan  ahead and buy it online, but this Italian bread recipe bakes up wonderfully without it anyway, so don’t worry if you have a hard time finding it.

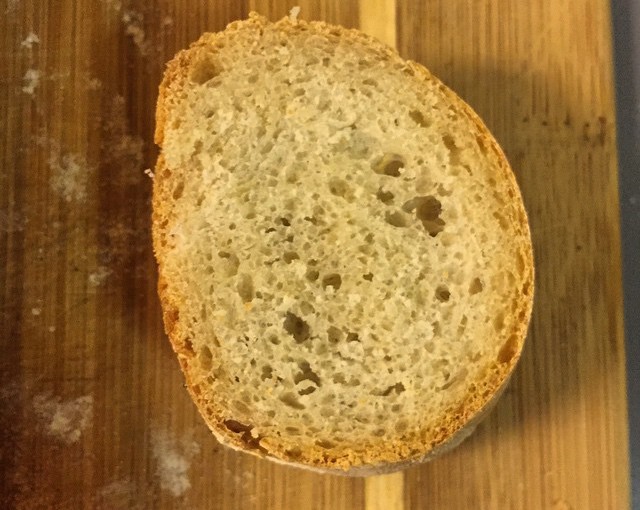
italian bread cross section

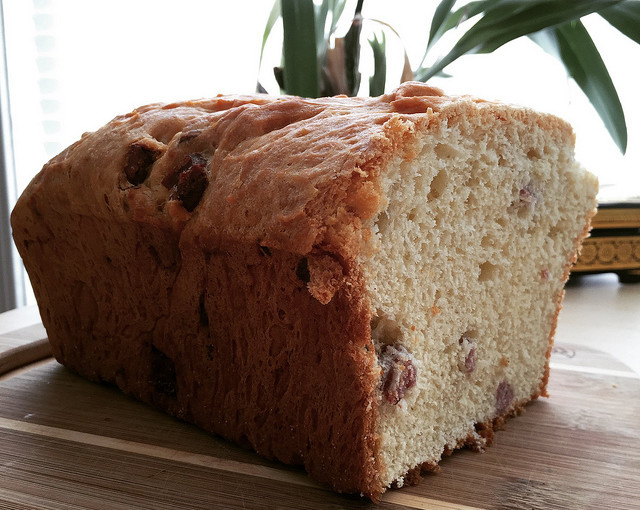
The best thing about this Italian bread is its shelf life, especially compared to French bread. The olive oil keeps it soft and tasty for a few days longer than French bread, which is a long time in bread lifecycles, considering that French bread loses its luster in about 24 hours. Italian bread makes a wonderful base for garlic bread, especially after a day or two. When fresh, the long fermenting biga and touch of sugar make this bread amazingly tasty and it needs no adornment.

Italian Bread Recipe

Slightly adapted from Peter Reinhart’s The Bread Baker’s Apprentice. Yields 2 1-lb loaves.

Biga Ingredients

  • 2.5 cups (11.25 ounces) unbleached bread flour
  • 1/2 tsp instant yeast
  • 6-7 ounces room temperature water

Italian Bread Ingredients

  • 18 ounces biga
  • 2.5 cups (11.25 ounces) unbleached bread flour
  • 1 2/3 tsp salt
  • 1 tbsp sugar
  • 1 tsp instant yeast
  • 1 tsp diastatic barley malt powder (optional)
  • 1 tbsp olive oil
  • 6-8 ounces lukewarm water (90-100°F)
  • Semolina flour or cornmeal for dusting

Procedure

  1. Make the biga: Stir together flour and yeast in a mixing bowl, then add 7 ounces of water and stir until a coarse ball forms. If there is excess flour on the bottom of the bowl, add a little more water. Turn out onto a floured counter and knead for at least 5 minutes, adding flour as needed. The dough should be soft and tacky, but not sticky. The internal temperature should be at least 77°F, but not more than 81°F. Transfer the dough to a lightly oiled bowl and cover with plastic wrap, then let ferment at room temperature for 2-4 hours, or until doubled. After the biga is done rising, degas it by kneading lightly, then return to bowl and refrigerate overnight.
  2. Remove the biga from the refrigerator to dechill at least an hour before making the dough. Cut it into 8-10 pieces and cover with plastic wrap before letting it come to room temperature.
  3. Mix the Italian bread dough: Combine the flour, salt, sugar, malt powder (if you’re using it) and yeast together in a large mixing bowl. Add the cut up pieces of biga and knead them in a bit. They won’t integrate into the dough very easily yet, but that’s ok. Add the olive oil and lukewarm water, and mix until the dough forms a rough ball.
  4. Turn the dough out onto a floured surface and knead for about 10 minutes. The consistency of the dough will be similar to French bread dough, but slightly softer and suppler.
  5. Shape the dough into a ball and return to a lightly oiled bowl for rising. Let rise for 2 hours at room temperature, or until dough has doubled in size.
  6. Shape the loaves: Divide the dough into 2 equal pieces, being careful not to degas the dough. Shape them into rough boules. Lightly dust with flour, then cover and let rest for 5 minutes. While the dough is resting, line a baking sheet with parchment and dust with semolina flour. Shape the boules a little more carefully– the outside should be smooth and tight.
  7. Let boules proof at room temperature for another hour, or until the loaves have swollen to about 1.5x their original size. Preheat the oven to 500°F when the loaves are close to done rising. If you’re using a baking stone, don’t forget to put it and a steam pan (I use a metal pie pan) in the oven when you start preheating.
  8. Bake the bread: If you’re baking the loaves directly on the sheet pan, simply score the loaves with an X or a square and place the pan in the oven. If you’re using a baking stone, carefully transfer the loaves one at a time to a peel or cutting board that’s well-dusted with semolina. Score the loaf and immediately slide it into the oven. Repeat with the second loaf. Pour a cup of hot water into the steam pan and close the door. After 30 seconds, open the door and spray the walls of the oven with water and close the door. Repeat the spraying process once more after 30 seconds, then lower the oven setting to 450°F. Bake for about 20 minutes, or until loaves are golden brown and sound hollow when tapped from bottom. Rotate loaves (or pan) 180° about halfway through baking to ensure even baking.
  9. Transfer your Italian bread to a cooling rack and let cool for at least an hour before slicing.

Year of Bread: Better-than-Cinnabon Cinnamon Buns

A lot of the bread I bake is done with the intent of eating it over the course of several days — as toast, in sandwiches, with soup, etc. But sometimes you need something sweet and decadent and meant to be scarfed down fresh out of the oven. And cinnamon buns fit the bill on all accounts.

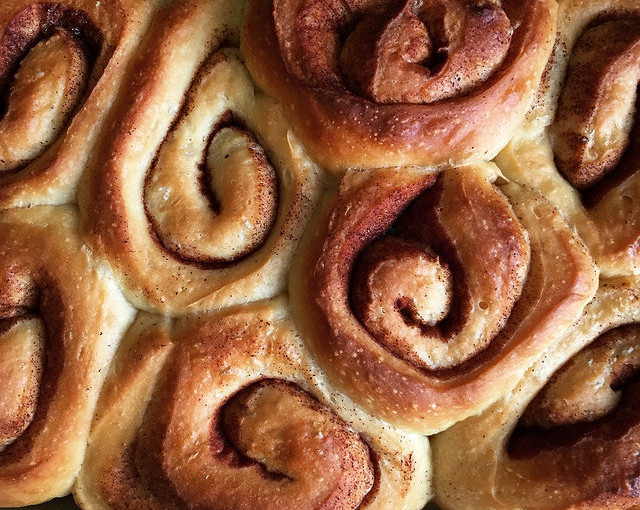
cinnamon bun cross sectionFor a lot of Americans (especially those who make frequent trips through an airport or mall), Cinnabon is the apex of cinnamon roll-goodness. But frankly they tend to be cloyingly sweet, huge, and not consistently fresh. This recipe from The Bread Baker’s Apprentice  yields cinnmon buns that are fluffy and balanced, not overly sweet or buttery, and just the right size for breakfast.

If you’re the planning type, these buns can be finished 90% of the way the day before baking to ensure optimal freshness and straight-from-the-oven warmth. Unfortunately, the long proofing time if the dough is chilled (3-4 hours) might require getting up early in the morning to pull the buns from the fridge.

16929303321_e268c1ca46_z

Better-than-Cinnabon Cinnamon Buns Recipe

Adapted from Peter Reinhart’s The Bread Baker’s Apprentice, Yields 8-10 cinnamon buns

Ingredients

  • 3 1/4 tablespoons granulated sugar
  • 1/2 tsp salt
  • 3 tablespoons unsalted butter, room temperature
  • 1/2 egg, slightly beaten (about 1.5 tablespoons of egg)
  • 1/2 tsp grated lemon zest
  • 1 3/4 cups (8 oz) AP or bread flour
  • 1 tsp instant yeast
  • 1/2 cup plus 1 tablespoon buttermilk or whole milk, room temperature
  • 1/4 cup cinnamon sugar (3 1/2 tbsp sugar plus 3/4 tbsp ground cinnamon)

Cinnamon Buns Instructions

  1. Cream sugar, salt and butter together. Add egg and lemon zest and mix until smooth. Then add flour, yeast and milk.
  2. Knead with a dough hook for about 10 minutes, or by hand for 12-15 minutes. The dough should be silky and supple, but not too dry. The dough should pass the windowpane test. Transfer to a lightly oiled bowl and roll dough to coat with oil. Cover with plastic wrap.
  3. Let sit at room temperature for about 2 hours, or until dough doubles in size.
  4. Turn dough out onto a lightly oiled surface and dust with flour. Gently roll out with a rolling pin to make a rectangle about 2/3 inch thick. Sprinkle cinnamon sugar over surface of dough, then roll up into a log. Cut in half with a sharp knife, then cut each half in half. Finally cut the four pieces in half once more to make 8 pieces.
  5. Arrange the buns in a parchment lined (or sprayed) pan about 1/2″ apart. They shouldn’t be touching, but should be close to each other. (From personal experience, if you don’t place them close enough together, they’ll kind of unravel as they bake. Mist with spray oil and cover with plastic wrap.
  6. Proof at room temperature for 75-90 minutes, until pieces have nearly doubled in size.
    1. At this point you can stick the cinnamon buns in the refrigerator and retard them for up to 2 days. Pull them out 3-4 hours before baking to allow for proofing. I did this for breakfast buns before work, so I had to get up around 4 to pull them out of the fridge (and promptly when back to bed).
  7. Preheat the oven to 350F with the oven rack on the lowest shelf.
  8. Bake for 20-30 minutes or until golden brown.I used a glass pan so I could check the doneness of the undersides easily.
  9. Let cool in the pan for about 10 minutes, then streak with fondant glaze while buns are warm but not too hot.

White Fondant Glaze

Sift 1 cup powdered sugar into a bowl, then whisk with 1-2 tablespoons of warm milk until sugar is dissolved. If you like, you can add a few drops of lemon extract or some more cinnamon, but I like mine to be pure sugary goodness.

pan of cinnamon buns

Year of Bread: Salami and Gouda Casatiello

casatiello from above

This Week: More Butter, More Eggs, More Flavor

Last week I mentioned that I wanted to try adding some savory tidbits to the basic brioche recipe, and this week’s bread ended up being, more or less, just that. Casatiello is an Italian version of brioche — lots of eggs, butter and milk in the dough — that includes bits of meat and cheese. I’m usually pretty wary of bread stuffed with exotic and/or chunky ingredients, since they tend to interfere with the formation of a nice crust, in my experience. But I’m baking everything in The Bread Baker’s Apprentice, so I can’t say no to this one!

salami and cheese

How the Dough Shaped Up

I used a full fat gouda and red-wine salami from Trader Joe’s– I’m sure I could have upped the ante with fancier ingredients, but since they’re just playing a supporting role in the bread, I kept things simple. Reinhart instructs that any salty, dry meat and any cheese that melts to a gooey consistency (read: fondue-worthy) can be used in place of salami and gouda.

Because it’s not quite as butter-loaded up as brioche, casatiello dough was a lot easier to work with, but it was still very wet and tacky. The sponge was very thin. Reinhart described it as “pancake batter,” but I’d say this was more like crepe batter if we’re going to be detail-oriented here. The dough came together really nicely. I mixed it up in a single bowl, and it had a relatively quick cycle of proofing compared to some of the loaves I’ve tried (I went from pulling ingredients out of the cupboard to pulling the finished loaf out of the oven in about five hours).

casatiellosponge

Casatiello Flavoring Notes for Next Time

Next time I make this bread, I’ll probably tweak a few things. I’ll cut the cheese into larger pieces, to make sure that the bread has nice gooey pockets of cheesey goodness here and there. The cheese was almost too well distributed and the texture didn’t really come out as much as I would have liked, especially once the bread was cool. I’ll also cut the salami into slightly smaller pieces. Although the pictures in the book show big hunks of salami scattered throughout the bread, an inevitable side effect is that poorly-placed hunks of meat tend to make slicing the bread into cohesive slices a bit tricky.

This would make an awesome savory muffin for brunch — the base reminded me a lot of Craftsman and Wolves’ egg-hearted Rebel Within, so maybe a casatiello muffin would make for the beginnings a good knockoff version. I think playing around with more ingredients would be fun, too — maybe salami and sun-dried tomato? Gruyere and black pepper? Olives? Roasted garlic cloves? With such a tender, buttery base, it seems like it would be hard to go wrong no matter what I threw in there.

casatiello-slice

Year of Bread: The Best Bagels I’ve Ever Had

bagel-dough-ballsI have made this recipe before, back when I discovered a version on my favorite blog for foodgawking, Smitten Kitchen. They were and still are the best bagels I’ve ever had. They’re chewy on the outside, fluffy and soft on the inside, and have an amazing flavor that pairs wonderfully with anything you smear (or schmear) on them.

Slow, Slow Rise

bagel-dough-risen Unsurprisingly, Reinhart recommends a slow fermentation for bagels. I think this is actually a benefit rather than an impediment, because it makes it easy (relatively speaking) to have fresh, hot bagels for breakfast without having to wake up crazy early to make them. I made the dough and shaped the bagels the night before baking, which runs about the same way as making a loaf of French bread, except with the added step of separating and shaping the bagels at the end. The shaped, slightly-proofed bagels just chill  in the fridge overnight and come out right before they’re ready for boiling and baking.

Bagels Fresh Out of the…Pot?

bagel-dough-roundsThe idea of intentionally putting dough in water is kind of weird to me. Boiling water seems so violent, and bread dough can be such a delicate substance. In the end, I find it easier to think of bagels as weird giant noodles during the boiling stage. In fact, the method used here actually has a lot in common with another favorite carb of mine: ramen. As with ramen noodles, a good bagel should be nice and chewy. Adding something to make the water more alkaline helps the dough take on a chewier consistency.  I added a tablespoon of baking soda to a big pot of water after it came to a boil. Science! The dough rings are boiled a few at a time, for a minute or two on each side, then pulled out and put back onto the baking sheet to get ready for the oven.

Topping It Off

bagels-coolingThis time I went with pretty simple toppings and didn’t do any dough mix-ins, because I was too lazy to do more prep than that. Marla Bakery here in SF has amazing salted bagels, so I followed suit and sprinkled a few of mine with sea salt. The sea salt stuck fine, but the bagels I topped with sesame seeds as well ended up  mostly naked as soon as I started handling them at all. There’s gotta be a way to give the seeds more sticking power– maybe a light egg white wash or something to “glue” them down a bit? I ended up just scooping the fallen seeds off the cutting board and sprinkling the on cream cheese when I ate one, but  the sesame seed ones were my favorite. They had a nuttiness and texture that really leveled up the flavor of the bagel overall.

Text[ural] Analysis

bagel-crossFresh out of the oven these bagels were absolutely delicious, with a nice chewy exterior and a soft, fluffy center. But I did feel that they baked up a little less impressively than they did the last time I baked them. Some of them were very bubbly/porous inside. A lot of them seemed to flatten out a bit more than usual. I think this might have been a result of letting them sit out on the counter too long this morning before I boiled them (waiting for the oven to heat up and the water to boil). This also made them very soft and flexible, which is not the greatest when you’re trying to peel them off the waxed (and oiled) paper that they spent the night on. Next time I will most definitely use well-sprayed parchment paper AND leave the bagels in the fridge until a minute or two before they go into the pot. Long story short: a quick warm up is good, but getting back to room temperature seems bad.

Breakfast is Served

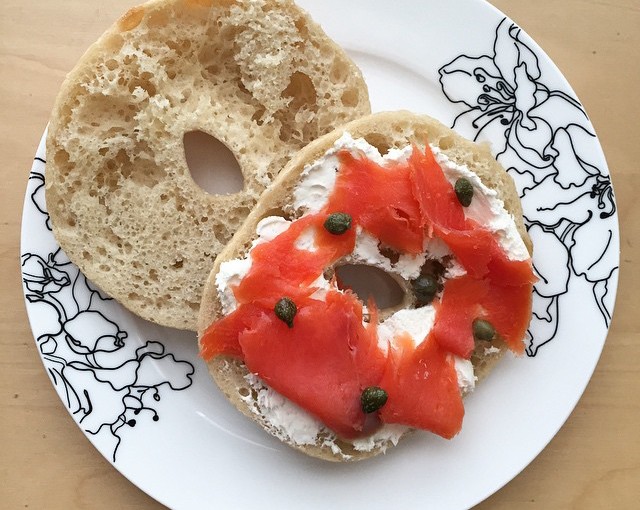
bagel-lox-closeBack in college my roommate and I used to have bagel breakfast days, usually soon after a Costco run that resulted in a fresh haul of groceries. We loaded them up with cream cheese, tomatoes and lox. It was our decadent weekend breakfast of choice. I topped this weekend’s bagels with a similar spread of cream cheese, lox and a sprinkling of capers– maybe not creative or original, but pretty damn tasty all the same.

Year of Bread: The First Loaf

bbaAs one of my food resolutions for 2015, I’ve decided to bake my way through Peter Reinhart’s The Bread Baker’s Apprentice, of which I received two copies for Christmas. The book really provides everything you’d want in a guide for making better bread, and with a little over 40 recipes it’ll make a feasible weekly challenge for this year. The introduction alone — a few chapters on the science and techniques behind good breadmaking — clocked in at over a hundred pages of info-heavy text. I can already tell that Reinhart is going to keep me on my toes from week to week.

For my first baking project, I decided to skip ahead to the French bread recipe. I had a couple reasons for choosing this as my maiden loaf. First of all, I wanted to take advantage of the bread/pizza stone that I also got for Christmas :). Secondly, I wanted to start with a recipe with which I was already somewhat familiar. I’ve made simple French baguettes before, so the process, ingredients, and “feel” of the dough aren’t entirely new to me. Since I was using new tools and some new techniques, I wanted to be able to focus on those new aspects of my baking setup rather than struggling with a new recipe. Here’s what I’ve learned from my first Reinhart baguette.

Making Bread is a Sciencepate

For producing a relatively simple food item, the breadmaking process is pretty fussy. There are a lot of factors that come into play, some which a baker has control over, and many which they do not. Learning to recognize the signs of a properly developing dough are helpful to keeping yourself on track– things like knowing whether it’s too wet or dry during the initial mixing and adjusting accordingly, or using in the windowpane test as a sign of proper gluten formation.

Making Bread is Slow

proofing baguetteReinhart is a big advocate of the slow fermentation process that is getting a lot of love these days in the bread world. I’m not expert enough to say that it does or doesn’t provide a higher quality loaf in the end, but one thing it definitely does is increase the amount of time it takes to go from mixing bowl to table.

I started my pre-ferment on Tuesday evening, let it hang out in the fridge overnight after an initial rise, then spend another four hours on Wednesday afternoon mixing, kneading, rising and shaping the dough before it ever even got close to the oven. Baking a good loaf of bread takes some forethought and planning, which isn’t a bad thing, but it’s probably not in-line with the way most people cook these days.

Making Good Bread is Difficultfinalbaguette

The funny thing about learning new skills is that the more you learn, the more you realize you don’t know shit. I thought I had a relatively good handle on baking, at least at the “advanced beginner” level. Now I’m not so sure. I totally skimped on the windowpane test, which is something I need to learn to be more patient about. I also need to be more aggressive about my scores – mine were a last-minute addition that pretty much just melted back into the bread unhelpfully.

Reinhart also suggests a much more complex oven set up than I’ve had previously: a pan of hot water and periodic spritzing of the oven sides to create a steamy environment for superior crust formation. Of course cranking up my oven to 500°F during preheating had the fun bonus effect of causing my extremely sensitive smoke detector to freak out, repeatedly. This was also the first time I’d used the peel method of getting the bread from rising spot to oven — usually I do the final rise directly in a bread pan or sheet, and just stick the whole thing in the oven. The process of transferring my loaf from couche to peel (read: terribly high-tech version consisting of an upside down cookie sheet dusted with semolina flour) to ultra-hot baking stone without degassing, dropping, or otherwise bothering the dough was nerve-wracking.

This Week’s Lessons

  • Trust the windowpane test — I’ve never been good about kneading until my dough passes the windowpane test for extensibility. I got it almost there this time, but next time I’ll try to not let my impatience get the better of me. This gets back to my note on bread being a science — getting the gluten to the correct level of stretchiness is what gives a baguette its deliciously crusty exterior.
  • Score aggressively — As I mentioned, my scoring work was hasty and sub-par. Next time I’m going to be less timid about it — those slashes are functional, after all, and not just cool-looking.
  • Let it rise — The consistency of my baguette was good, but not great. I wish the crumb had been a little more open and holey, as you find with professionally baked French bread. I think if I had been a little more careful about not bothering it while it was rising or rushed through the process of getting the dough into the oven, then I probably could have gotten the consistency I was aiming for.
  • Eat your mistakes — They’ll probably be pretty tasty all the same!