"Icing Practice" by Ginnerobot via Flickr

The Importance of Smart Practice: When Practice Doesn’t Make Perfect

Back in January, I decided to jump start my blogging and hone my kitchen skills by baking my way through Peter Reinhart’s The Bread Baker’s ApprenticeI’ve been baking bread for a long time now. Back in college my diet consisted of more peanut butter sandwiches on homemade bread than I care to remember. I love fresh, warm bread and one of my favorite childhood memories was baking big, brick-shaped loaves in a bread maker in my parents’ kitchen. The basic concept of measuring ingredients, kneading dough, then shaping and baking it isn’t a new one for me. But up until lately, my bread-making skills had been stagnant for a long time. Sure, I’ve baked a lot of loaves, but for a while noticed that my bread kept turning out more or less the same, and I didn’t see any progress towards the bakery-level quality I would like to achieve. I was practicing a lot, but I wasn’t getting any better.

Starting a weekly bread baking practice has improved my baking skills by leaps and bounds in the past few months. And while the frequency with which I bake has certainly been a factor in my improvement, there’s a more critical reason that my bread quality has improved so much lately: I’ve been practicing smarter.

A Study in Ciabatta: Why Practicing Well is Critical

I’ll admit that I’ve been baking most of Reinhart’s recipes only once each this year. While I plan to circle back to remake many of my favorites, blogging about the same recipe week in and week out would get tedious, and I’d prefer test my skills in lots of different ways this year. I also don’t want my roommates to hold a carb intervention after I serve up the same loaf of bread the 30th week in a row.

Ciabatta has been one notable exception, and it’s the perfect example of what good practice looks like. The first time I baked ciabatta, I made two loaves — one spiked with mushrooms, the other plain — and wrote a post about it. Reinhart’s ciabatta recipe is simple formula that relies on good ingredients and confident dough-handling to make a great loaf. I thought my first loaves turned out pretty well. They were soft and tasty. But they weren’t quite like the ciabatta I knew from bakeries. Check out the crumb texture here:

ciabatta crumb

There aren’t any big holes! One of the trademarks of traditional ciabatta is an open, holey texture. My bread was delicious, and would have made a great sandwich bread or burger bun, but it wasn’t quite what I had aimed for.

Trying Again: Identifying Weak Points

After my first attempt, I reviewed the recipe (Reinhart includes fantastic baking notes in his books, I’m just too much of a scrub to internalize them very well the first time around) and compared it to a few more ciabatta recipes online. A tight crumb was my main problem. I determined that I was either deflating my dough too much and pushing the air bubbles out during the shaping, or adding too much flour and making the dough too dense and stiff to develop proper bubbles in the first place. You can see how dry my first batch of dough looked:

ciabatta - folded

Notes on my shortcomings duly made, I knew what to try harder at during my next attempt. The week after I made my first ciabatta, I made another batch for a small dinner party that I cooked for. This time I tried to correct for the tight crumb of my first loaf by keeping the dough wetter during proofing. Dry dough is easier to handle, so it’s tempting to overflour and make kneading and shaping easier. I had to actively resist the temptation to do so this time. And as a result, ciabatta #2 had a much better texture in the end. Compare this wetter dough to the one above:

wet ciabatta dough

The resulting loaf was better, but still not perfect — it had more holes, but was a little too dense. I was still overhandling the dough while I was shaping it. But this was a good thing! I had correctly identified my main problems and was making progress towards correcting them. Most importantly, I knew what to do to make my bread even better.

And Again: Mastering the Technique

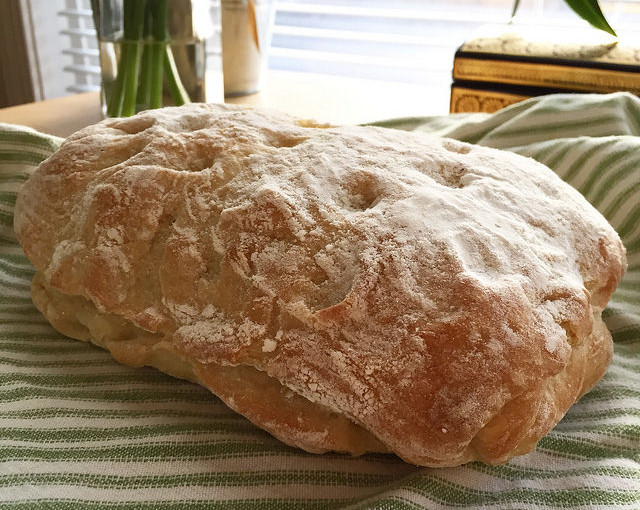
I had friends over for dinner a few weeks later and decided to make the ciabatta one more time. This time I let the dough stay very wet and loose. I was also extremely careful not to deflate the dough whenever I was handling it.  It was a messy, sticky ordeal, but the results were worth a bit of frustration. Finally, my bread was full of nice, big pockets!

ciabatta with holes

Cooking Beyond Your Comfort Zone

The next time I make ciabatta, I’ll keep what I’ve learned in mind and be able to replicate or even improve my last results. The biggest lesson I learned during this exercise was that I need to stop trying to confine new recipes to my cooking comfort zone. I’m more accustomed to working with stiffer, drier bread dough, so I tried to force the ciabatta dough to conform to my preferences instead of the other way around.

Let yourself be uncomfortable with your cooking endeavors. Put your faith in trustworthy recipes and tried-and-true techniques. Add a bit more butter than you think you should if your dish is turning out too dry, or throw in a little “too much” spice if it doesn’t have enough flavor.  Push each iteration of your new favorite recipe to be better than the last. Be patient, taste often, and don’t be afraid of messing up — that’s how you figure out how to make it better the next time around.

How to Practice Smarter Cooking

Practicing the same recipes over and over with the explicit intention to improve your results each time helps improve your cooking repertoire rather than just expand it. Having a library of recipes and techniques you can prepare confidently and consistently helps you gauge your progress in a measurable way, and allows you to see how all of those techniques you’ve mastered fit together into a variety of different dishes. Plus, once you’ve gotten tweaked and tested a couple of recipes to perfection, you can make them without a lot of thought, which lets you play around with variations and have more fun with them.

To get started, find three dishes that you love and resolve to cook each of them at least five times. Every time you make the dish, think about (or even better: write down) what you did well and what you could have done better. Did it look the way you expected it to look? Did it taste different from what you anticipated? The next time you make it, actively try to address at least one problem you’re having with the dish. Bit by bit, each dish will get better every time.


Featured photo by Ginnerobot via Flickr

Year of Bread: Ciabatta

ciabatta - folded

Looks like it’s time to get back to multi-day recipes again! Ciabatta has long been a favorite of mine — it’s tender and floury and makes a solid canvas for all sorts of dipping, topping, and filling combos. Reinhart gives several suggestions for flavoring the dough, I decided to make one plain ciabatta and one mushroom ciabatta. I like this recipe so much that I’m included an abbreviated version of Peter Reinhart’s original recipe — for more notes and variations, I absolutely recommend checking out his books!

The Process

Ciabatta dough is quite loose and wet compared to many bread doughs, and it seems to take a delicate touch to keep it from falling apart or losing its shape as it comes together. While most recipes I’ve tried thus far don’t have the bread takes shape or come out of the mixing bowl until the last stages, this one comes out almost immediately and gets squished into a rough rectangle and stretched repeatedly.

ciabatta doughsA huge amount of flour goes into the stretching and shaping process of this floppy dough. This shouldn’t come as a surprise — even store-bought ciabatta is usually dusted with a healthy coating of flour. Some of the mushrooms are incorporated with the other ingredients, but the majority are folded into the “completed” dough during the folding process.

mushroom ciabatta

Baking

Ciabatta is baked on the baking stone (or a preheated cookie sheet), slid from a cutting board or pizza peel directly into the oven. From terrible past experiences, the best tip I know for doing this is to liberally coat the cutting board under the bread with semolina flour or cornmeal — otherwise your dough will not transfer smoothly into the oven, losing precious heat and probably misshaping your poor loaf.

I was successful this time though, and my loaves baked up beautifully in about 15 minutes. The indentations in the plain loaf were a result of my failing to stretch the dough immediately before sliding it into the oven, and attempting to rectify the situation slightly afterwards. Oops.

16094234804_c95ea507ed_z

Results

The bread was delicious — it was moist and tender, with a soft wheaty taste. The mushroom version was especially moist and flavorful, although I might want to play with the mushrooms types a bit in the future.

The crumb wasn’t quite right, however. A trademark of good ciabatta is the presence nice big holes in the crumb, and mine was pretty tight and uniform. The loaves turned out tasty enough that I don’t mind the texture “issue,” but I did have the chance to make the same recipe again over the weekend. This time I kept the dough much wetter, and while the sticky dough was a little more difficult to handle, the texture of the crumb was much better. All goes to show that practice does make perfect!

ciabatta crumb

Peter Reinhart’s Mushroom Ciabatta Recipe

Makes two 1-pound loaves

  • 3.25 cups (22.75 oz) poolish* (must prepare the day before!)
  • 3 cups (13.5 oz) unbleached bread flour
  • 1 3/4 tsp salt
  • 1 1/5 tsp instant yeast
  • 6 tablespoons water
  • 1/2 cup olive oil
  • 5 dried porcini mushrooms, broken into pieces
  • 6 tablespoons warm water
  • 1 pound fresh button or shiitake mushrooms (I used shiitake)
  • 4 cloves garlic, pressed or minced
  • Salt and pepper

*How to Make a Poolish: The day before you bake your bread, mix 11.25 ounces bread flour, 12 oz water and 1/4 tsp instant yeast until flour is fully hydrated. Let sit at room temperature for 3-4 hours until the mixture is nice and bubbly, then immediately refrigerate until the next day.

  1. Remove the poolish from the refrigerator for at least an hour to bring it to room temp. While the poolish is warming up, prep the mushrooms.
    1. Soak the dried mushrooms in the warm water for at least 30 minutes. Drain and set aside.
    2. Sautee the fresh mushrooms and garlic with 1/4 cup olive oil until soft. Strain off pan juices and add to dried mushrooms. Salt and pepper rest of the mushrooms to taste.
  2. Mix flour, salt and yeast together in a large bowl. Add poolish, water and 1/4 cup olive oil and mix until the ingredients form a sticky ball. Add dried mushrooms and pan juices. If you’re mixing by hand, go ahead and get your hands dirty for this one — dip you hand in a bowl of water and use it to knead the dough in the bowl, rotating the bowl with your other hand (don’t worry if this sounds confusing, it makes more sense in action). The dough should be very sticky but have a smooth consistency, and while it will stick to the bottom of the bowl, it should clear the sides of the bowl pretty well by the time it’s done.
  3. To prepare the dough for resting, sprinkle a cookie sheet liberally with flour to make a bed  8 inches square. Scrape the dough onto the bed of flour, then use the “stretch and fold” method, incorporating half the fresh mushrooms into the dough as you fold it.
    1. Stretch and Fold:  Dust the dough liberally with flour, then pat into a rectangle. Wait 2 minutes for dough to relax, then pull the short ends of the rectangle outward until dough is about twice as long. Fold the dough into thirds, then press back into a rectangle. Mist with spray oil and dust with flour.
  4. Cover the dough and let rest (it may puff up, but probably won’t rise very much) for 30 minutes, then repeat stretch and fold movement again, incorporating the rest of the fresh mushrooms into the dough. Cover and let ferment for 1 1/2-2 hours.
  5. Set up a couche (clean, floured kitchen towel) for two loaves. Carefully divide the dough into two equal pieces and use the stretch and fold method to give the dough its final shape (a rough rectangle). Mist the dough with spray oil and dust with flour, then cover with a towel and let rise for 45-60 minutes. The dough should swell noticeably.
  6. While the dough is rising, preheat the oven to 500F, making sure to place an empty metal or cast iron pan on the lowest rack. If you’re using a pizza stone like I did, make sure to stick that in the oven during preheating too!
  7. When the oven and the dough are ready, carefully lift the loaves one at a time onto a pizza peel or wooden cutting board that has been very liberally dusted in semolina flour or cornmeal. As you set them down, stretch them to be 9-12 inches long. They might spring back a bit, but that’s okay.
  8. Pour a cup of hot water into the steam pan right before you close the oven. It will, as the name suggests, immediately steam up the oven. Now for the fussy part: wait 30 seconds, then open the oven and spritz or sprinkle a bit of water on the sides of the oven. Do this two more times, then close the oven and turn the temperature down to 450F.
  9. Back for 15-20 minutes, until light golden (They will register 205F inside). The loaves will be hard at first, but will soften once they cool down. Cool for at least 45 minutes before slicing and eating!