Year of Bread: Nutella Challah and Sesame Sea Salt Challah

sesame seed challah

After many requests, this post was updated on 4/21/2015 to include the Nutella challah version. Enjoy!

I was initially planning to do a pure chocolate stripe through the braid of this delectable loaf of challah, but the texture of Nutella lends itself well to spreading, and who doesn’t love Nutella?

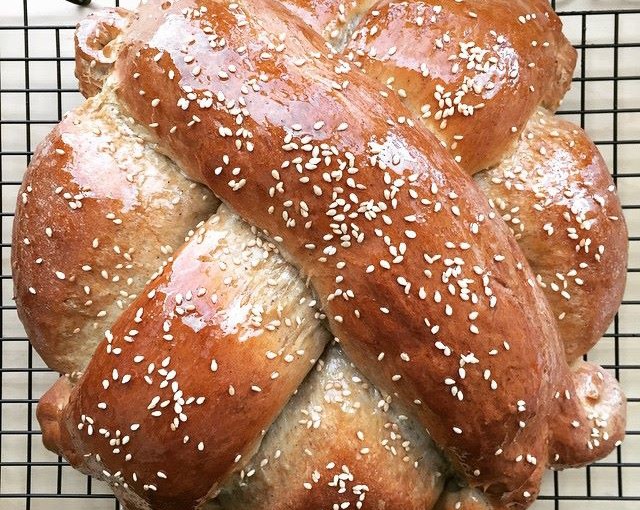
Instead of doing one giant loaf this week, I broke the recipe into two smaller loaves of challah– one with a more traditional topping of sesame seeds (and sea salt!), and the other with a fat stripe of chocolatey-hazelnut goodness running through the braid. I’ve made a few variations of challah before, but this was by far the most beautiful batch I’ve ever made. The bread itself is simply lovely; it’s got a flaky crust and a light, chewy crumb. The one downside is that it dries out a little quickly, so it’s best eaten within a day or two of baking (all the more reason to do it yourself).

16637471672_42c29d3371_z

Braiding the Loaves

I’m getting pretty good at the basic mechanics of working with bread dough– I’m a lot more patient about kneading it, and I think that shows in the texture of these loaves in particular. The tricky part this week was getting stable, even braids. Speaking from personal experience, if the dough isn’t firm enough, the strands will just melt together into a lumpy blob. If it’s too dry they won’t hold together. I used a spatula to sweep a healthy glob of Nutella along the inner side of each strand I set it in place. In retrospect I could have been a little more generous, as a good amount of it seems to bake away in the oven.

nutella and dough

Baking Up and Chowing Down

I know you’re supposed to wait for at least an hour before digging into a fresh loaf, but I couldn’t help but tear off a hunk of bread pretty soon after they came out of the oven. This recipe reminded me of a toned-down version of the Greek Celebration Bread that I baked a while ago. It doesn’t have quite the same flavor-punch of spices and orange peel, and the crumb is a bit drier. However of its simplicity make it an amazing complement to a bowl of soup or a slathering of jam. I buttered mine up and drizzled some honey on top.

16451098590_7379596463_z

Pump Up the Flavor

I just discovered an alternative recipe in the New York Times that I’d love to try — it’s flavored with orange, fennel and sesame seeds and seems like it would bridge the gap between challah and tsoureki, not that anyone was asking for that. But Reinhart’s recipe is going to remain my go-to for challah; it’s pretty fast, simple and clean, and can be reinvented every time you make it.

Nutella Challah

Nutella Challah Recipe

Adapted from Peter Reinhart’s The Bread Baker’s Apprentice

Ingredients

  • 4 cups unbleached bread flour
  • 2 tbsp sugar
  • 1 tsp salt
  • 1 1/2 tsp instant yeast
  • 2 tbsp vegetable oil
  • 2 large eggs, slightly beaten
  • 2 large egg yolks, slightly beaten
  • 3/4 – 1 cup water, room temperature
  • 1/2 cup Nutella or other chocolate hazelnut spread (optional if making plain challah)
  • 2 egg whites, whisked until frothy, for egg wash
  • Spray oil like Pam for prep

Procedure

  1. Stir together dry ingredients (flour, sugar, salt, yeast) in a bowl and set aside. In a separate bowl, whisk together oil, whole eggs and yolks, and 3/4 cup of water. Pour the egg mixture into the flour mixture and mix with a spoon until ingredients start to form a ball. If the dough is too dry, slowly add water as needed.
  2. Transfer the dough to a floured counter and knead for about 10 minutes, sprinkling in flour if the dough is too sticky. It should pass the windowpane test and register approximately 80F.
  3. Form the dough into a smooth ball and transfer to a lightly oiled bowl. Cover with plastic wrap and let rise for an hour at room temperature.
  4. Remove dough from bowl and knead for 2 more minutes to degas. Reform into ball and return to oiled bowl for another hour. The dough should swell to about 1.5x it’s original volume.
  5. Remove the dough from the bowl and divide it into 3 equal pieces (or 6 if you’d like to make two smaller loaves, like I did. Form each dough ball into a boule (smooth ball) and cover with a towel, then let rest for 10 minutes.
  6. Line a baking sheet with parchment paper. Roll three of the pieces of dough into long strands, and pinch gently to connect them at one end. Braiding dough is a little trickier than braiding hair and other, less delicate substances, but the general movement is the same. Every time you move one strand of dough over another, use a spatula or spoon to spread a bit of Nutella between the two strands. The Nutella tends to “bake off” a bit in the oven, so go ahead and be liberal with the good stuff. When you get to the end of the braid, pinch the ends together gently to close. Repeat with second set of dough if making 2 loaves.braided challah loaves
  7. Transfer the loaves to the baking sheet. Brush the loaves with egg wash (save the rest for later). Spray one side of a piece of plastic wrap with spray oil and loosely cover each loaf (oil-side down, of course).
  8.  Proof for 60-75 minutes, or until dough has grown 1.5x its size. Preheat the oven to 350F.
  9. Brush the loaves again with egg wash. Bake for 20 minutes, then rotate pan and bake for another 20-45 minutes, depending on how big your loaves are. The bread will be deep golden brown and sound hollow when tapped from the bottom.
  10. Transfer to a rack and cool for at least an hour before slicing and serving. Serve by itself or with a healthy dollop of MORE Nutella.

16637480502_b7294fc3c0_z

Year of Bread: Salami and Gouda Casatiello

casatiello from above

This Week: More Butter, More Eggs, More Flavor

Last week I mentioned that I wanted to try adding some savory tidbits to the basic brioche recipe, and this week’s bread ended up being, more or less, just that. Casatiello is an Italian version of brioche — lots of eggs, butter and milk in the dough — that includes bits of meat and cheese. I’m usually pretty wary of bread stuffed with exotic and/or chunky ingredients, since they tend to interfere with the formation of a nice crust, in my experience. But I’m baking everything in The Bread Baker’s Apprentice, so I can’t say no to this one!

salami and cheese

How the Dough Shaped Up

I used a full fat gouda and red-wine salami from Trader Joe’s– I’m sure I could have upped the ante with fancier ingredients, but since they’re just playing a supporting role in the bread, I kept things simple. Reinhart instructs that any salty, dry meat and any cheese that melts to a gooey consistency (read: fondue-worthy) can be used in place of salami and gouda.

Because it’s not quite as butter-loaded up as brioche, casatiello dough was a lot easier to work with, but it was still very wet and tacky. The sponge was very thin. Reinhart described it as “pancake batter,” but I’d say this was more like crepe batter if we’re going to be detail-oriented here. The dough came together really nicely. I mixed it up in a single bowl, and it had a relatively quick cycle of proofing compared to some of the loaves I’ve tried (I went from pulling ingredients out of the cupboard to pulling the finished loaf out of the oven in about five hours).

casatiellosponge

Casatiello Flavoring Notes for Next Time

Next time I make this bread, I’ll probably tweak a few things. I’ll cut the cheese into larger pieces, to make sure that the bread has nice gooey pockets of cheesey goodness here and there. The cheese was almost too well distributed and the texture didn’t really come out as much as I would have liked, especially once the bread was cool. I’ll also cut the salami into slightly smaller pieces. Although the pictures in the book show big hunks of salami scattered throughout the bread, an inevitable side effect is that poorly-placed hunks of meat tend to make slicing the bread into cohesive slices a bit tricky.

This would make an awesome savory muffin for brunch — the base reminded me a lot of Craftsman and Wolves’ egg-hearted Rebel Within, so maybe a casatiello muffin would make for the beginnings a good knockoff version. I think playing around with more ingredients would be fun, too — maybe salami and sun-dried tomato? Gruyere and black pepper? Olives? Roasted garlic cloves? With such a tender, buttery base, it seems like it would be hard to go wrong no matter what I threw in there.

casatiello-slice

Year of Bread: Tsoureki (Greek Celebration Bread)

greek-bread-spicesLast year I read a book on the history of the spice trade, and it threw a lot of ideas about “traditional” flavors out the window. Even modern standards like black pepper and cinnamon were once exotic, extravagantly priced and often hard to come by in the average person’s kitchen. That’s why I think it’s so interesting that today you can not only buy everything from saffron to paprika to allspice on the same shelf in grocery stores, but that some places even give the stuff away for free. Single-serving pepper packets are a fast food staple, and coffee chains often put out shakers of cinnamon and nutmeg for customers to use at-will. Spice culture has come a long way in the last few centuries! This week’s bread is a kind of tsoureki, labelled in Reinhart’s book as “Greek Celebration Bread.” You can tell that this loaf is meant for special occasions, because it’s chock-full of spices and takes a bit of extra effort to come together.

Poolishes, Bigas and Barms, Oh My!

(Sorry for the lame heading, everyone.) Technically speaking, this bread was a piece of cake (ha). I started with a poolish the night before, then added the rest of the ingredients and did the standard kneading and two rises. While I was aware of what pre-fermentation was before I started this baking project, I had no idea how many different kinds existed. Next time I do a bread post maybe I’ll do a run-down of the different types of types of pre-ferments, but for now know that a poolish just has a slightly higher water percentage than other common starters.

greek-bread-dough
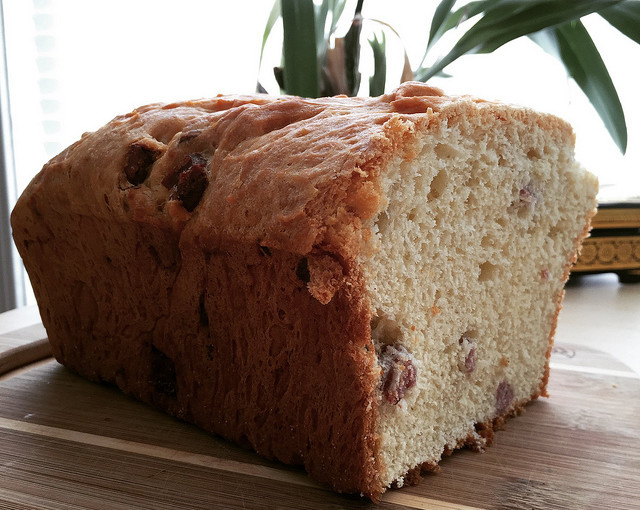
This tsoureki is enriched with eggs, milk, oil and honey, and is generously flavored with orange rind, allspice, nutmeg, cinnamon, cloves and almond extract. It smells awesome, from the first step to the last. Other versions of this bread include more substantial additives like raisins, walnuts, dried fruit and even hard-boiled eggs, which would be interesting to try out.  You can see in unbaked bread just how much spice went into this dough– it’s visibly flecked with goodness.

Shaping the Loaf

There are a few different shapes that these loaves come in, depending on the occasion. Although it’s usually reserved for Christmas and has different set of flavoring ingredients, I picked the cross-shaped Christopsomo because it looked cool without being too labor-intensive to create. The prebaked one looked pretty wonky, so I was worried that I’d chosen poorly. Luckily, once it came out of the oven it looked much more symmetrical.

Glazing Up

greek-bread-glazeAfter I baked the bread, I immediately gave it a wash of honey, sugar, water and orange extract (I didn’t have a bottle on-hand, so I simmered some minced orange peel with the honey mixture to give it an orangey scent and hue), as well as a sprinkling of toasted sesame seeds. The glaze does make the crust stickier than I usually like my breads to be, but the sweetness really balances out the dense, flavorful loaf well. In the future I might up the water to honey and sugar ratio to make it a little less sticky.

 Closing Thoughts

greek-bread-sideThis bread was really fun to make! Sometimes the ingredients in a loaf of bread can feel pretty boring, since it’s often a conduit for other foods with stronger flavors. One thing that my pictures don’t really convey is how MASSIVE this bread baked up to be– it’s impressively large and I can see how it would make a great centerpiece for a holiday meal. I’d love to try miniature versions of this style to eat as a breakfast bun or a sandwich.

Year of Bread: New England Anadama

anadama-breadI’ve been watching The Mind of a Chef a lot lately, and am totally entranced by the baking genius of Christina Tosi (of Momofuku Milk Bar). Watching her make corn cookies is almost enough to make me want to enroll in culinary school. Corn isn’t really an ingredient I think of when I think of cookies, but considering the sweetness of fresh corn and its long-standing association with a healthy pat of butter on the cob, it makes a lot of sense. I guess that’s the essence of innovation in food, when it comes down to it — creating something so new, so unexpected that people are surprised — but when you think about it, you wonder why it didn’t exist all along.

anadama-1
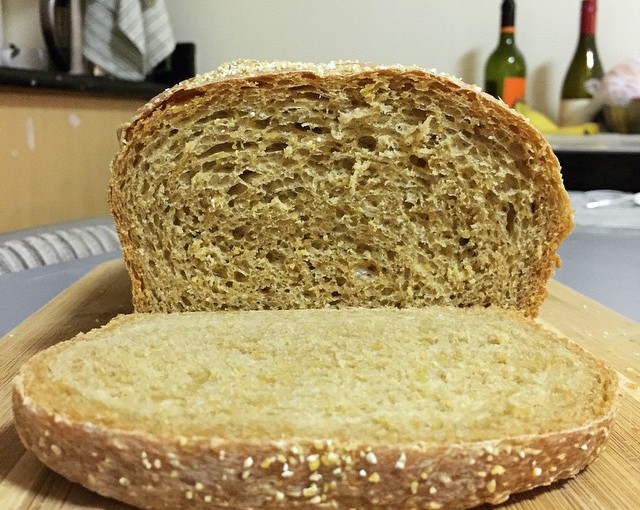
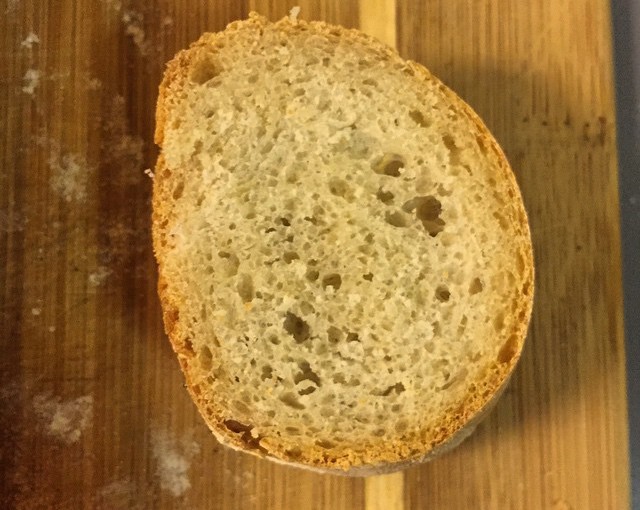
Corn was also the bassline of my bread this week, the first alphabetically in The Bread Baker’s Apprentice. When I was a kid we used to go to the farmers’ market to buy loaves of “squaw bread,” which was dark and sweet and grainy and delicious by itself and for a sandwich. Anadama reminds me a lot of that bread — it’s lightly sweet, with a texture that just screams “please spread something on me!” …In the most PG way possible. The sweetness of the bread comes from an overnight cornmeal “soaker” and a few tablespoons of molasses, a fun ingredient that looks super cool as it rolls down the mini mountains of flour in a bowl.
anadama-2I’ve made a lot of grainy breads in the past, and one problem I almost always run into is a soft, lifeless crust, or lack thereof. This is probably related to my subpar kneading time (windowpane test strikes again!), so this time I tried to knead the dough to a much stretchier consistency than I usually do. Maybe it has to do with the relative heat wave we were experiencing this week, or the sugar in the corn that had been soaking for 12+ hours by the time I added the yeast, but this dough rose super well. It was a three stage building process to make the dough (soaker >> sponge >> finished dough), so maybe that also helped.

Anadama is usually a pan bread, which is a little easier to handle because you just plop it in the pan and let it rise until you stick it in the oven. It also gives a nice, sandwich-ready shape to the loaf, so the end result pretty versatile. I ate it mostly with peanut butter and honey. Even after a good soaking, the cornmeal gave this bread a nice texture without being gritty– I’d definitely add this bread to my weekly baking lineup.

This Week’s Lesson

Learn to think of old ingredients in new ways — and post weekly blogposts in a more timely manner.


Year of Bread: The First Loaf

bbaAs one of my food resolutions for 2015, I’ve decided to bake my way through Peter Reinhart’s The Bread Baker’s Apprentice, of which I received two copies for Christmas. The book really provides everything you’d want in a guide for making better bread, and with a little over 40 recipes it’ll make a feasible weekly challenge for this year. The introduction alone — a few chapters on the science and techniques behind good breadmaking — clocked in at over a hundred pages of info-heavy text. I can already tell that Reinhart is going to keep me on my toes from week to week.

For my first baking project, I decided to skip ahead to the French bread recipe. I had a couple reasons for choosing this as my maiden loaf. First of all, I wanted to take advantage of the bread/pizza stone that I also got for Christmas :). Secondly, I wanted to start with a recipe with which I was already somewhat familiar. I’ve made simple French baguettes before, so the process, ingredients, and “feel” of the dough aren’t entirely new to me. Since I was using new tools and some new techniques, I wanted to be able to focus on those new aspects of my baking setup rather than struggling with a new recipe. Here’s what I’ve learned from my first Reinhart baguette.

Making Bread is a Sciencepate

For producing a relatively simple food item, the breadmaking process is pretty fussy. There are a lot of factors that come into play, some which a baker has control over, and many which they do not. Learning to recognize the signs of a properly developing dough are helpful to keeping yourself on track– things like knowing whether it’s too wet or dry during the initial mixing and adjusting accordingly, or using in the windowpane test as a sign of proper gluten formation.

Making Bread is Slow

proofing baguetteReinhart is a big advocate of the slow fermentation process that is getting a lot of love these days in the bread world. I’m not expert enough to say that it does or doesn’t provide a higher quality loaf in the end, but one thing it definitely does is increase the amount of time it takes to go from mixing bowl to table.

I started my pre-ferment on Tuesday evening, let it hang out in the fridge overnight after an initial rise, then spend another four hours on Wednesday afternoon mixing, kneading, rising and shaping the dough before it ever even got close to the oven. Baking a good loaf of bread takes some forethought and planning, which isn’t a bad thing, but it’s probably not in-line with the way most people cook these days.

Making Good Bread is Difficultfinalbaguette

The funny thing about learning new skills is that the more you learn, the more you realize you don’t know shit. I thought I had a relatively good handle on baking, at least at the “advanced beginner” level. Now I’m not so sure. I totally skimped on the windowpane test, which is something I need to learn to be more patient about. I also need to be more aggressive about my scores – mine were a last-minute addition that pretty much just melted back into the bread unhelpfully.

Reinhart also suggests a much more complex oven set up than I’ve had previously: a pan of hot water and periodic spritzing of the oven sides to create a steamy environment for superior crust formation. Of course cranking up my oven to 500°F during preheating had the fun bonus effect of causing my extremely sensitive smoke detector to freak out, repeatedly. This was also the first time I’d used the peel method of getting the bread from rising spot to oven — usually I do the final rise directly in a bread pan or sheet, and just stick the whole thing in the oven. The process of transferring my loaf from couche to peel (read: terribly high-tech version consisting of an upside down cookie sheet dusted with semolina flour) to ultra-hot baking stone without degassing, dropping, or otherwise bothering the dough was nerve-wracking.

This Week’s Lessons

  • Trust the windowpane test — I’ve never been good about kneading until my dough passes the windowpane test for extensibility. I got it almost there this time, but next time I’ll try to not let my impatience get the better of me. This gets back to my note on bread being a science — getting the gluten to the correct level of stretchiness is what gives a baguette its deliciously crusty exterior.
  • Score aggressively — As I mentioned, my scoring work was hasty and sub-par. Next time I’m going to be less timid about it — those slashes are functional, after all, and not just cool-looking.
  • Let it rise — The consistency of my baguette was good, but not great. I wish the crumb had been a little more open and holey, as you find with professionally baked French bread. I think if I had been a little more careful about not bothering it while it was rising or rushed through the process of getting the dough into the oven, then I probably could have gotten the consistency I was aiming for.
  • Eat your mistakes — They’ll probably be pretty tasty all the same!