Year of Bread: Cinnamon Raisin Bread

16857212545_ca1e1b7f9a_z
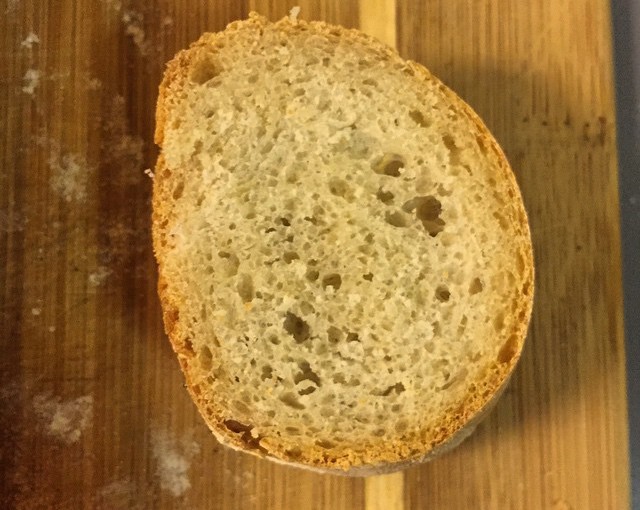
Confession: I don’t like raisins. I’ll eat pretty much any other dried fruit, and enjoy it, but raisins just aren’t my thing. So when I got to this particular recipe for cinnamon raisin bread in The Bread Baker’s Apprentice, my first thought was to just leave the raisins out. Unfortunately, I live in a house of raisin bread lovers, so instead of throwing them out entirely, I decided to split the difference and bake a loaf of with raisins for everyone else, and a loaf with walnuts for me. They were both fantastic.

This recipe produced the softest, most supple dough. It’s got a good amount of fat in it — milk, egg and a touch of vegetable shortening — to keep it from being too dry. It’s also got a healthy dose of cinnamon kneaded right into the dough, which is why this is definitely cinnamon raisin bread and not just, well, raisin bread.

cinnamon rollingAdding chunky ingredients like dried fruit and nuts should always be done towards the end of the kneading process, otherwise they end up getting squished. I divided the dough in half before incorporating the walnuts and raisins, then folded the ingredients in until they were (somewhat) evenly distributed.raisin bread dough

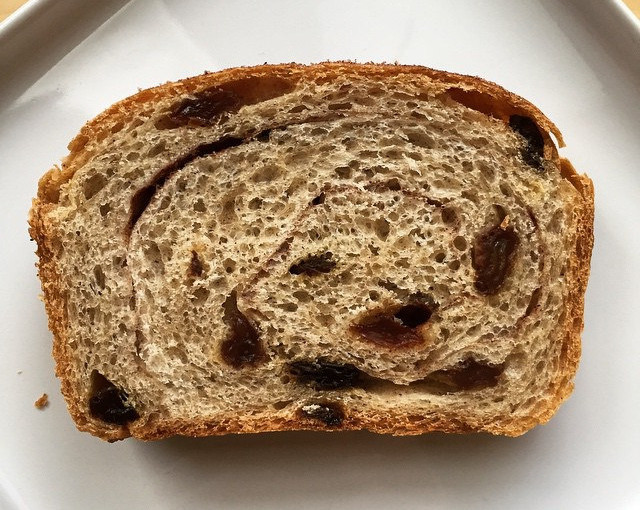
The bread also has a spiral of cinnamon sugar swirling through it, which is easy enough to add but looks fancy — just sprinkle a healthy layer of cinnamon sugar into the dough before rolling it up into a loaf shape. I added extra raisins during this stage, to the raisin loaf. I also sprinkled some cinnamon sugar on top of the loaves, which looks and tastes great, but makes them slightly sticky on the outside, especially after a day or two of sitting around in the kitchen. I would probably skip the cinnamon sugar crust next time in favor of an egg or butter wash.

cinnamon walnut bread

Cinnamon Raisin Bread and Cinnamon Walnut Swirl Bread

Adapted from Peter Reinhart’s Bread Baker’s Apprentice

Yields two smallish loaves or one biggish loaf

Ingredients

  •  3.5 cups (16oz) unbleached bread flour
  • 4 tsp granulated sugar
  • 1 1/4 tsp salt
  • 2 tsp instant yeast
  • 1 1/4 tsp ground cinnamon
  • 1 large egg, slightly beaten
  • 2 tbsp shortening, melted or at room temp
  • 1/2 cup buttermilk or whole milk, room temp
  • 3/4 cup water
  • 1 1/4 cup raisins, rinsed and drained (optional)
  • 1 cup chopped walnuts (optional)

For Filling/Topping:

  • 1/2 cup sugar
  • 2 tbsp cinnamon

Process

  1. Stir together dry ingredients (flour, sugar, salt, yeast and cinnamon) in a mixing bowl.
  2. Add wet ingredients and stir until ingredients come together.
  3. Turn dough out onto a floured counter and knead for 10 minutes. The dough should be soft and silky– not too stiff or sticky (although at this point it’s better that it’s slightly on the wet side, so add flour or water to adjust as necessary.
  4. Add most of the raisins or walnuts (or both), and knead for about 2 minutes — you want them to be fairly well distributed, but don’t knead so long that they start to fall apart.
  5. Shape the dough into a ball and return to an oiled bowl, covering with plastic wrap. Let rest for 2 hours, or until dough doubles in size.
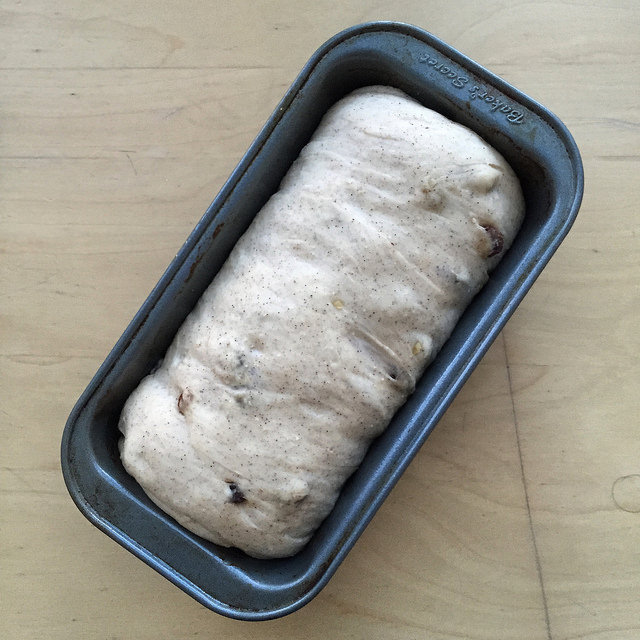
  6. If you’re baking 2 loaves, divide into 2 equal pieces and form them into loaves. Place the loaves in greased bread pans and mist the top with spray oil, then cover loosely.
    1. Forming Loaves:  Gently press the piece of dough into a 5×8 rectangle. Sprinkle liberally with cinnamon sugar, and the remaining raisins or walnuts, if using. Starting at one of the short ends, roll up into a loaf, pinching the seam closed to seal.
  7. Proof at room temperature for 60-90 minutes. The tops of the loaves should crest the top of the pans and swell considerably. Preheat the oven to 350F while the loaves are rising.
  8. Bake the loaves for 20 minutes. Rotate the pans 180 degrees and back for another 20-30 minutes. Note: If you’re baking a large loaf, it may take longer. The loaves will be golden brown and should sound hollow when tapped on the bottom.
  9. Immediately remove the loaves from their pans and cool on a rack for at least 1 hour before slicing. Enjoy cinnamon raisin bread plain, or toasted with a slather of butter.

cinnamon raisin loaf from above

Year of Bread: The First Loaf

bbaAs one of my food resolutions for 2015, I’ve decided to bake my way through Peter Reinhart’s The Bread Baker’s Apprentice, of which I received two copies for Christmas. The book really provides everything you’d want in a guide for making better bread, and with a little over 40 recipes it’ll make a feasible weekly challenge for this year. The introduction alone — a few chapters on the science and techniques behind good breadmaking — clocked in at over a hundred pages of info-heavy text. I can already tell that Reinhart is going to keep me on my toes from week to week.

For my first baking project, I decided to skip ahead to the French bread recipe. I had a couple reasons for choosing this as my maiden loaf. First of all, I wanted to take advantage of the bread/pizza stone that I also got for Christmas :). Secondly, I wanted to start with a recipe with which I was already somewhat familiar. I’ve made simple French baguettes before, so the process, ingredients, and “feel” of the dough aren’t entirely new to me. Since I was using new tools and some new techniques, I wanted to be able to focus on those new aspects of my baking setup rather than struggling with a new recipe. Here’s what I’ve learned from my first Reinhart baguette.

Making Bread is a Sciencepate

For producing a relatively simple food item, the breadmaking process is pretty fussy. There are a lot of factors that come into play, some which a baker has control over, and many which they do not. Learning to recognize the signs of a properly developing dough are helpful to keeping yourself on track– things like knowing whether it’s too wet or dry during the initial mixing and adjusting accordingly, or using in the windowpane test as a sign of proper gluten formation.

Making Bread is Slow

proofing baguetteReinhart is a big advocate of the slow fermentation process that is getting a lot of love these days in the bread world. I’m not expert enough to say that it does or doesn’t provide a higher quality loaf in the end, but one thing it definitely does is increase the amount of time it takes to go from mixing bowl to table.

I started my pre-ferment on Tuesday evening, let it hang out in the fridge overnight after an initial rise, then spend another four hours on Wednesday afternoon mixing, kneading, rising and shaping the dough before it ever even got close to the oven. Baking a good loaf of bread takes some forethought and planning, which isn’t a bad thing, but it’s probably not in-line with the way most people cook these days.

Making Good Bread is Difficultfinalbaguette

The funny thing about learning new skills is that the more you learn, the more you realize you don’t know shit. I thought I had a relatively good handle on baking, at least at the “advanced beginner” level. Now I’m not so sure. I totally skimped on the windowpane test, which is something I need to learn to be more patient about. I also need to be more aggressive about my scores – mine were a last-minute addition that pretty much just melted back into the bread unhelpfully.

Reinhart also suggests a much more complex oven set up than I’ve had previously: a pan of hot water and periodic spritzing of the oven sides to create a steamy environment for superior crust formation. Of course cranking up my oven to 500°F during preheating had the fun bonus effect of causing my extremely sensitive smoke detector to freak out, repeatedly. This was also the first time I’d used the peel method of getting the bread from rising spot to oven — usually I do the final rise directly in a bread pan or sheet, and just stick the whole thing in the oven. The process of transferring my loaf from couche to peel (read: terribly high-tech version consisting of an upside down cookie sheet dusted with semolina flour) to ultra-hot baking stone without degassing, dropping, or otherwise bothering the dough was nerve-wracking.

This Week’s Lessons

  • Trust the windowpane test — I’ve never been good about kneading until my dough passes the windowpane test for extensibility. I got it almost there this time, but next time I’ll try to not let my impatience get the better of me. This gets back to my note on bread being a science — getting the gluten to the correct level of stretchiness is what gives a baguette its deliciously crusty exterior.
  • Score aggressively — As I mentioned, my scoring work was hasty and sub-par. Next time I’m going to be less timid about it — those slashes are functional, after all, and not just cool-looking.
  • Let it rise — The consistency of my baguette was good, but not great. I wish the crumb had been a little more open and holey, as you find with professionally baked French bread. I think if I had been a little more careful about not bothering it while it was rising or rushed through the process of getting the dough into the oven, then I probably could have gotten the consistency I was aiming for.
  • Eat your mistakes — They’ll probably be pretty tasty all the same!