kaiser roll

Year of Bread: Kaiser Rolls

If your only experience of Kaiser rolls thus far has been the prebagged kind you get at the grocery store, or soggy sandwiches on deli trays, these are going to change your mind about how awesome they are. Peter Reinhart’s Kaiser rolls are flavorful but neutral, with a chewy but not tough crust and a soft, light interior. They make the perfect canvas for many a sandwich, and the dough has just a bit of fat to keep the rolls from drying out too quickly.

The History of the Kaiser Roll and Other Interesting Things

Kaiser rolls were named in honor of the Emperor Franz Joseph I of Austria in the 18th century, although they’ve probably been around in some form or another for longer than that. A fun fact (if you’re the type of person who puts history and/or linguistics in the “fun” category): kaiser is the German word for “Emperor,” and has been in use since the days of the Holy Roman Empire, back when years only had three digits. It’s derived from the imperial Roman title “Caesar,” taken from the cognomen of Julius Caesar. For Slavic languages, it’s also where the word tsar (or czar) comes from. That a word  can be carried across cultural and linguistic barriers over time, picking up new significance as it goes, is a fascinating indicator of the way humans share ideas. Caesar’s name endures down through the centuries and across many languages as a metonym for power. And that’s how we end up with a vaguely crown-shaped roll, named in honor of an Austrian emperor whose title was plucked from the name of a Roman politician who lived almost 2 millennia before him.

But I digress — back to the bread at hand.

kaiser roll crumb

Shaping Kaiser Rolls

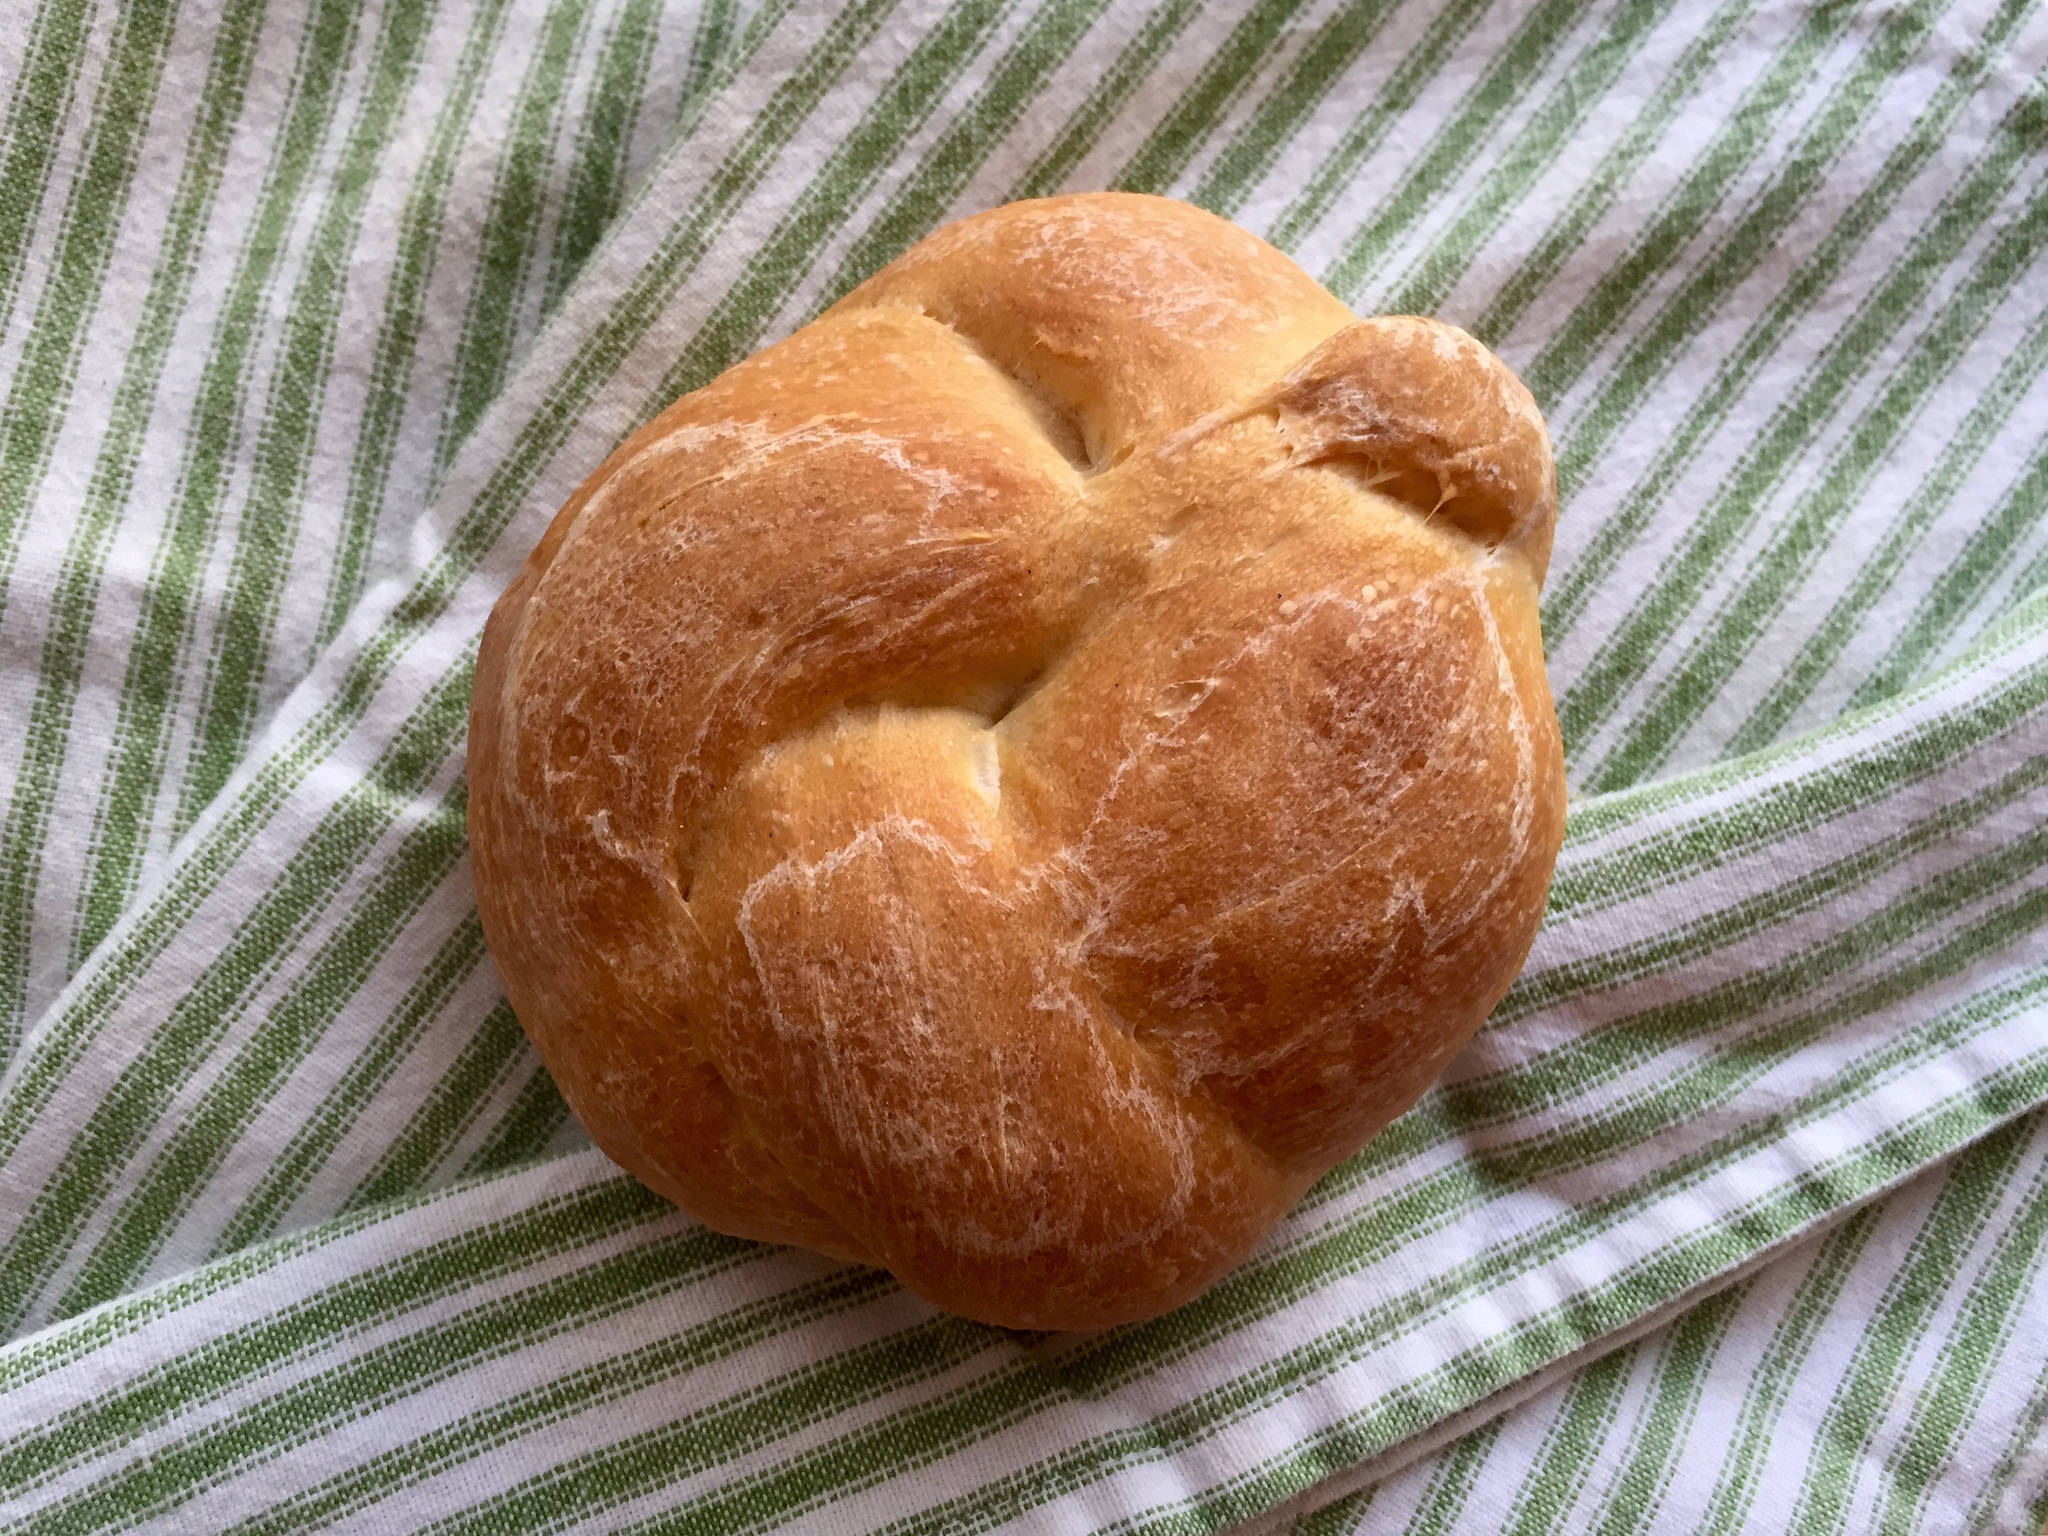
I found that the trickiest part of the process was shaping the rolls. Kaiser rolls have a distinctive swirl to them, which professional bakers generally create with a specialized Kaiser roll cutter. Since I don’t have such a tool on hand in my rather minimalist kitchen, I opted to tie the rolls in knots. Unfortunately, the dough was soft and tacky enough that wherever it touched itself it stuck, so I essentially got one shot at creating the perfect knot for each roll. Most of my 6 rolls did not end up as picture-perfect swirls. The next time I make these, I may firm the dough up slightly more with a bit more flour, to make for easier shaping.

kaiser roll dough knot

Salami and Cheese Sandwich, aka the Very Best Thing to Do with Your Kaiser Roll

I fell in love with the Kaiser roll sandwich on a trip to Austria, although the sandwich itself wasn’t anything you couldn’t get anywhere else in the world. Maybe it was the high altitude of Innsbruck. Maybe it was my persistent jetlag. Or maybe it was just the fact that I hadn’t been able to get my stomach to behave after a beer-filled night in Munich the day before, followed by a long and insufferably winding bus ride through the Alps in the morning. But when I took a bite of the salami and provolone sandwich– selected haphazardly at a local grocery store– the fog lifted from my brain and my taste buds came alive. The bread was fresh and tender, the salami peppered and not too salty, and the cheese cool and creamy. It was simple but perfectly balanced. It was the best sandwich I had ever tasted.

Or maybe my memory is just overly-rosy. But regardless, I still love these sandwiches because they’re an easy lunch that’s cheap and packs well. I like to add a little hot mustard to keep it interesting.

kaiser salami and cheese sandwich

Kaiser Roll Recipe

Yields 6 large rolls. Adapted from Peter Reinhart’s The Bread Baker’s ApprenticeI’ve omitted the diastatic barley malt powder as it can be difficult to find and the rolls bake up well without it, but the recipe remains largely the same otherwise.

Ingredients

  • 1 1/2 cups (8 ounces) pâte fermentée
    • 2.5 ounces bread flour
    • 2.5 ounces AP flour
    • 1/2 tsp salt
    • 1/4 tsp instant yeast
    • 3-4 ounces of water, room temperature
  • 2 1/4 cups (10 ounces) bread flour
  • heaping 3/4 tsp salt
  • 1 tsp instant yeast
  • 1 large egg
  • 1 1/2 Tbsp oil
  • 5-6 ounces water, lukewarm (90-100°F)
  • Semolina flour for dusting
  1. Preparing the Pâte Fermentée: Stir together flour, salt, and yeast in a mixing bowl. Add 3/4 cup water and stir until a coarse ball forms. Adjust water or flour if the dough is too sticky or too stiff.
  2. Turn out onto a floured counter and knead for 5 minutes, or until it registers about 77-81°F and passes the windowpane test. Transfer to an oiled bowl, cover and let rise for about an hour. The dough should swell to 1.5x its original size.
  3. Knead lightly to degas, then return to covered bowl and refrigerate overnight, or up to 3 days.
  4. The Next Day: Remove the pâte fermentée from the fridge at least an hour before making the dough. Cut it into 8-10 pieces and cover while it’s coming to room temperature.
  5. Make the Dough: Mix together the flour, salt, and yeast in a large mixing bowl, then add the wet ingredients (start with the minimum amount of water). Stir until the ingredients form a ball, adding extra water if the mixture is too dry.
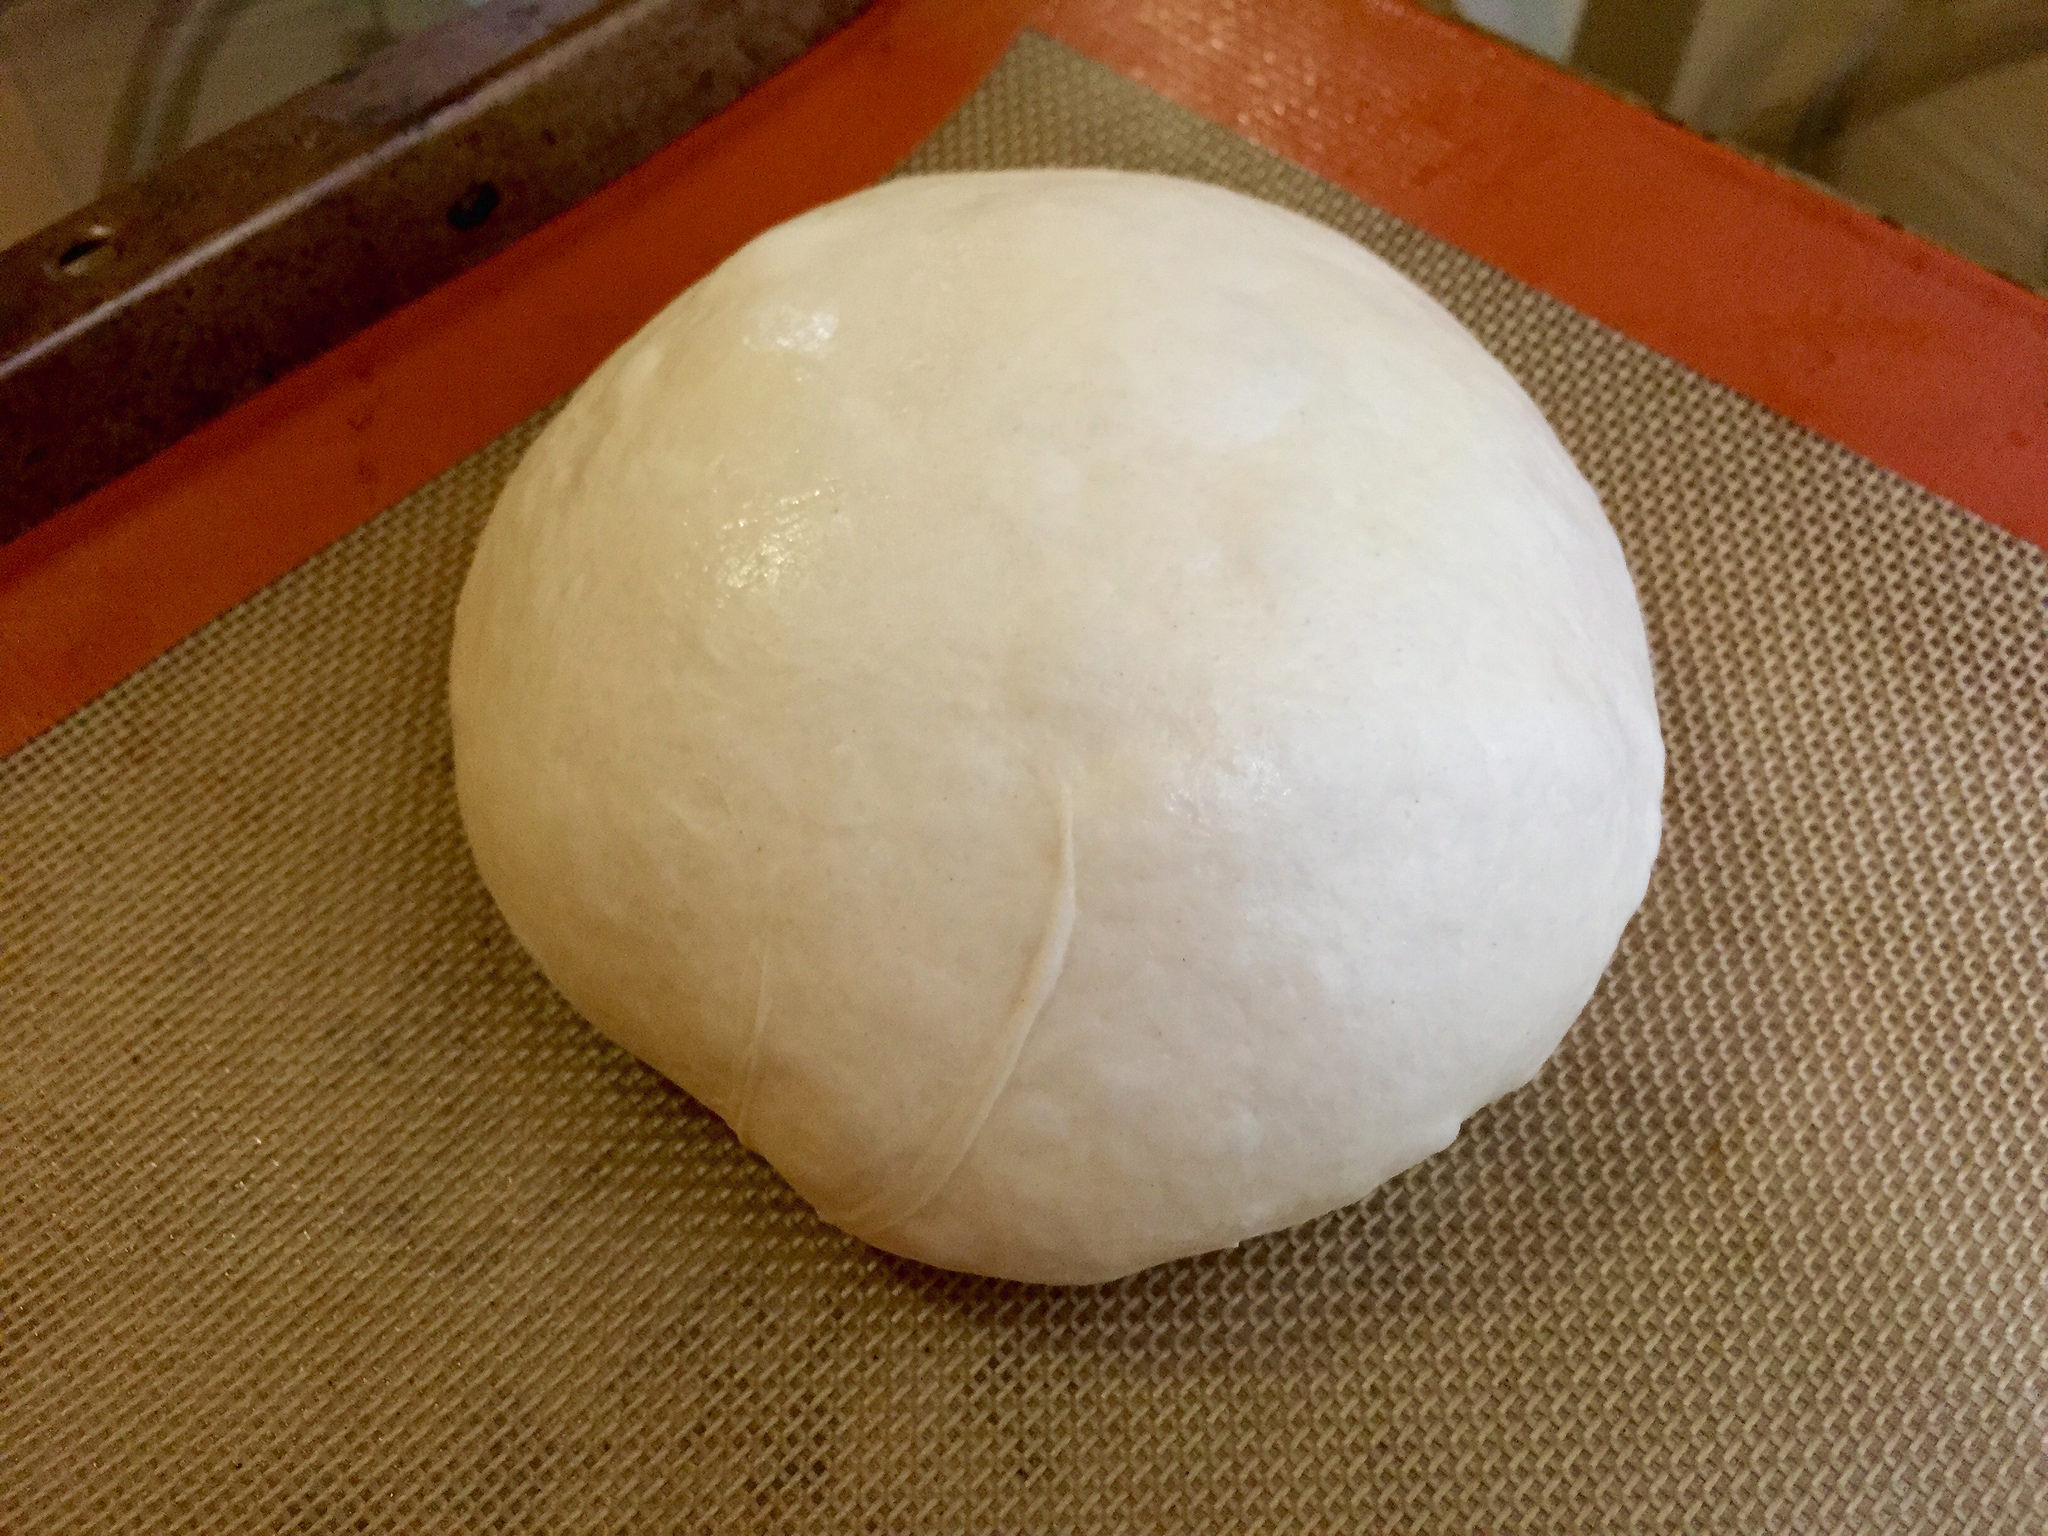
  6. Turn the dough out onto a floured surface and knead for 10 minutes, or until dough is soft and tacky, but doesn’t stick to the kneading surface. It should register about 77-81°F and pass the windowpane test.
  7. Place dough in an oiled bowl and cover to ferment for 2 hours. The dough should double in size.
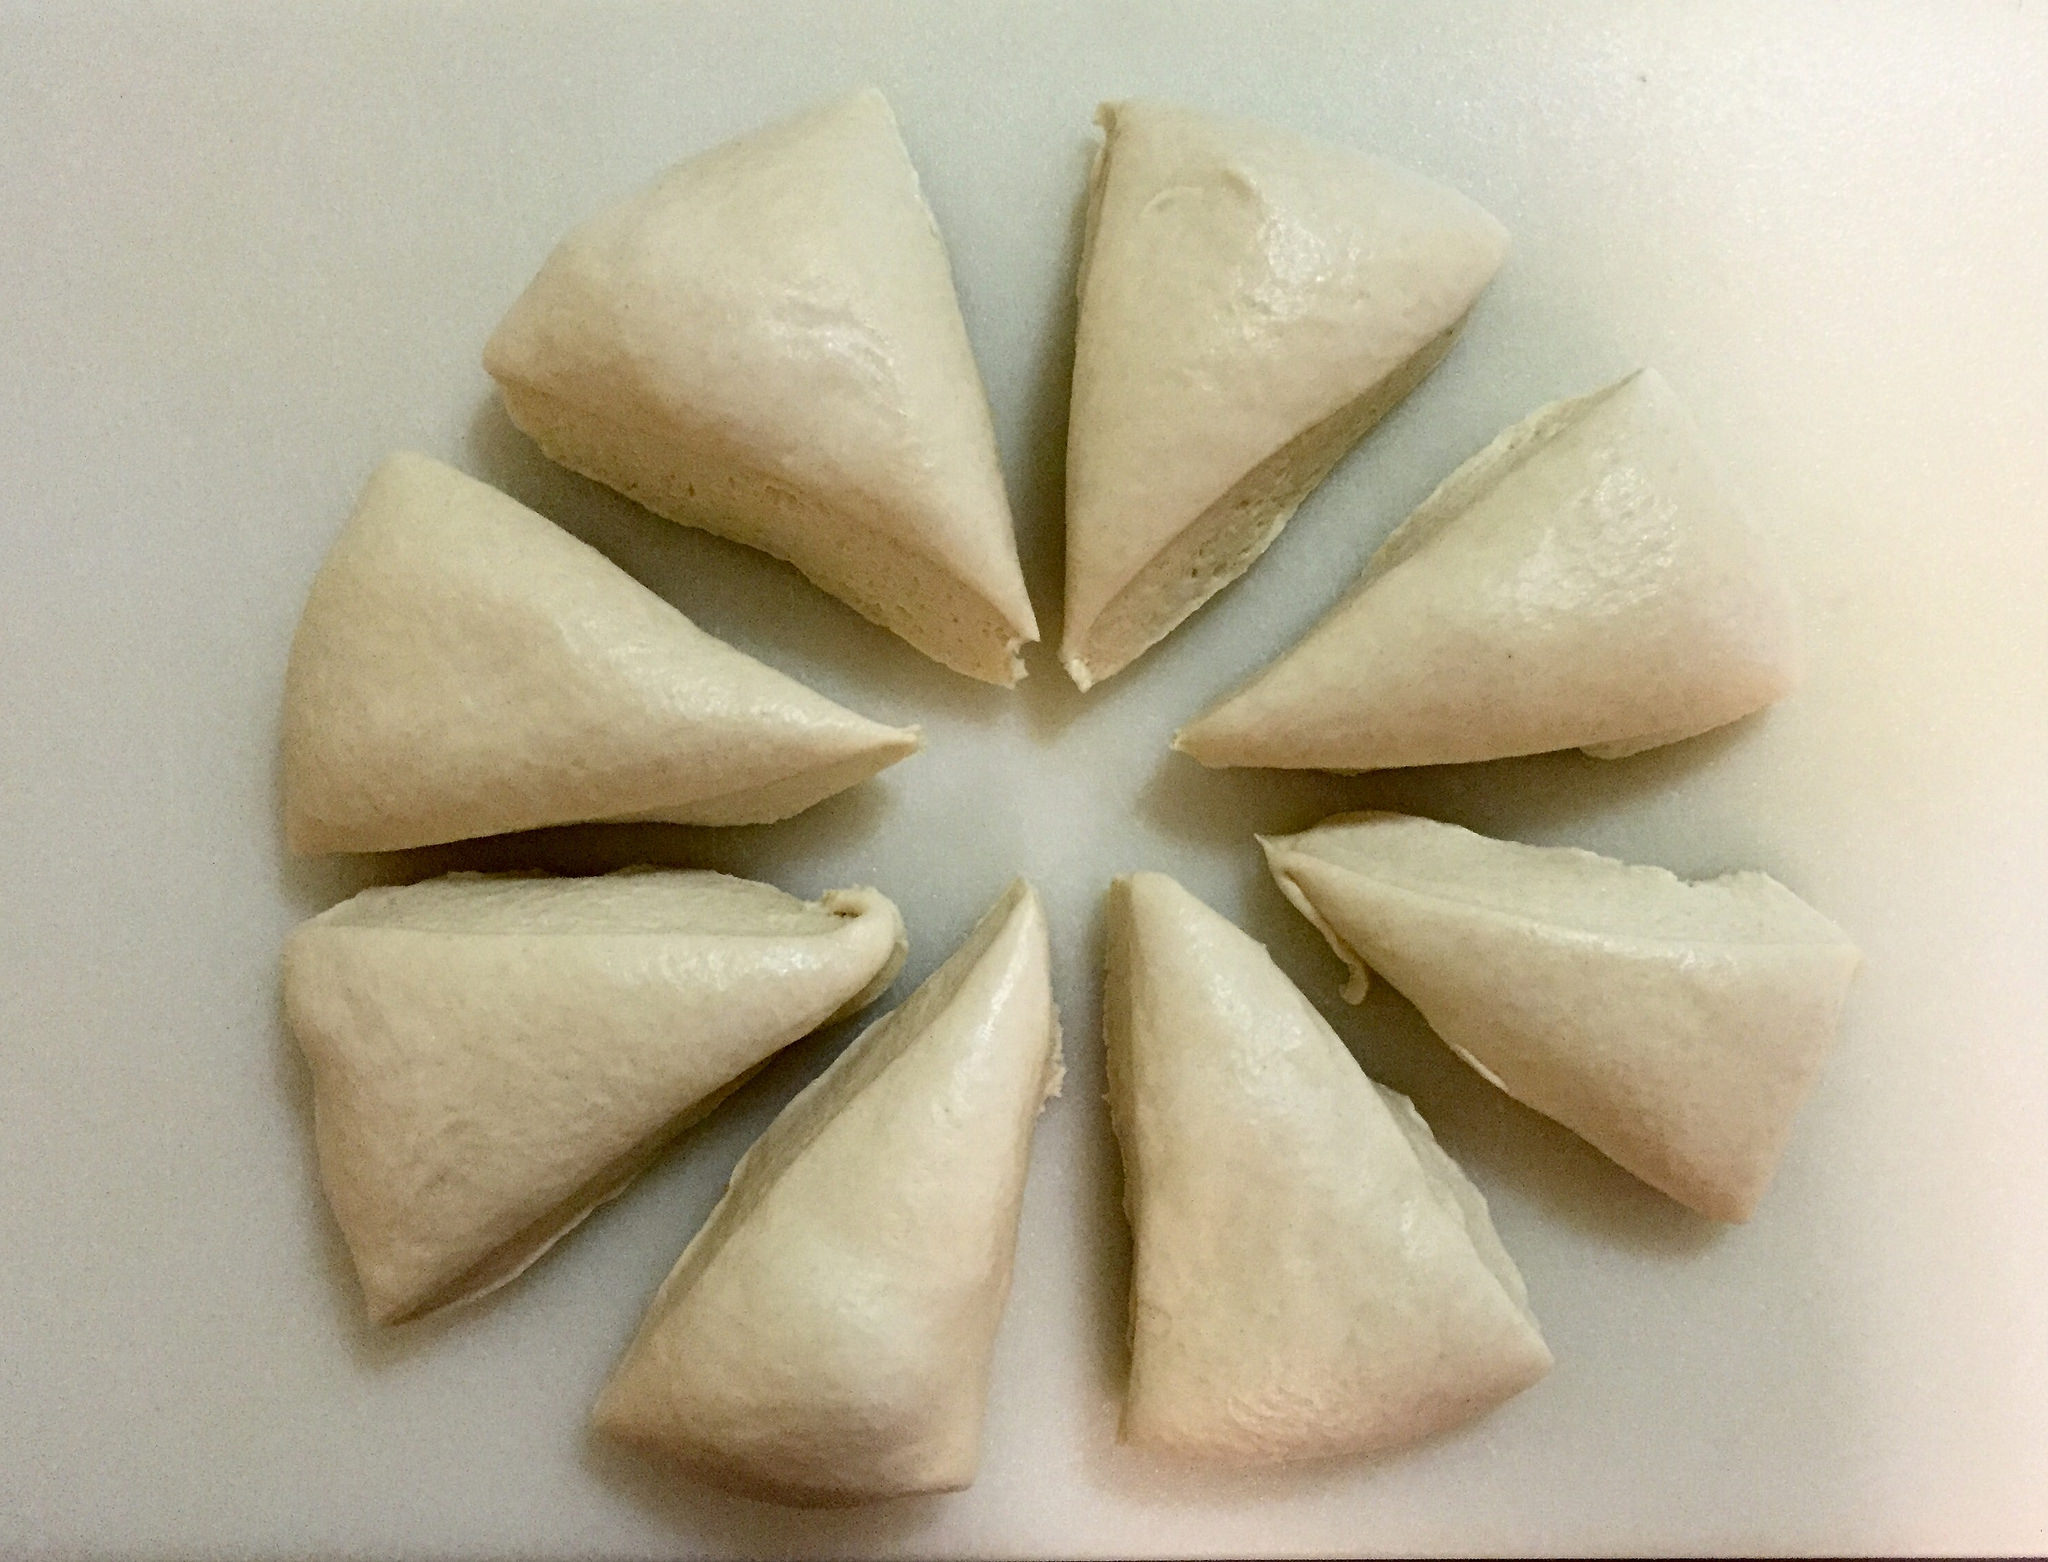
  8. Shape the Rolls: Divide the dough into 6 equal pieces and form them into round rolls. Cover with plastic wrap that has been sprayed with spray oil and let rest for 10 minutes. Proceed with shaping the rolls, placing them on a parchment-lined baking sheet that has been dusted with semolina flour as you finish each one.
    1. Knotting the rolls: To create the distinctive swirl of Kaiser rolls, roll one portion of the dough out into a long strand, about 8-9 inches. Tie a simple knot in the center of the dough, then tuck the loose ends into the middle of the roll (one end over the top and one up through the bottom).
  9. Proof the rolls for another hour, preheating the oven to 425°F when they’re close to ready.
  10. Bake the Rolls: Mist the rolls lightly with water immediately before baking. Place the pan in the oven and mist the oven walls too.  Bake for 10 minutes, then reduce temperature to 400°F and continue baking for another 15-20 minutes, or until rolls are golden brown.
  11. Transfer rolls to cooling rack and let cool for at least 30 minutes before serving.

kaiser roll dough sheet


italian bread

Year of Bread: Italian Bread

Italian Bread vs. French Bread

What’s the difference between Italian Bread and French Bread, you say? That’s a good question. They’re not that different, but the nuts and bolts of it is that Italian bread uses a biga instead of pâte fermentée as a starter, and that Italian bread has just a bit of sugar and fat in it, unlike the bare-bones lean dough of French bread. Those changes mean that Italian bread ends up with a softer crust and a slightly sweeter taste than its Gallic counterpart.

italian bread biga

Baking with Biga

When it comes to baking bread, there are many different incarnations of the preferment. The pâte fermentée and the poolish are two I’ve used frequently in the past. Italian bread uses a biga, which is a relatively dry, bland starter. A biga, which is Italian in origin, doesn’t include salt. This means that less yeast is required to make it rise. Frankly, I’m not sure how much the ultimate taste is affected by different

Frankly, I’m not sure how much the ultimate taste is affected by different starters if all other variables are equal. Many of Reinhart’s recipes offer alternate instructions for using different starters for the same bread. Your choice might end up being based on tradition, and how much time you want to spend on a loaf of bread. Dry starters like biga require a bit more hands on time ( kneading), whereas wetter ones like soakers might require only a quick stir.

A New Ingredient (or not): Diastatic Barley Malt Powder

Diastatic barley malt powder is an ingredient recommended by Reinhart as “yeast food.” It essentially accelerates the yeast’s growth and makes the dough have a richer taste and color in the end. Unfortunately, even in San Francisco, where you can find many strange and wonderful ingredients to cook with, I had a hard time finding this particular addition to my baking collection. Next time I’ll plan  ahead and buy it online, but this Italian bread recipe bakes up wonderfully without it anyway, so don’t worry if you have a hard time finding it.

italian bread cross section

The best thing about this Italian bread is its shelf life, especially compared to French bread. The olive oil keeps it soft and tasty for a few days longer than French bread, which is a long time in bread lifecycles, considering that French bread loses its luster in about 24 hours. Italian bread makes a wonderful base for garlic bread, especially after a day or two. When fresh, the long fermenting biga and touch of sugar make this bread amazingly tasty and it needs no adornment.

Italian Bread Recipe

Slightly adapted from Peter Reinhart’s The Bread Baker’s Apprentice. Yields 2 1-lb loaves.

Biga Ingredients

  • 2.5 cups (11.25 ounces) unbleached bread flour
  • 1/2 tsp instant yeast
  • 6-7 ounces room temperature water

Italian Bread Ingredients

  • 18 ounces biga
  • 2.5 cups (11.25 ounces) unbleached bread flour
  • 1 2/3 tsp salt
  • 1 tbsp sugar
  • 1 tsp instant yeast
  • 1 tsp diastatic barley malt powder (optional)
  • 1 tbsp olive oil
  • 6-8 ounces lukewarm water (90-100°F)
  • Semolina flour or cornmeal for dusting

Procedure

  1. Make the biga: Stir together flour and yeast in a mixing bowl, then add 7 ounces of water and stir until a coarse ball forms. If there is excess flour on the bottom of the bowl, add a little more water. Turn out onto a floured counter and knead for at least 5 minutes, adding flour as needed. The dough should be soft and tacky, but not sticky. The internal temperature should be at least 77°F, but not more than 81°F. Transfer the dough to a lightly oiled bowl and cover with plastic wrap, then let ferment at room temperature for 2-4 hours, or until doubled. After the biga is done rising, degas it by kneading lightly, then return to bowl and refrigerate overnight.
  2. Remove the biga from the refrigerator to dechill at least an hour before making the dough. Cut it into 8-10 pieces and cover with plastic wrap before letting it come to room temperature.
  3. Mix the Italian bread dough: Combine the flour, salt, sugar, malt powder (if you’re using it) and yeast together in a large mixing bowl. Add the cut up pieces of biga and knead them in a bit. They won’t integrate into the dough very easily yet, but that’s ok. Add the olive oil and lukewarm water, and mix until the dough forms a rough ball.
  4. Turn the dough out onto a floured surface and knead for about 10 minutes. The consistency of the dough will be similar to French bread dough, but slightly softer and suppler.
  5. Shape the dough into a ball and return to a lightly oiled bowl for rising. Let rise for 2 hours at room temperature, or until dough has doubled in size.
  6. Shape the loaves: Divide the dough into 2 equal pieces, being careful not to degas the dough. Shape them into rough boules. Lightly dust with flour, then cover and let rest for 5 minutes. While the dough is resting, line a baking sheet with parchment and dust with semolina flour. Shape the boules a little more carefully– the outside should be smooth and tight.
  7. Let boules proof at room temperature for another hour, or until the loaves have swollen to about 1.5x their original size. Preheat the oven to 500°F when the loaves are close to done rising. If you’re using a baking stone, don’t forget to put it and a steam pan (I use a metal pie pan) in the oven when you start preheating.
  8. Bake the bread: If you’re baking the loaves directly on the sheet pan, simply score the loaves with an X or a square and place the pan in the oven. If you’re using a baking stone, carefully transfer the loaves one at a time to a peel or cutting board that’s well-dusted with semolina. Score the loaf and immediately slide it into the oven. Repeat with the second loaf. Pour a cup of hot water into the steam pan and close the door. After 30 seconds, open the door and spray the walls of the oven with water and close the door. Repeat the spraying process once more after 30 seconds, then lower the oven setting to 450°F. Bake for about 20 minutes, or until loaves are golden brown and sound hollow when tapped from bottom. Rotate loaves (or pan) 180° about halfway through baking to ensure even baking.
  9. Transfer your Italian bread to a cooling rack and let cool for at least an hour before slicing.
green onions in jar

Minimizing Kitchen Waste

Minimizing kitchen waste is a challenge in many homes. Up to 40% of food in America is thrown away instead of being eaten. Keeping a well-stocked fridge and pantry often leads to extra food, and extra food and leftovers can easily go bad. For fledgling cooks who are still getting the hang of shopping for and preparing food regularly, learning how much to buy, prepare, and cook can end up wasting a lot of otherwise edible food. Whether you’re concerned with saving money or reducing your kitchen footprint, there are a few easy ways to help minimize kitchen waste when you cook and make your kitchen more efficient. waste minimizing grocery list

Shop with a Menu in Mind

Most people use one of two approaches when they go to the grocery store. They buy food without any real scheme for preparing it, picking up a few portions of protein, bundles of vegetables, and bags of pasta and grains. Others go in armed with specific recipes they want to make and grab one of every item on the ingredients lists. These shoppers might end up buying too much of one thing, or picking up a duplicate of something they already have at home.  Next time you go to the store, think about what you’re planning on cooking for the next few days. Take a peek in the fridge to make sure you don’t end up buying something you already have on the shelf. Buy each item with a purpose (or a few purposes) in mind, and try to match the amount you buy to the amount you need.

Have extra stuff hanging out in the fridge from your last trip to the store? A quick search on your favorite recipe site can help you figure out what to do with that last half of an onion or a single sausage. I’ve recently started using Handpick, an app that lets you pick the ingredients you have and helps you find popular recipes to use them up. It’s a great tool for finding new ways to pair multiple ingredients and stretch your cooking creativity.

spice jars

Buy What You’ll Use and Store Ingredients Correctly

Sometimes it can be hard to tell how much of an ingredient you’ll actually use, so if you’re buying a new or unusual ingredient, try to buy only as much as the recipe calls for. If possible, buy ingredients from a grocery store that offers bulk spices and dry goods. Just because they’re called bulk containers doesn’t mean you have to buy a lot of each thing– these goods are sold by weight, so you can buy just a few ounces of a new spice, or pounds and pounds of your preferred type of rice.  It’s a great way get to exactly the amount you need and can prevent overspending. Buying “in bulk” is especially valuable when it comes to new or infrequently used ingredients, and helps minimize the amount of food that you end up throwing away.

When you get home from shopping, store your ingredients in ways that help extend their life to make sure that they don’t go bad before you get around to cooking them. Dry goods keep better when stored in airtight containers, and many vegetables will last longer when kept in a cool, dry place. There are countless great storage hacks out there to help keep different ingredients in good shape, from keeping green onions fresh by setting their roots in water to wrapping hard cheese in parchment paper to prevent mold growth.

Learn to Trim Food More Efficiently

When I first moved to San Francisco, I lived near an Asian grocery store that had a veritable menagerie of edible fish, fowl and mammal meats for sale. One day I saw cow tongue among the chicken hearts and pig trotters. Knowing that I loved lengua tacos back in LA, I decided to try preparing some myself. I went to the store, bought an alien-looking, vacuum-packed cow tongue, and went home to get started. And then everything went wrong. The recipe I found suggested peeling off the tough outer casing and thinly slicing the meat before searing it. The tongue was slick and slippery, and the outermost layer didn’t “peel right off” as the recipe had promised. I had to cut it off, slippery piece by slippery piece, sacrificing at least a third of the edible meat as I went. My small, embarrassingly dull knife could barely cut through the meat to slice it into thin strips. By the time I was ready to start cooking the meat, most of it was sitting in a pile of discarded scraps. That night we ate tofu for dinner, and I learned a huge lesson about the importance of having the right gear and skills in the kitchen.

Use the appropriate tools and learn how to cut different foods properly to minimize what you throw away. There are plenty of great guides on the web teach yourself how to trim a piece of meat, and knowing how to cut excess fat off a steak or break apart a whole chicken are great skills to learn. A sharp knife makes more precise cuts than a dull one, so you’re less likely to make mistakes. Have simple but effective tools, can also help you get the most out of your ingredients; for example, a citrus reamer can help you squeeze a few more teaspoons of juice out of a lemon, and a vegetable peeler helps prevent you from accidentally slicing off too much when you’re peeling potatoes. Another part of learning how to cut things is learning what’s edible and what’s not. The greens of many vegetables — beets, for example — can be cooked and eaten just like chard, and the fat and bones from meat can make great additions to homemade soups.

waste bowl

Use a Mise en Place and a Waste Bowl 

Using a mise en place system helps you be more mindful of your ingredients while you’re cooking. By taking the time to cut up everything ahead of time, you can ensure that you’ve prepared your ingredients correctly, and that you didn’t forget anything. Consolidate the scraps you do create when you’re cooking into a trash bowl. You don’t need a special container for this–I usually use a small mixing bowl or an empty plastic bag. As an added bonus, this makes cleaning up when you’re done cooking a lot quicker and easier.

If you’re looking to up your waste minimization game even more, have a designated scrap bowl for building a stock bag. Keep things like carrot tops and onion skins, and even fatty trimmings to help beef up (sometimes literally) the flavor of your soups and stocks. Scraps can be stored in a Ziploc in the freezer until you’ve accumulated enough to fill your stock pot.

Find Smart Ways to Use Leftovers

All those Tupperware and takeout containers in the fridge can end up being your own personal mold farm if you’re not careful. Keep an inventory of your leftovers and make an effort to eat them before they start getting fuzzy. I have a whiteboard on the outside of the fridge to remind myself what I still need to eat. Being mindful of your leftovers is the biggest step you can take in ensuring that they get eaten instead of tossed.

Try to incorporate leftovers into new meals, too. A bit of leftover chicken breast can be cubed and thrown into a salad. Bread that’s gone a little too stale to make toast can be pulsed in the blender to make breadcrumbs.  The last scoop of yogurt in a tub can give a marinade a tangy bite. There are very few foods that won’t last a day or two in the fridge, and many can easily be reinvented as a new dish.

salad with leftover chicken

The Big Picture: Minimize Kitchen Waste by Planning Ahead

Perhaps surprisingly, reducing the amount of food (and food packaging) you throw away can take a little bit of practice. But with a little foresight and planning you can train yourself to use better kitchen waste management techniques relatively quickly. It’s a simple way to make you kitchen a little tidier and more effective, and can end up saving you money and time (fewer shopping trips!) in the long run.


french bread boule

Year of Bread: French Bread

Last January, I started my 2015 bread baking challenge with an attempt at one of the most basic recipes in The Bread Baker’s Apprentice: classic French bread. French bread is practically ubiquitous in Western restaurants and households. It’s one of the most standard, basic accompaniment to practically any dish.  It’s the wheat-eating world’s answer to a bowl of white rice. But basic doesn’t mean easy, and out of all the recipes that I’ve tried my hand at this year, this recipe one is the one wherein success seems to evade me the most. But it’s just flour, salt, yeast and water. How hard could it be?

So much of the reason why good French bread is so well-regarded is that it’s not the ingredients that make it good. Of course using higher quality of flour or filtered water might make a bit of a difference when it comes to flavor and texture, but in my baking experience, 90% of what separates a good loaf of French bread from a bad one is execution.

french bread cross section

Air is an Ingredient!

This sounds silly, but what makes leavened bread what it is is an airy, porous texture. Baking bread is an interesting practice in capturing empty space– bakers coax dough to rise with just the right amount of yeast and heat, and a measure of agitation to provide a gluten structure that can withstand a bit of stretchings. They wait until the dough has reached just the right amount of loftiness — and not too long, so it won’t collapse– and then bake it to solidify those glutinous structures like the vaulted arches of a Gothic cathedral in tiny, edible miniature. Is bread really a micromonument of the human drive to build? Maybe that’s just me waxing poetic about gluten.

Learning to “Feel” the Bread

Tactile things are really hard to learn from a book. Learning to use cues like the windowpane test and taking the temperature of the dough periodically help give quantifiable benchmarks to gauge how long to knead the dough. But a big part of it is just learning what “done” feels like at different stages. Ultimately, you just have to get comfortable with different textures and consistencies, and understand that every recipe (in fact, every batch) will probably end up having its own quirks and eccentricities.

french bread pate fermentee

Timing is Important

Yeast waits for no baker, so it’s important to let it have its way and accommodate the whims of the dough. It can be easy to get excited or impatient and try to rush the process, but ultimately the dough will rise at the rate it rises. For a complex rising schedule, I like to go backwards from the time I want the bread to be done and figure out when to start each stage. As much as patience is key for a good rise, being quick and confident when it comes to shaping and slicing loaves and transferring them to the oven is also important.

french bread slice

I haven’t tweaked Reinhart’s recipe for French bread much at all, apart from shaping it into boules (round loaves) rather than the suggested baguettes. As you can see above, I got a nice, crusty exterior this time around, and a passably “holey” crumb. This is an extremely lean bread (no fat at all in the dough), so it’s best consumed within a day of baking. Fortunately, it’s great by itself, with a smear of butter or for sopping up pasta sauce, so it isn’t hard to eat it quickly.

Peter Reinhart’s French Bread Recipe

Taken from The Bread Baker’s ApprenticeYields 3 small baguettes, 2 medium round loaves, or an indeterminate number of other shapes.

Ingredients

Pâte Fermentée:

  • 5 ounces bread flour
  • 5 ounces AP flour
  • 3/4 tsp salt
  • 1/2 tsp instant yeast
  • 3/4 cup water, room temperature

French Bread:

  • 16 ounces pâte fermentée (see above)
  • 5 ounces bread flour
  • 5 ounces AP flour
  • 3/4 tsp salt
  • 1/2 tsp instant yeast
  • 3/4 cup water, lukewarm (90-100°F)
  1. To make pâte fermentée: The night before or up to 3 days before you want to make the dough, mix flour, salt and yeast in a large mixing bowl. Add water and mix until ingredients form a ball. Add a few tablespoons more water if necessary; erring on the wetter side as it’s easier to firm up a dough than it is to add water once you start kneading. Turn dough out onto a floured counter and knead for 5-6 minutes, adding flour as necessary. The dough should be pliable and feel tacky, but not sticky.
  2. Place the dough in a lightly oiled bowl and cover, then let sit at room temperature for about an hour. The dough should swell significantly but won’t quite double. Knead dough lightly to degas, then re-cover and place in refrigerator until ready to make French Bread dough.
  3. To make french bread dough: Remove pâte from the refrigerator at least an hour before to dechill; cutting it up into 8 or so pieces helps speed this process. Mix flour, salt, yeast in a bowl, then add pâte fermentée pieces. Begin to knead the pâte fermentée pieces into the flour (it won’t work well), then add water and continue mixing until the dough comes together. Add extra water if necessary.
  4. Turn dough out onto a floured counter and knead for about 10 minutes. The pâte fermentée pieces should be entirely incorporated with the “new” dough. The dough should pass the windowpane test and register about 77-81°F.
  5. Shape the dough into a smooth ball and place in a lightly oiled bowl. Cover and let rise for 2 hours, or until the dough has doubled in bulk.
  6. Shaping the loaves: Turn the proofed dough onto a floured counter. Being careful to degas the dough as little as possible, use a pastry cutter or sharp knife to divide the dough into two or three pieces, depending on how many loaves you are making. I simply made round boules — check out the man himself, Peter Reinhart, shaping loaves on YouTube for a more in-depth tutorial.
  7. Let the loaves rest for at least 45 minutes, or until 1.5x starting size.
  8. Baking the loaves: Preheat oven to 500°F. If you’re using a baking stone (I use one by Old Stone Oven and I love it, but they’re entirely necessary), place the stone on the center rack before you turn the oven on. Place a metal or cast iron (not glass) pan in the bottom of the oven now, regardless of whether you’re using a stone or not; this will be your steam pan. A few minutes before you’re ready to bake the bread, heat up about half a cup of water — it doesn’t have to be boiling, but very hot is best.
  9. If using the baking stone, liberally dust a cutting board or pizza peel with semolina flour or cornmeal. Carefully transfer one of the loaves to the peel, then slide it into the preheated oven. Repeat for remaining loaves, then pour the hot half cup of water into the steam pan and shut the oven. After 30 seconds, open the door and mist the walls of the oven with water (or sprinkle some in with your hand). Repeat twice more, then turn the oven down to 450°F. If the whole misting process is too much fuss for you, you can skip it. It makes a difference in the crust’s texture, but it won’t ruin the bread if you don’t do it.
  10. Bake for 10 minutes, then rotate the loaves 180° for even baking. Bake for another 10-15 minutes, then remove and place loaves on a cooling rack. The finished loaves should be golden brown and will sound hollow when tapped on the bottom.
  11. Let rest for at least an hour before slicing and consuming.


Year of Bread: Garlic Herb Focaccia

Focaccia is the fun cousin of ciabatta; it has a wet, long-fermenting dough that bakes up to a light, somewhat flat but very bubbly bread — plus a healthy dose of herb-infused olive oil. It doesn’t look neat and tidy, but bakes into a landscape of olive-oil filled valleys and air bubble peaks. Flavor-wise, focaccia plays second fiddle to no one. It’s great for dipping in oils and sauces, but it’s baked with so much rich olive oil flavor that it holds its own as well. Olive oil plays a huge part in making this focaccia recipe great. A healthy coating pools in the divots on the top side of the bread, and runs down the sides and sizzles underneath during baking for a thick, crispy bottom crust. If you’re looking for a great base for a deep dish pizza crust, this might be the perfect recipe.

focaccia2

A Slow Fermentation Masterpiece

This focaccia feels like the epitome of Reinhart’s slow fermentation baking philosophy. Be forewarned that a significant amount of proofing time is required on both days of the bread’s preparation.When all is accounted for, it requires a bit over 5 hours of room temperature proofing and a long night in the refrigerator. The time it takes for the dough to reach bubbly perfection is worth it, however; the final product has a fantastically complex taste and really lets the flavor of the yeast stand out. Much like ciabatta, a very wet poolish-style starter is the foundation of this loaf. In this case, the poolish is all that’s used, as no other ingredients are added on day 2.

Any number of toppings can be used to dress up this loaf, but I used a simple olive oil infused with herbs and garlic. I found that an extra sprinkling of salt over the top of the focaccia after baking immensely improved the overall balance of the flavor. I had a really hard time leaving the fresh, warm slices alone long enough to take photos.

focaccia1

Focaccia with Basil Garlic Oil

Yields one very large focaccia loaf. Slightly adapted from Peter Reinhart’s The Bread Baker’s Apprentice

Focaccia Ingredients

  • 5 cups (22.5 oz) bread flour
  • 2 tsp salt
  • 2 tsp instant yeast
  • 6 T olive oil
  • 2 cups water, room temp
  • Extra olive oil for drizzling

Herb Oil Ingredients

  • 1/2 cup olive oil (doesn’t have to be extra virgin)
  • 1 large garlic clove, smashed
  • 2 T fresh basil leaves
  • 1 tsp fresh marjoram
  • 1 tsp fresh thyme
  • A few pinches each of salt and pepper

Note: Any combination of fresh herbs will do for this, depending on your flavor preference.

Instructions

  1. Preparing the Dough: The day before you want to bake the focaccia, assemble the dough. Stir together the flour, salt, and yeast in a large mixing bowl, then add the water and olive oil. Stir with a wooden spoon (or your hand) until the dough comes together. continue mixing or kneading for about 5 minutes. The dough should be smooth and loose, but not too sticky. It will stick to the bottom of the bowl, but should clear the sides as you mix.
  2. Sprinkle flour on a counter to make an 8×8-inch bed for the dough. Transfer the dough into the bed and dust liberally with flour, patting (as best you can– the dough will be very loose and uncooperative) into a rectangle. Wait 5 minutes for the dough to rest.
  3. Pulling the dough from either side, gently stretch it to about twice its length, then fold it over itself into thirds, as if you were folding a piece of paper to put in an envelope. Mist with spray oil and dust with flour, then cover with plastic wrap and let sit for 30 minutes.
  4. After 30 minutes, repeat process. Let sit again for 30 minutes.
  5. After the second 30 minute period, repeat the stretching one last time and then let sit for an hour. It won’t rise, but it will swell and spread significantly (Just to recap, that’s 3 “stretches” total).focaccia poolish
  6. Proceed with shaping; line a baking sheet with parchment, then drizzle some olive oil over the parchment. spread it around with a spatula (or your fingers) so that most of the parchment is covered. Shape the dough into a rough rectangle, spray lightly with oil, and cover with plastic wrap.
  7. Refrigerate overnight.
  8. Making the Herb Oil: You can do this the night you make the dough, or right before you prepare the dough for its final proofing. Heat the olive oil to about 100°F in a small saucepan, and stir in chopped herbs and garlic clove. Keep over low heat for a few minutes, stirring occasionally. Remove from heat and let cool slightly, then remove the garlic clove and discard (if you prefer, mince the garlic before adding it to the oil and leave it in. You can double the recipe if you wish, and keep the extra oil in the refrigerator.herb oil
  9. Baking the Focaccia: The next day, remove the dough from the fridge 3 hours before you’re ready to bake. Right after removing the pan from the fridge, drizzle half the herb oil over the bread, then press down with your fingers to create dimples. It’s important not to depress the entire loaf; you want to retain some of those air bubbles to get the desired texture (see below). Drizzle the rest of the herb oil over the bread, before re-covering (loosely) with plastic wrap. Let rise for 3 hours at room temperature.focaccia dough
  10. About 20-30 minutes before you want to bake the loaf, preheat the oven to 500°F.
  11. When you’re ready to bake, uncover the bread carefully. It will probably spread to cover most of the pan, but don’t worry if it doesn’t. Place the pan in the oven and turn the heat down to 450°F. Bake for 10 minutes, then rotate pan 180° and bake for another 5-10 minutes, or until lightly golden brown (I baked mine for about 7 minutes after turning).