light wheat bread slices

Year of Bread: Light Wheat Bread

I love a good loaf of something fancy and decadent. But on the average day, I usually just want a decent piece of wheat bread to toast up and slather with peanut butter. The nice thing about this recipe for light wheat bread is that it’s quick and fool-proof to make. Bread with whole wheat flour requires less dough kneading, and does best with a shorter fermentation time than white bread. This light wheat bread loaf won’t last as long as a store-bought loaf, but otherwise it looks and acts pretty much like something you’d buy at the store.

Last year The Kitchn ran a recipe for insanely decadent $10 toast, which featured a piece of homemade toast slathered in imported butter, artisanal jam, local honey, fresh peanut butter, sea salt and edible gold flakes. While I didn’t try it out myself, I also failed to realize that it was, in fact, a culinary April Fools’ Joke. However, it did make me consider different combinations of breakfast toast toppings. Who’s to say you have to choose between peanut butter and jam? Or that sea salt won’t balance out the sweetness of honey? I’ve ended up adopting the winning combo of chunky peanut butter, a drizzle of honey and a sprinkle of sea salt for my own toast (on days when I have time to make a multi-step breakfast, that is). It takes a relatively plain breakfast and adds just enough depth of flavor to elevate it from averagely edible to delicious. I highly recommend everyone give it a try!

wheat bread loaf whole

Light Wheat Bread Recipe

Yields one 2 lb. loaf. From Peter Reinhart’s The Bread Baker’s Apprentice.

Ingredients

  • 2.5 cups bread flour
  • 1.5 cups whole-wheat flour
  • 1.5 Tbsp honey
  • 1.5 tsp salt
  • 3 Tbsp powdered milk*
  • 1.5 tsp instant yeast
  • 2 Tbsp unsalted butter, room temperature
  • 1.25 cups water, room temperature

*Don’t have powdered milk on hand? Take out 3 Tbsp water and substitute 3 Tbsp low-fat milk, adding it along with the other wet ingredients.

  1. Stir together dry ingredients in a mixing bowl. Add butter, honey and water and stir until the ingredients form a ball. If the dough isn’t coming together or seems too dry, add a little more water a few teaspoons at a time. Better that it’s a little too wet at this point rather than too dry.
  2. Turn dough out onto a floured counter and knead for about 10 minutes. The dough should be tacky but not sticky, and register 77ºF to 81ºF. Transfer to a lightly oiled bowl and cover with plastic wrap.
  3. Let rise for 1.5-2 hours, or until dough doubles in size.
  4. Turn dough out onto a lightly floured surface and press it into a rectangle about 6 inches wide and 8-10 inches long. Form the dough into a loaf by rolling it up, pressing the seam of the roll as you go to create surface tension (that’s how you’ll get a good crust). Transfer loaf to a lightly oiled (or buttered) loaf pan, mist with spray oil, then cover loosely with plastic wrap.
  5. Proof the loaf for about 90 minutes. The dough should crest above the lip of the pan, but shouldn’t swell so much that it overflows the pan. Preheat the oven to 350ºF when the loaf is almost ready.
  6. Put the pan in the oven and bake for 30 minutes, then rotate the pan 180 degrees and continue baking for another 15-30 minutes. When the bread is done it will be golden brown and sound hollow when thumped from the bottom.
  7. Remove the bread from the loaf pan immediately when you take it out of the oven and cool on a rack for at least 1 hour before slicing and serving.

light wheat bread loaf sliced

lavash crackers

Year of Bread: Lavash Crackers

I’ll be honest — this hasn’t been my favorite recipe in The Bread Baker’s Apprentice. It isn’t even my favorite cracker recipe. That honor goes to Smitten Kitchen’s flatbreads with honey, thyme and sea salt, which I have made twice in rapid succession and are so addictive that I’m slightly afraid to make them again. But in the interest of forging ahead through the book, I’m including my take on Reinhart’s recipe for your reading pleasure.

lavash crackers

Why Are Crackers in a Bread Book?

The dough used for these crackers is actually pretty versatile. It’s a simple formula that makes a soft, stretchy dough that rolls out well. Rolled very thin, the dough bakes up quickly into thick, crunchy crackers. Rolled a little thicker and slightly underbaked, they end up as something like a lavash wrap (perfect if you’re in the habit of making wraps instead of sandwiches for lunch). And if you cut the dough into circles and bake it at very high temperatures (500°F), they’ll puff up into a nice pita bread. Perhaps unsurprisingly, the texture and flavor of these reminded me of pita chips (and would be awesome with hummus).

lavash cracker dough

Lavash Cracker Toppings

Since crackers often end up getting dipped into all sorts of good stuff, they don’t necessarily need a ton of extra flavor on their own. If you’re planning on pairing these with a dip or a spread, you keep your toppings to a simple sprinkle of sea salt on top right before you bake them.

I threw a bunch of different things on top of my batch of crackers to see what worked best. I used fresh black pepper, thyme, sesame seeds, and hot paprika, all with a bit of sea salt. Much of the chunkier toppings ended up falling off pretty quickly. However, I really loved the hot paprika and sea salt. The next time I bake this cracker recipe (or another one), I’ll probably repeat that combo for the whole batch. Whatever you end up choosing, keep in mind that a little goes a long way flavor-wise, especially for spicier ingredients, since the flavor of the cracker itself is pretty neutral.

image_18724878821_o

Lavash Crackers Recipe

Yields 1 sheet pan of crackers. Adapted from Peter Reinhart’s The Bread Baker’s Apprentice.

Ingredients

  • 1.5 cups bread flour
  • 1/2 tsp salt
  • 1/2 tsp instant yeast
  • 1/2 tbsp honey
  • 2 tbsp vegetable oil
  • 1/3 – 1/2 cup water, room temperature
  • Hot paprika and sea salt for topping
  1. Combine the dry ingredients in a mixing bowl. In another bowl, whisk together honey, oil, and 1/3 cup water. Pour honey mixture into dry mixture and stir to combine. If the mixture is too dry, add the remaining portion of water.
  2. Turn the dough out onto a floured work surface and knead for about 10 minutes. The dough should be firm, but stretchy and satiny to the touch. Form the dough into a ball and transfer to a lightly oiled bowl, then cover.
  3. Let ferment at room temperature for about 90 minutes, or until dough doubles  in size.
  4. Preheat the oven to 350°F.  Mist your work surface lightly with spray oil, then turn the dough out onto the surface. Dust the top of the dough very lightly with flour. Press the dough into a rectangle. Use a rolling pin to roll the dough out into a thin sheet, about 15×12 inches. If the dough doesn’t stay rolled out very well and tries to spring back, stop working on it and let the gluten relax for a few minutes, then continue. You can lift it up by one end (carefully) and wave it a little to help this process. When the dough reaches the desired thinness, let the dough relax for 5 minutes. Line a sheet pan with baking parchment and carefully transfer the dough to the parchment (it shouldn’t stick to the work surface). If the dough hangs over the edge of the pan, trim it with a sharp knife or scissors.
  5. Mist the top of the dough with water and sprinkle on any toppings that you’d like to add. If you want your crackers to be specific shapes (rectangles, long strips, and triangles are good options), cut them now. Don’t worry about separating the pieces — they’ll break apart easily after baking. Otherwise, you can break the cracker sheet apart into less uniform pieces (some might even call them “rustic” crackers) after it has cooled.
  6. Bake for 15-20 minutes, or until crackers begin to brown evenly across the top. Note: Keep an eye on the crackers for the first few minutes in the oven — if you’ve got any air pockets, they’ll swell into big bubbles. You can attempt to keep them at bay by poking them with a sharp knife early on in the baking process, but the longer you wait the less you can do about it (hence the mega bubble in my batch, as seen below).
  7. After you take the crackers out of the oven, let them cool in the pan for about 10 minutes. Then just snap them apart or break them into shards and serve.lavash crackers bubble
italian bread

Year of Bread: Italian Bread

Italian Bread vs. French Bread

What’s the difference between Italian Bread and French Bread, you say? That’s a good question. They’re not that different, but the nuts and bolts of it is that Italian bread uses a biga instead of pâte fermentée as a starter, and that Italian bread has just a bit of sugar and fat in it, unlike the bare-bones lean dough of French bread. Those changes mean that Italian bread ends up with a softer crust and a slightly sweeter taste than its Gallic counterpart.

italian bread biga

Baking with Biga

When it comes to baking bread, there are many different incarnations of the preferment. The pâte fermentée and the poolish are two I’ve used frequently in the past. Italian bread uses a biga, which is a relatively dry, bland starter. A biga, which is Italian in origin, doesn’t include salt. This means that less yeast is required to make it rise. Frankly, I’m not sure how much the ultimate taste is affected by different

Frankly, I’m not sure how much the ultimate taste is affected by different starters if all other variables are equal. Many of Reinhart’s recipes offer alternate instructions for using different starters for the same bread. Your choice might end up being based on tradition, and how much time you want to spend on a loaf of bread. Dry starters like biga require a bit more hands on time ( kneading), whereas wetter ones like soakers might require only a quick stir.

A New Ingredient (or not): Diastatic Barley Malt Powder

Diastatic barley malt powder is an ingredient recommended by Reinhart as “yeast food.” It essentially accelerates the yeast’s growth and makes the dough have a richer taste and color in the end. Unfortunately, even in San Francisco, where you can find many strange and wonderful ingredients to cook with, I had a hard time finding this particular addition to my baking collection. Next time I’ll plan  ahead and buy it online, but this Italian bread recipe bakes up wonderfully without it anyway, so don’t worry if you have a hard time finding it.

italian bread cross section

The best thing about this Italian bread is its shelf life, especially compared to French bread. The olive oil keeps it soft and tasty for a few days longer than French bread, which is a long time in bread lifecycles, considering that French bread loses its luster in about 24 hours. Italian bread makes a wonderful base for garlic bread, especially after a day or two. When fresh, the long fermenting biga and touch of sugar make this bread amazingly tasty and it needs no adornment.

Italian Bread Recipe

Slightly adapted from Peter Reinhart’s The Bread Baker’s Apprentice. Yields 2 1-lb loaves.

Biga Ingredients

  • 2.5 cups (11.25 ounces) unbleached bread flour
  • 1/2 tsp instant yeast
  • 6-7 ounces room temperature water

Italian Bread Ingredients

  • 18 ounces biga
  • 2.5 cups (11.25 ounces) unbleached bread flour
  • 1 2/3 tsp salt
  • 1 tbsp sugar
  • 1 tsp instant yeast
  • 1 tsp diastatic barley malt powder (optional)
  • 1 tbsp olive oil
  • 6-8 ounces lukewarm water (90-100°F)
  • Semolina flour or cornmeal for dusting

Procedure

  1. Make the biga: Stir together flour and yeast in a mixing bowl, then add 7 ounces of water and stir until a coarse ball forms. If there is excess flour on the bottom of the bowl, add a little more water. Turn out onto a floured counter and knead for at least 5 minutes, adding flour as needed. The dough should be soft and tacky, but not sticky. The internal temperature should be at least 77°F, but not more than 81°F. Transfer the dough to a lightly oiled bowl and cover with plastic wrap, then let ferment at room temperature for 2-4 hours, or until doubled. After the biga is done rising, degas it by kneading lightly, then return to bowl and refrigerate overnight.
  2. Remove the biga from the refrigerator to dechill at least an hour before making the dough. Cut it into 8-10 pieces and cover with plastic wrap before letting it come to room temperature.
  3. Mix the Italian bread dough: Combine the flour, salt, sugar, malt powder (if you’re using it) and yeast together in a large mixing bowl. Add the cut up pieces of biga and knead them in a bit. They won’t integrate into the dough very easily yet, but that’s ok. Add the olive oil and lukewarm water, and mix until the dough forms a rough ball.
  4. Turn the dough out onto a floured surface and knead for about 10 minutes. The consistency of the dough will be similar to French bread dough, but slightly softer and suppler.
  5. Shape the dough into a ball and return to a lightly oiled bowl for rising. Let rise for 2 hours at room temperature, or until dough has doubled in size.
  6. Shape the loaves: Divide the dough into 2 equal pieces, being careful not to degas the dough. Shape them into rough boules. Lightly dust with flour, then cover and let rest for 5 minutes. While the dough is resting, line a baking sheet with parchment and dust with semolina flour. Shape the boules a little more carefully– the outside should be smooth and tight.
  7. Let boules proof at room temperature for another hour, or until the loaves have swollen to about 1.5x their original size. Preheat the oven to 500°F when the loaves are close to done rising. If you’re using a baking stone, don’t forget to put it and a steam pan (I use a metal pie pan) in the oven when you start preheating.
  8. Bake the bread: If you’re baking the loaves directly on the sheet pan, simply score the loaves with an X or a square and place the pan in the oven. If you’re using a baking stone, carefully transfer the loaves one at a time to a peel or cutting board that’s well-dusted with semolina. Score the loaf and immediately slide it into the oven. Repeat with the second loaf. Pour a cup of hot water into the steam pan and close the door. After 30 seconds, open the door and spray the walls of the oven with water and close the door. Repeat the spraying process once more after 30 seconds, then lower the oven setting to 450°F. Bake for about 20 minutes, or until loaves are golden brown and sound hollow when tapped from bottom. Rotate loaves (or pan) 180° about halfway through baking to ensure even baking.
  9. Transfer your Italian bread to a cooling rack and let cool for at least an hour before slicing.
french bread boule

Year of Bread: French Bread

Last January, I started my 2015 bread baking challenge with an attempt at one of the most basic recipes in The Bread Baker’s Apprentice: classic French bread. French bread is practically ubiquitous in Western restaurants and households. It’s one of the most standard, basic accompaniment to practically any dish.  It’s the wheat-eating world’s answer to a bowl of white rice. But basic doesn’t mean easy, and out of all the recipes that I’ve tried my hand at this year, this recipe one is the one wherein success seems to evade me the most. But it’s just flour, salt, yeast and water. How hard could it be?

So much of the reason why good French bread is so well-regarded is that it’s not the ingredients that make it good. Of course using higher quality of flour or filtered water might make a bit of a difference when it comes to flavor and texture, but in my baking experience, 90% of what separates a good loaf of French bread from a bad one is execution.

french bread cross section

Air is an Ingredient!

This sounds silly, but what makes leavened bread what it is is an airy, porous texture. Baking bread is an interesting practice in capturing empty space– bakers coax dough to rise with just the right amount of yeast and heat, and a measure of agitation to provide a gluten structure that can withstand a bit of stretchings. They wait until the dough has reached just the right amount of loftiness — and not too long, so it won’t collapse– and then bake it to solidify those glutinous structures like the vaulted arches of a Gothic cathedral in tiny, edible miniature. Is bread really a micromonument of the human drive to build? Maybe that’s just me waxing poetic about gluten.

Learning to “Feel” the Bread

Tactile things are really hard to learn from a book. Learning to use cues like the windowpane test and taking the temperature of the dough periodically help give quantifiable benchmarks to gauge how long to knead the dough. But a big part of it is just learning what “done” feels like at different stages. Ultimately, you just have to get comfortable with different textures and consistencies, and understand that every recipe (in fact, every batch) will probably end up having its own quirks and eccentricities.

french bread pate fermentee

Timing is Important

Yeast waits for no baker, so it’s important to let it have its way and accommodate the whims of the dough. It can be easy to get excited or impatient and try to rush the process, but ultimately the dough will rise at the rate it rises. For a complex rising schedule, I like to go backwards from the time I want the bread to be done and figure out when to start each stage. As much as patience is key for a good rise, being quick and confident when it comes to shaping and slicing loaves and transferring them to the oven is also important.

french bread slice

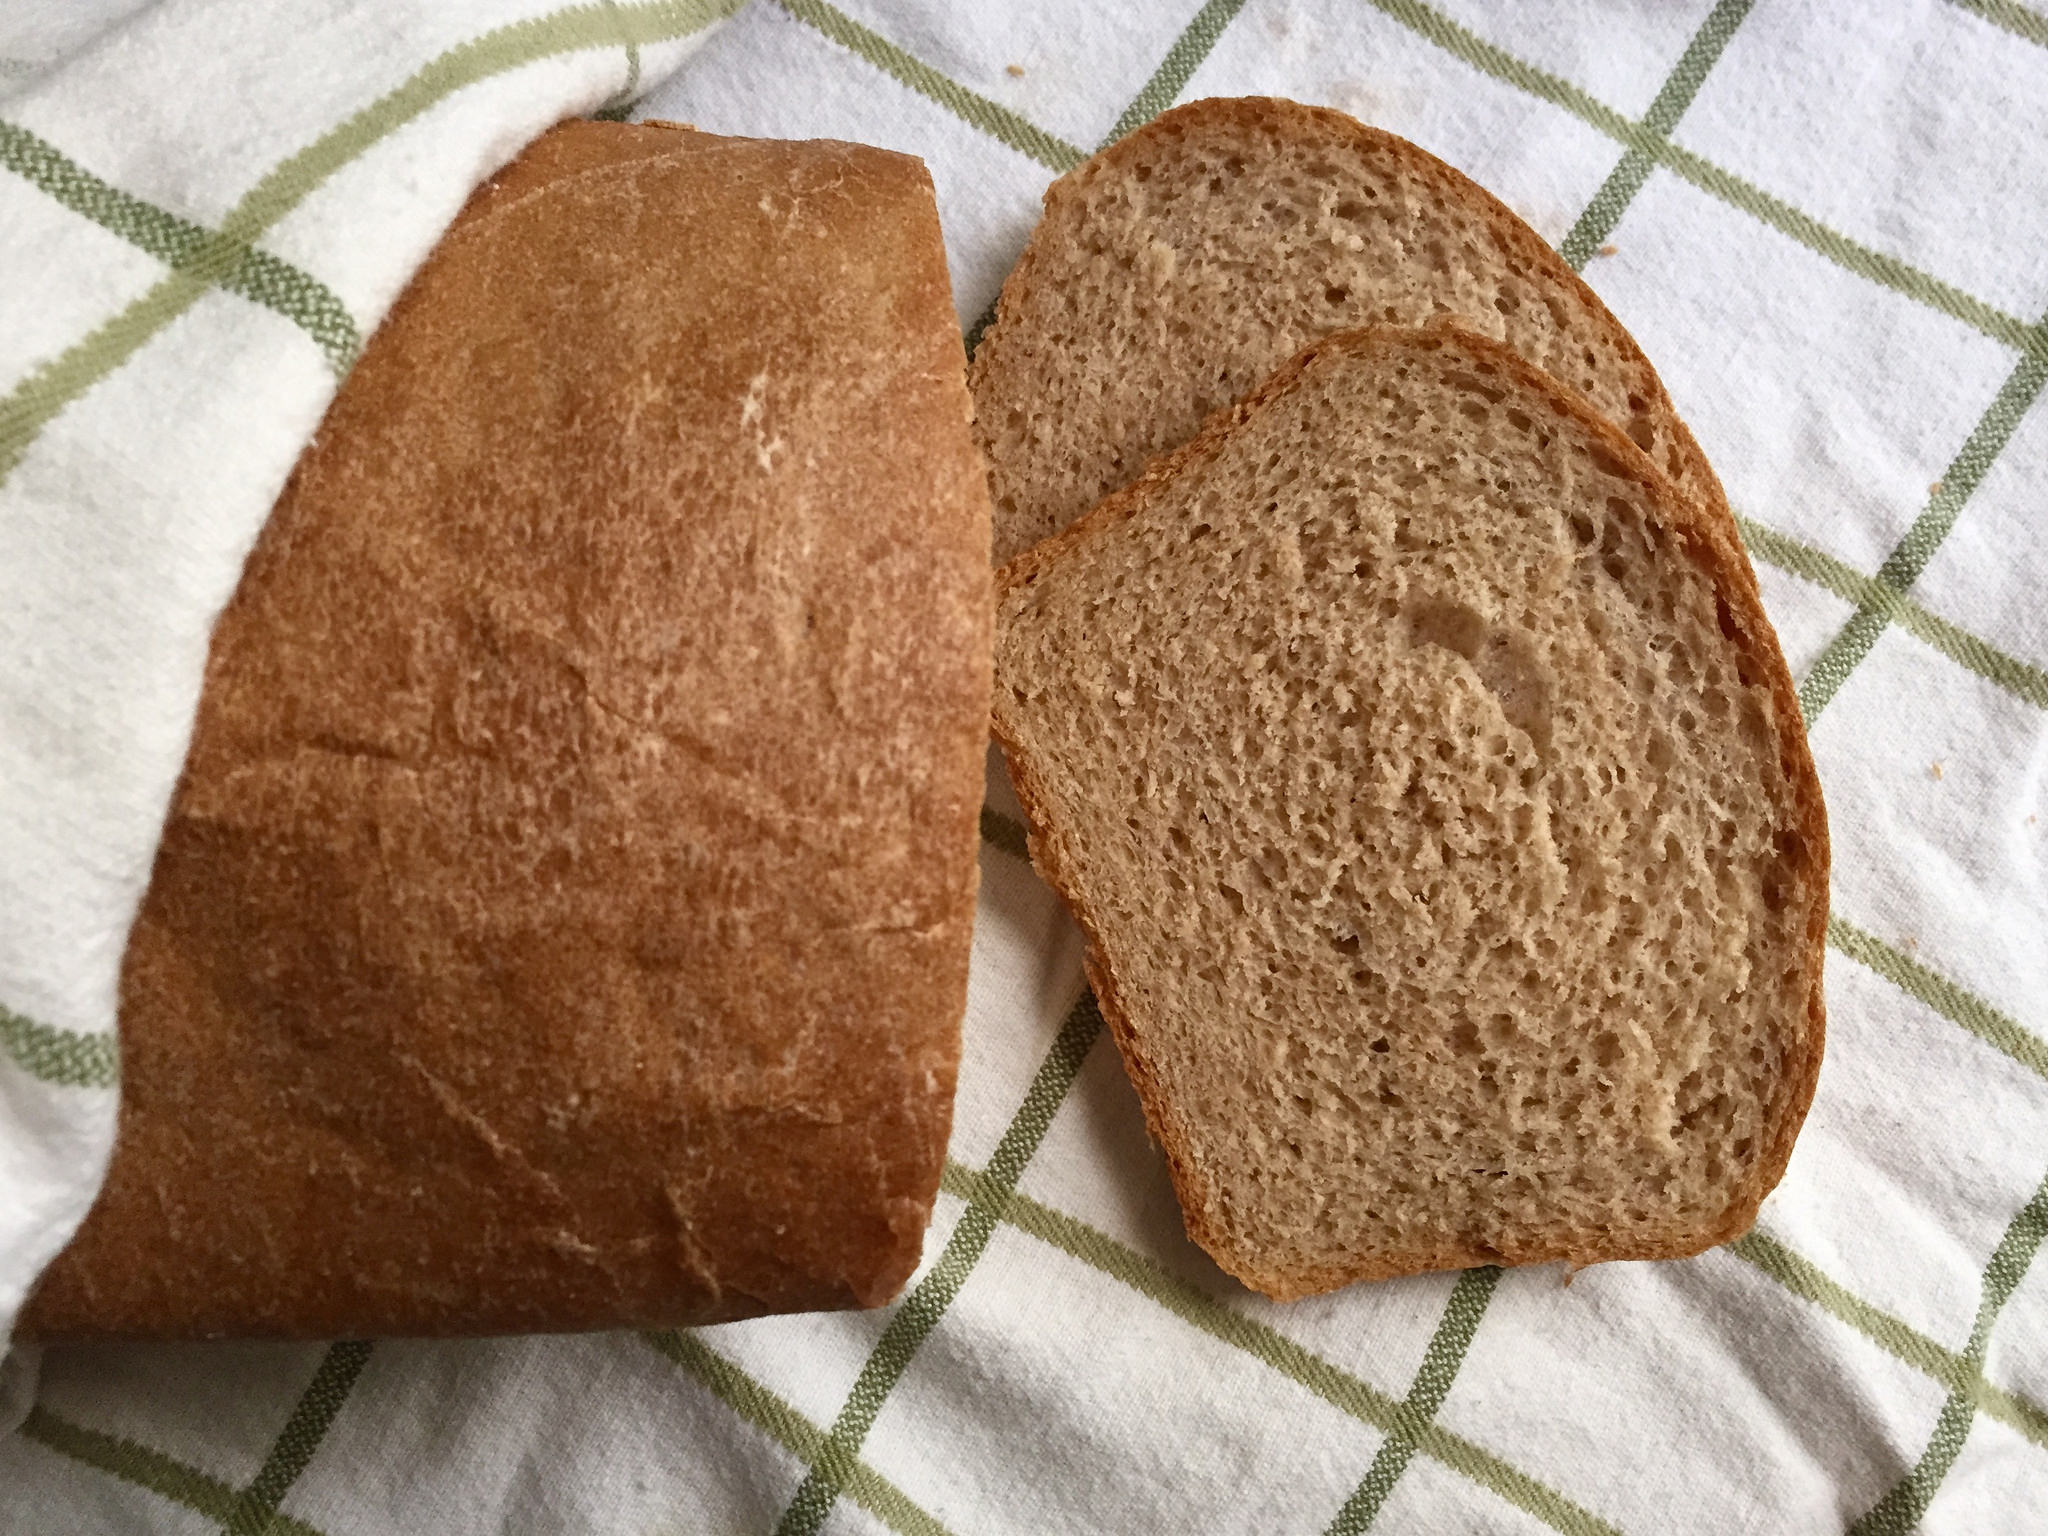
I haven’t tweaked Reinhart’s recipe for French bread much at all, apart from shaping it into boules (round loaves) rather than the suggested baguettes. As you can see above, I got a nice, crusty exterior this time around, and a passably “holey” crumb. This is an extremely lean bread (no fat at all in the dough), so it’s best consumed within a day of baking. Fortunately, it’s great by itself, with a smear of butter or for sopping up pasta sauce, so it isn’t hard to eat it quickly.

Peter Reinhart’s French Bread Recipe

Taken from The Bread Baker’s ApprenticeYields 3 small baguettes, 2 medium round loaves, or an indeterminate number of other shapes.

Ingredients

Pâte Fermentée:

  • 5 ounces bread flour
  • 5 ounces AP flour
  • 3/4 tsp salt
  • 1/2 tsp instant yeast
  • 3/4 cup water, room temperature

French Bread:

  • 16 ounces pâte fermentée (see above)
  • 5 ounces bread flour
  • 5 ounces AP flour
  • 3/4 tsp salt
  • 1/2 tsp instant yeast
  • 3/4 cup water, lukewarm (90-100°F)
  1. To make pâte fermentée: The night before or up to 3 days before you want to make the dough, mix flour, salt and yeast in a large mixing bowl. Add water and mix until ingredients form a ball. Add a few tablespoons more water if necessary; erring on the wetter side as it’s easier to firm up a dough than it is to add water once you start kneading. Turn dough out onto a floured counter and knead for 5-6 minutes, adding flour as necessary. The dough should be pliable and feel tacky, but not sticky.
  2. Place the dough in a lightly oiled bowl and cover, then let sit at room temperature for about an hour. The dough should swell significantly but won’t quite double. Knead dough lightly to degas, then re-cover and place in refrigerator until ready to make French Bread dough.
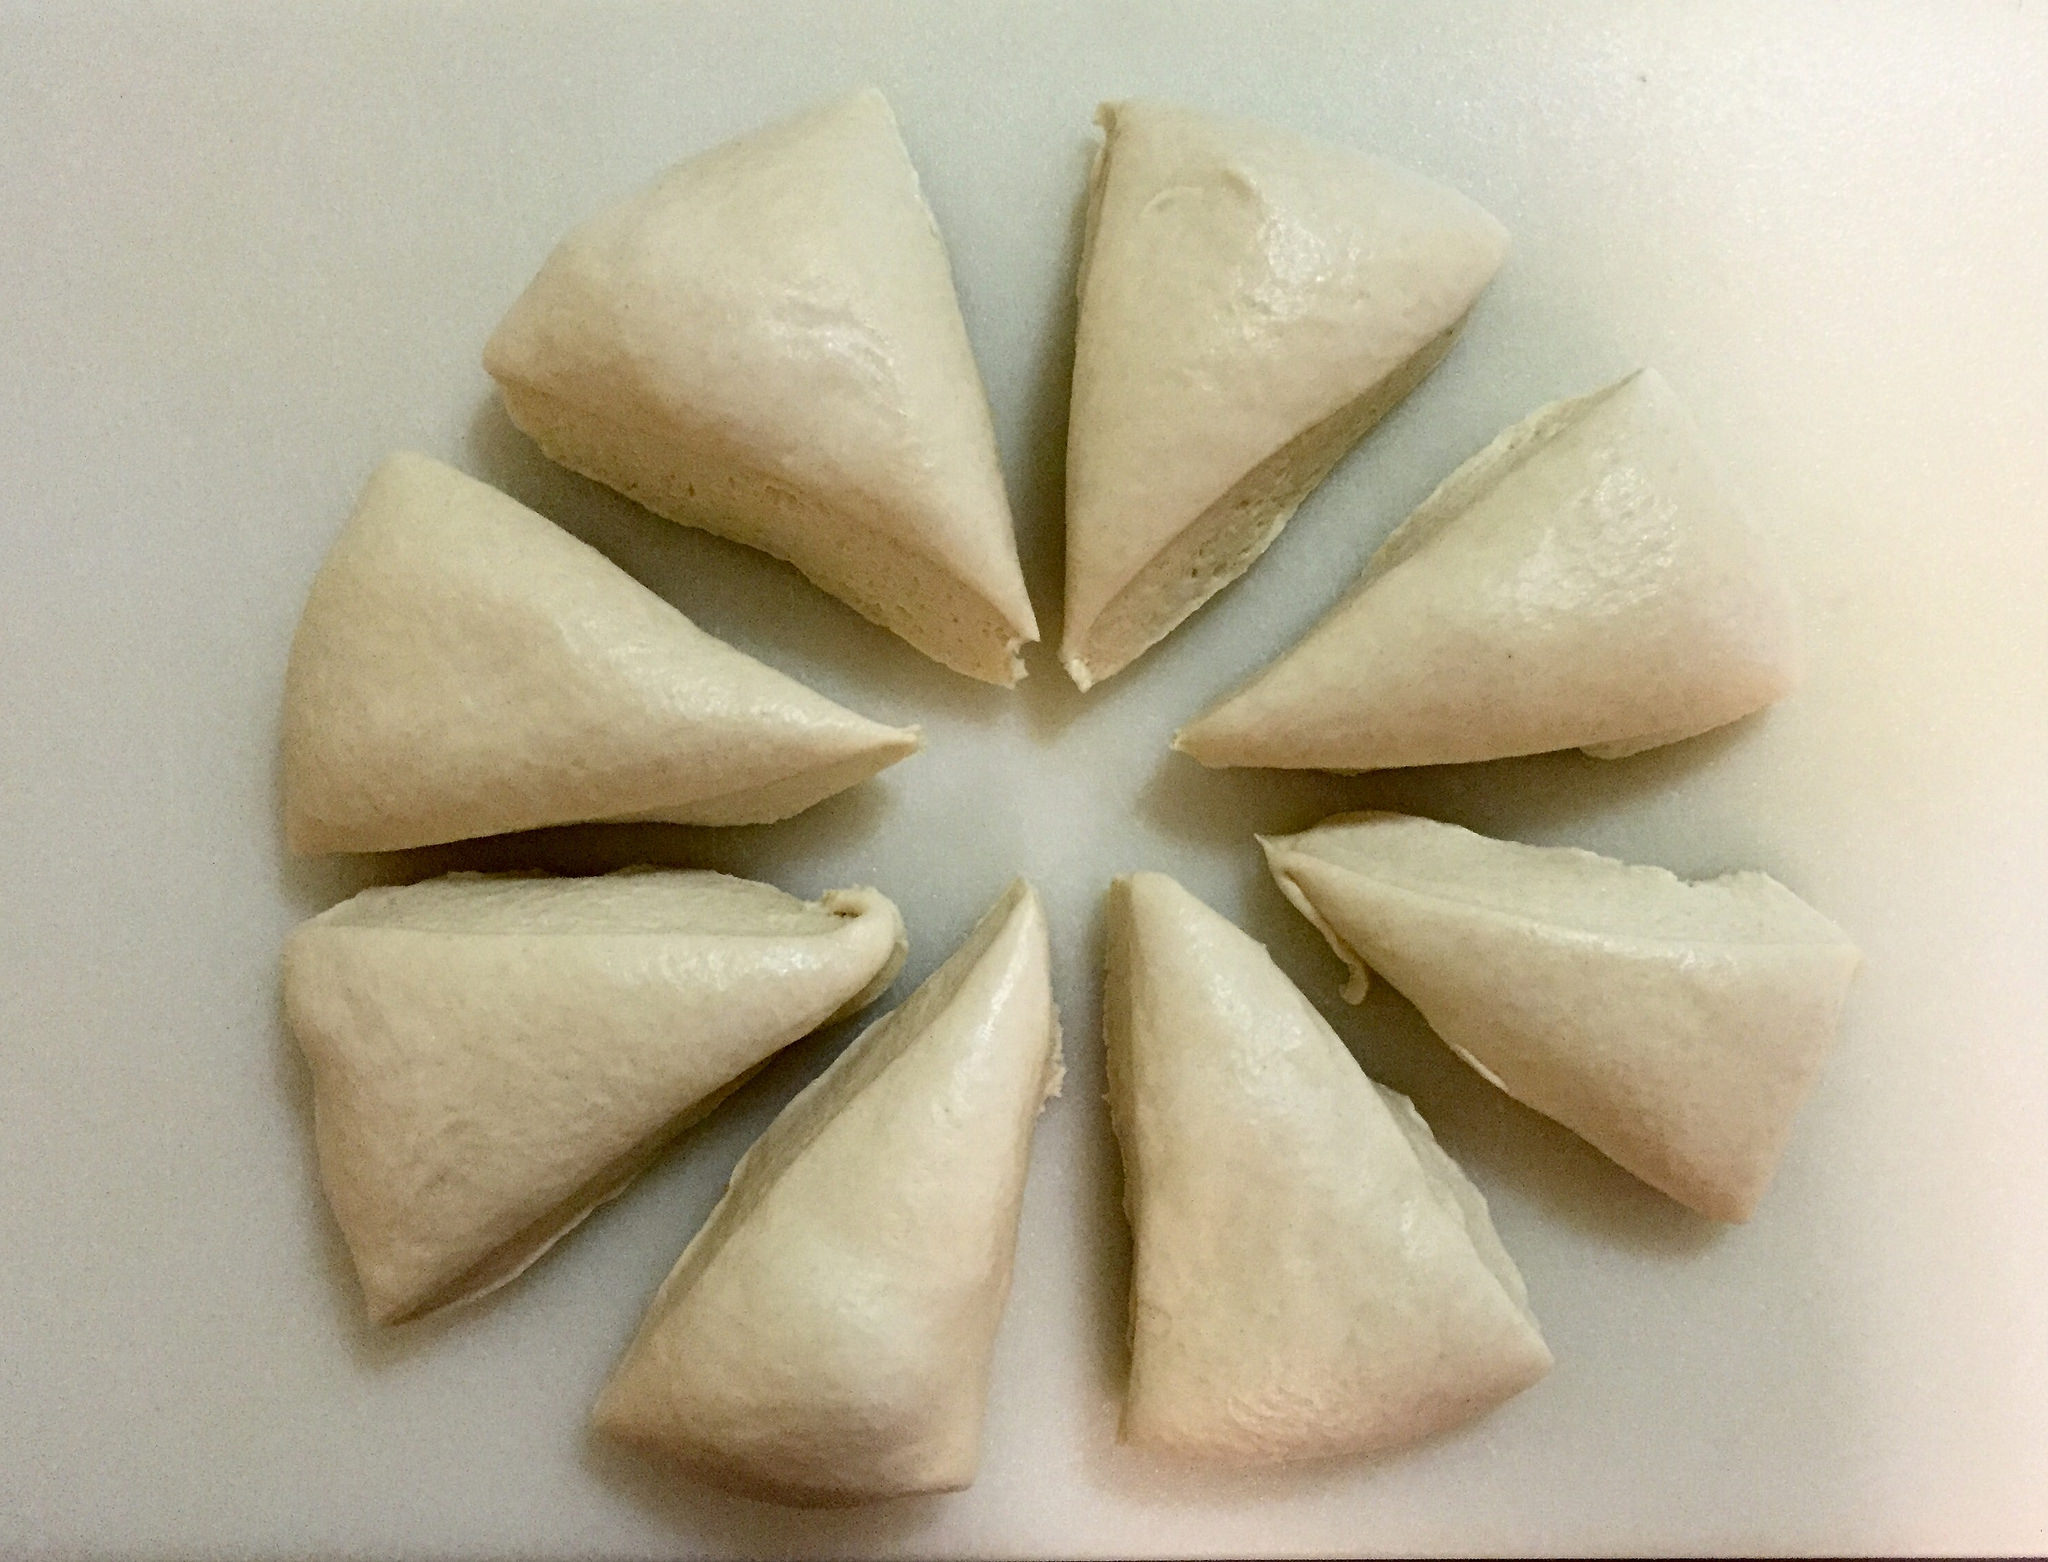
  3. To make french bread dough: Remove pâte from the refrigerator at least an hour before to dechill; cutting it up into 8 or so pieces helps speed this process. Mix flour, salt, yeast in a bowl, then add pâte fermentée pieces. Begin to knead the pâte fermentée pieces into the flour (it won’t work well), then add water and continue mixing until the dough comes together. Add extra water if necessary.
  4. Turn dough out onto a floured counter and knead for about 10 minutes. The pâte fermentée pieces should be entirely incorporated with the “new” dough. The dough should pass the windowpane test and register about 77-81°F.
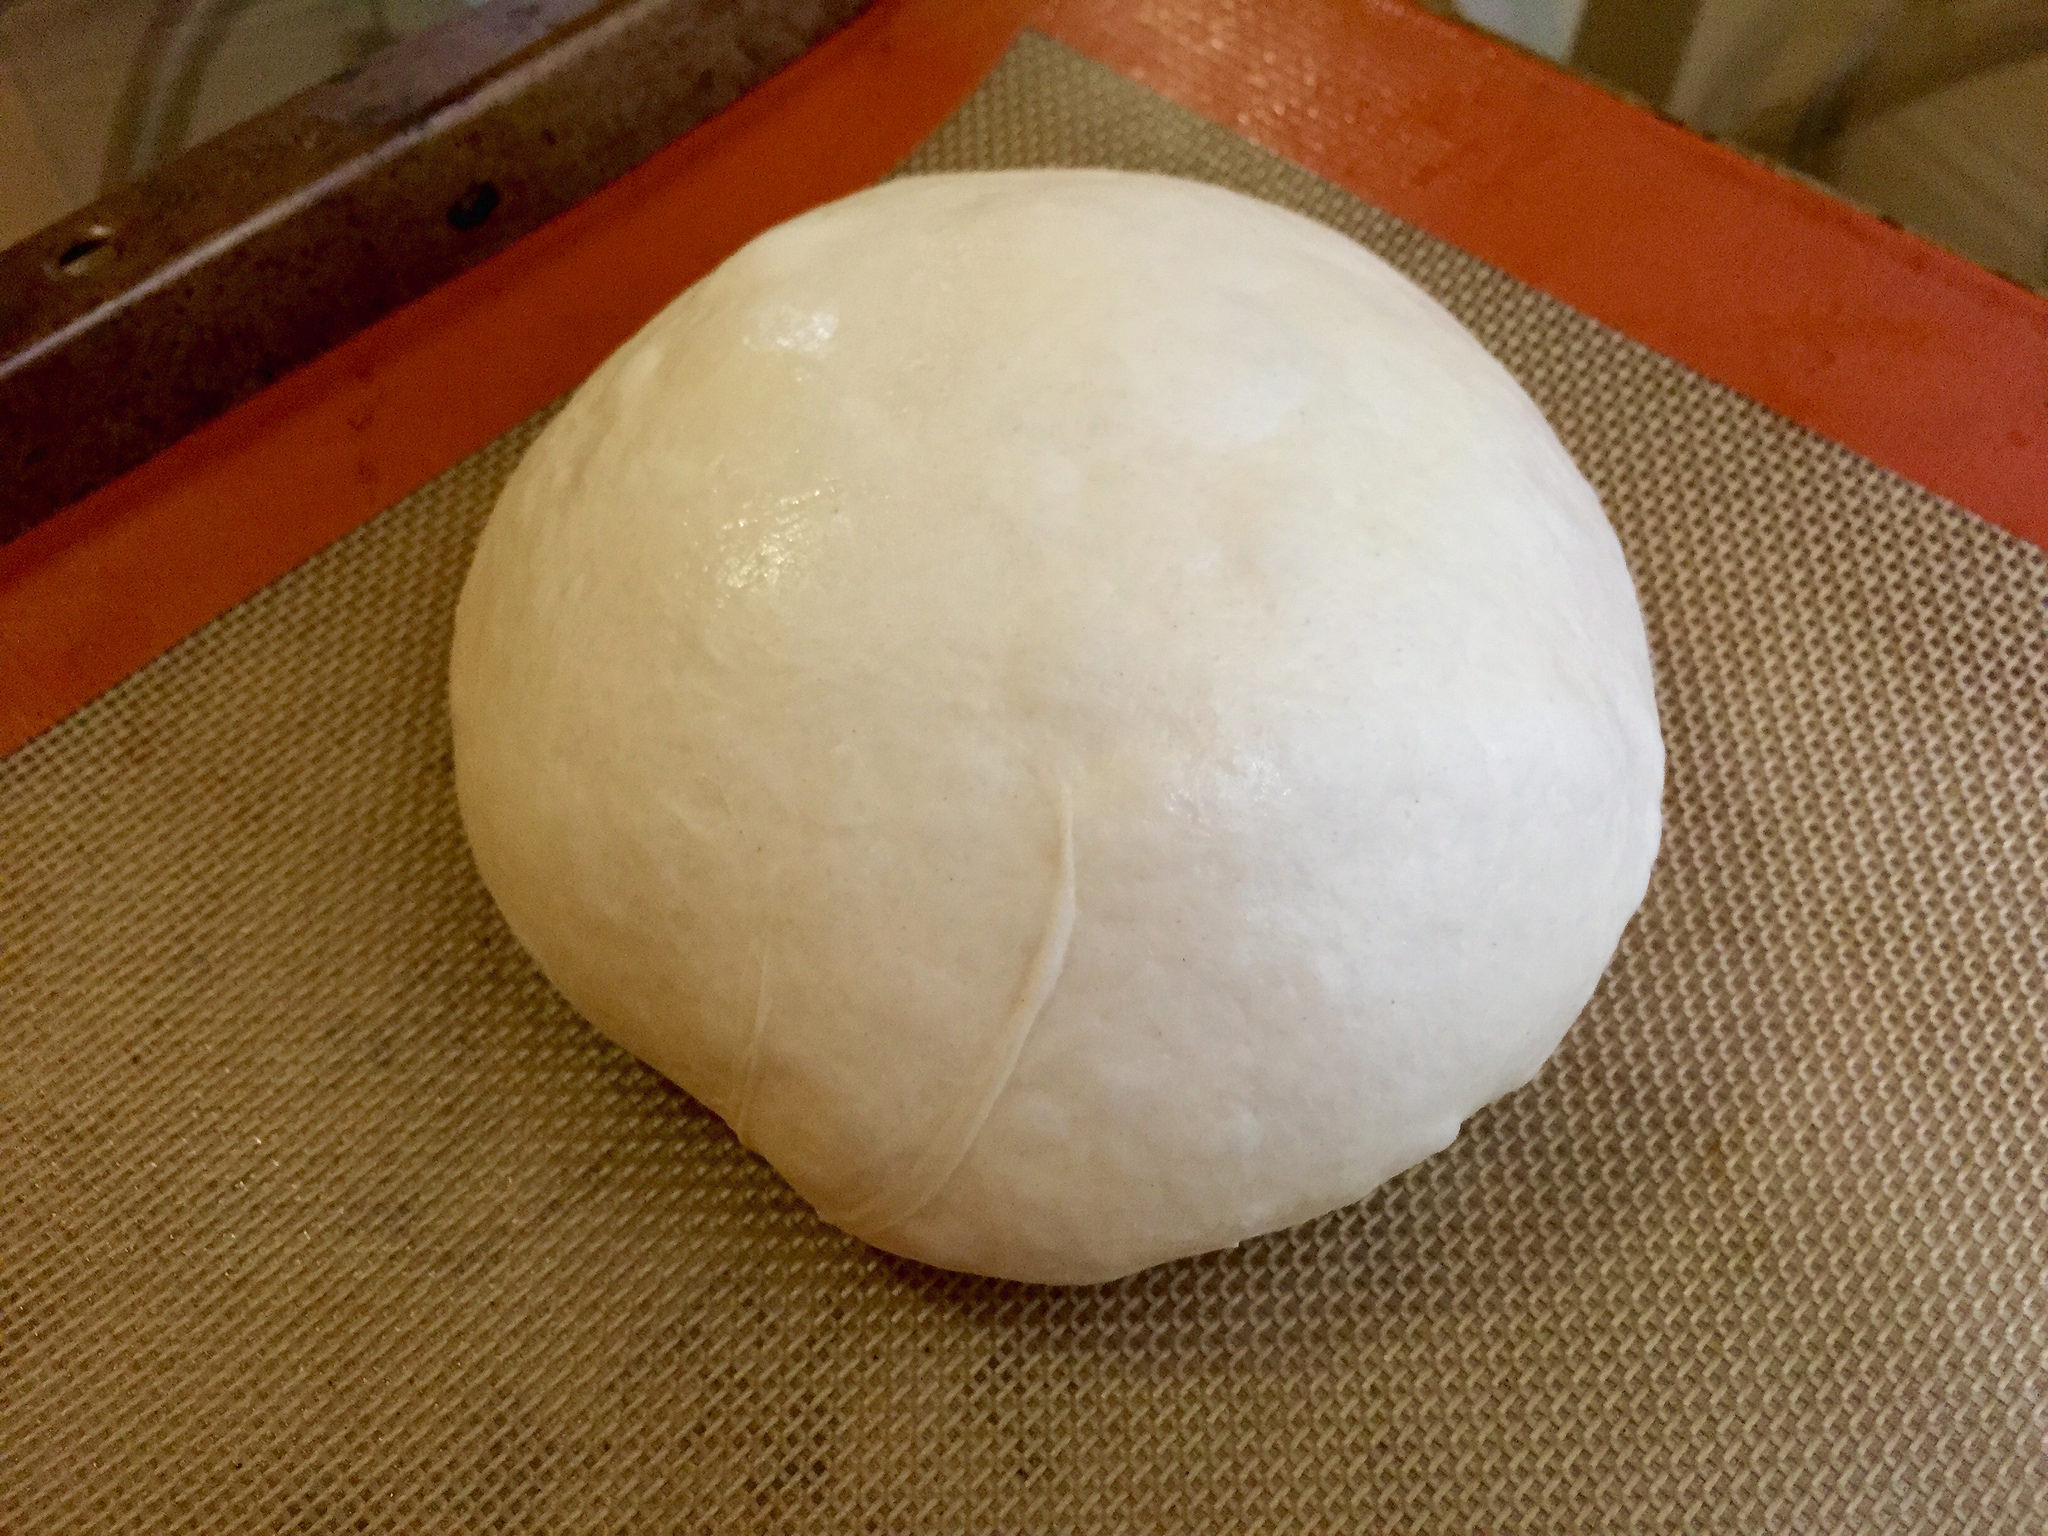
  5. Shape the dough into a smooth ball and place in a lightly oiled bowl. Cover and let rise for 2 hours, or until the dough has doubled in bulk.
  6. Shaping the loaves: Turn the proofed dough onto a floured counter. Being careful to degas the dough as little as possible, use a pastry cutter or sharp knife to divide the dough into two or three pieces, depending on how many loaves you are making. I simply made round boules — check out the man himself, Peter Reinhart, shaping loaves on YouTube for a more in-depth tutorial.
  7. Let the loaves rest for at least 45 minutes, or until 1.5x starting size.
  8. Baking the loaves: Preheat oven to 500°F. If you’re using a baking stone (I use one by Old Stone Oven and I love it, but they’re entirely necessary), place the stone on the center rack before you turn the oven on. Place a metal or cast iron (not glass) pan in the bottom of the oven now, regardless of whether you’re using a stone or not; this will be your steam pan. A few minutes before you’re ready to bake the bread, heat up about half a cup of water — it doesn’t have to be boiling, but very hot is best.
  9. If using the baking stone, liberally dust a cutting board or pizza peel with semolina flour or cornmeal. Carefully transfer one of the loaves to the peel, then slide it into the preheated oven. Repeat for remaining loaves, then pour the hot half cup of water into the steam pan and shut the oven. After 30 seconds, open the door and mist the walls of the oven with water (or sprinkle some in with your hand). Repeat twice more, then turn the oven down to 450°F. If the whole misting process is too much fuss for you, you can skip it. It makes a difference in the crust’s texture, but it won’t ruin the bread if you don’t do it.
  10. Bake for 10 minutes, then rotate the loaves 180° for even baking. Bake for another 10-15 minutes, then remove and place loaves on a cooling rack. The finished loaves should be golden brown and will sound hollow when tapped on the bottom.
  11. Let rest for at least an hour before slicing and consuming.


Year of Bread: Cranberry Walnut Bread

cranberry bread ingredientsWhile I love a good piece of whole grain toast slathered with peanut butter for breakfast, there’s something to be said for stuffing your toast full of flavor before you bake it. It makes for a much easier get-out-the-door-fast kind of breakfast (or snack) that way.

the cranberry bread doughThe Dough

Here’s the thing: I dig a good, flavorful filling for bread, oftentimes they end up being very fussy during the kneading stage. By itself, this is a perfectly nice dough. It’s lightly orangey and slightly sweet, and it’s easy to handle. Without any additions at all it would make a great little twist on your average white toast bread.

But to get a good flavor dispersion, you really have to jam in a ton of cranberries and walnuts. These tend to ruin the smooth consistency of the dough, and can be hard to incorporate evenly. Chunky add-ins can make it hard to form a good crust, and just serve as an obstacle to keeping the dough in one piece until they’re set during baking.

cranberries and the dough

The Braid

The other slightly annoying thing about this bread is Reinhart’s suggested shaping — the dramatic double braid. It’s one braid on top of the other. My first braid looked great — tight and uniform, tucked together neatly. The second, smaller braid refused to stay perched atop the big braid during the final rise, opting instead to slowly unravel and slide down the side, and forcing me to continually reposition it, trying very carefully not to deflate it. Argh.

Luckily, the final effect looked a bit more rustic and freeform than I anticipated, but still appetizing. If I make this bread again, I’ll probably stick to a single braid, or use a loaf pan, eliminating the stress of shaping and braiding altogether.

braided cranberry loaf

Mixing It Up…Next Time

But you know what I really want to try with this recipe? Incorporating the flavorings into the cornbread recipe from last week’s post, getting it even closer to being a Thanksgiving flavor menagerie. Would topping that with french fried onions be taking it too far?

This cranberry walnut bread comes together relatively quickly, and stays pretty soft and tasty for a few days. Make one on Sunday night for a Monday morning toast that’ll make your weekday breakfast a little more flavorful.

finished cranberry walnut bread

Cranberry Walnut Celebration Bread

Adapted (very slightly) from Peter Reinhart’s The Bread Baker’s Apprentice. Yields 1 large braided loaf.

Ingredients

  • 3 cups bread flour
  • 3 tablespoons granulated sugar
  • 3/4 tsp salt
  • 3 1/2 tsp instant yeast
  • 1 1/2 orange or lemon zest
  • 2 eggs, slightly beaten
  • 1/2 cup milk + 1/2 tablespoon vinegar, room temperature
  • 2 tablespoons unsalted butter, melted
  • 1/4 cup water, room temperature
  • 1 cup sweetened, dried cranberries
  • 3/4 cup coarsely chopped walnuts
  • 1 egg, whisked until frothy, for egg wash

Cranbery Walnut Bread Instructions

  1. Stir together flour, sugar, salt, yeast and zest in a large mixing bowl. Add eggs, buttermilk and butter. Stir, slowly adding water to make a soft, pliable dough.
  2. Transfer dough to a floured counter and knead for about 5 minutes. The dough should smooth and soft. Add water or flour as needed to adjust consistency. Add cranberries and knead for another 2 minutes, then add walnuts and gently knead in until evenly distributed.
    1. A method that works well for me when it comes to incorporating large chunks of ingredients such as cranberries is to start by flattening the dough out into a rough rectangle. Place a scoop of cranberries to one side of the dough, and fold the other side over. Flatten and fold a few more times, then repeat with the rest of the cranberries.
  3. Transfer to an oiled bowl and cover in plastic wrap. Let rise for 1.5-2 hours, or until dough doubles in size.
  4. Transfer to a counter and deflate slightly. Either transfer to a greased loaf pan or divide into 3 pieces and braid. Place pan or loaf on a sheet pan and brush with half of the egg wash.
  5. Proof uncovered at room temperature for about 90 minutes, or until dough nearly doubles. Brush the loaf a second time with the rest of the egg wash. Preheat the oven to 325F when you’ve got about 30 minutes left to rise.
  6. Bake for approximately 25 minutes, then rotate pan and continue baking for another 25-30 minutes. The loaf should be a deep golden brown and sound hollow when thumped on the bottom.
  7. Remove the cranberry walnut bread from the pan and transfer it to a cooling rack. Allow the loaf to cool for at least an hour before slicing and serving.