Blue Apron Review

Last week I got to try Blue Apron with a friend’s referral code. I’ve had a few friends use Blue Apron in the past, and I’ve been curious about it for a while. Overall, it was a great experience, but I chose not to continue it.  I do have some mixed thoughts on the product, and I thought I’d share them in case anyone else is considering Blue Apron for themselves.

What I Liked About Blue Apron

1. Meal-Based Recipes

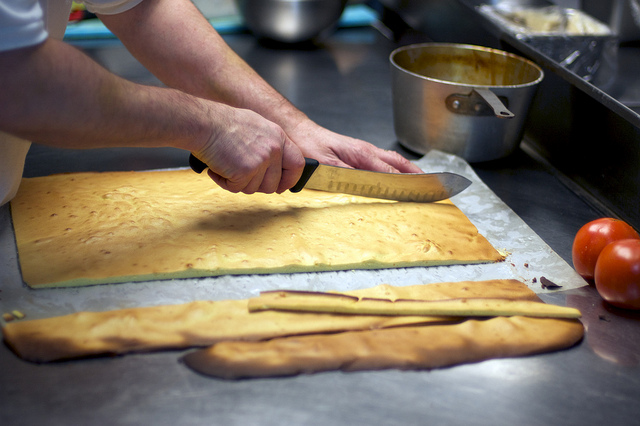
One thing I really, really liked about Blue Apron is the meal-based format of their recipes. When you’re cooking on a time crunch or don’t have a lot of experience, it’s nice to know how to pace multiple dishes to be done at the same time. From doing prep all at once to timing each step correctly to make sure everything comes together simultaneously, Blue Apron’s recipes do a pretty good job of creating meals, not just dishes. I would still recommend that you read through the entire recipe before you start — there are a few “prep” things that are placed halfway through the cooking process that I’d prefer to do at the before I start heating anything up.

2. Tasty Recipes and High-Quality Ingredients

The ingredients were fresh and high-quality. I was worried that the produce would be subpar, since I wasn’t sure what the delivery process looked like, but everything was of a quality I would have bought if I had gone to the store and picked it out myself.

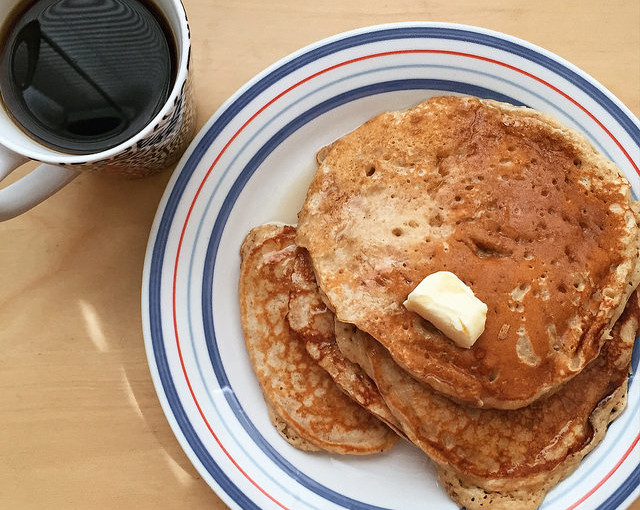
Every single recipe was delicious, and I’m sure I’ll make them again. Blue Apron has done a great job developing recipes that are well-balanced and flavorful. They were healthy; not necessarily the kind of food I’d eat if I were trying to lose weight, but not too heavy. There was a good mix of whole, fresh ingredients that weren’t overly salty, fatty or cholesterol-laden.

3. Convenience

They bring the box right to your door! It’s packed with large ice packs and well-organized. As I unpacked, I realized that the pork chop packaging had been torn during shipping, but because of the way everything was packed it didn’t leak on anything except the ice pack. I usually spend a good amount of time deciding what to cook and shopping for ingredients each week, but with Blue Apron I didn’t have to. It was a nice break from the norm, and I can see how having everything delivered ready-to-cook would be a huge boon to busy individuals or families.

What I Didn’t Like about Blue Apron

1. Not enough cooking jargon

On one hand,  jargon can be alienating and confusing. On the other hand — the hand you’re learning to cook with — it’s an important way to describe techniques, and most recipes use some level of lingo. Blue Apron recipes tend to eliminate these cooking words in favor of simpler ones. One of the recipes called for quick-pickled onions, but the word “pickled” strangely didn’t appear anywhere on the recipe. The technique was there, (soaking sliced onions in red wine vinegar), but without the jargon or outside knowledge, you wouldn’t necessarily know that. Understanding the language and the techniques behind them are an important part of learning to cook.

2. Portion Size

While the dishes weren’t meager, I did find myself wishing I had a little extra each night. I usually cook relatively large portions for myself and my boyfriend so that we either have leftovers for lunch or a second helping. I supplemented all but one of the meals with a secondary side dish, to make sure we didn’t get hungry later, and it seemed liked just enough food. That said, if you don’t have quite a big eater at the table, you’ll probably find Blue Apron’s portions to be just right.

3. Packaging Waste

One of the biggest problems I saw with Blue Apron was the amount of packaging it involved. Any ingredient that wasn’t whole and somewhat shelf-stable was packaged in small plastic cups or bags. I appreciate the fact that finding cheap, tough, lightweight alternative packaging solutions can be tough. However, I try to minimize kitchen waste wherever possible. This means purchasing larger quantities and opting for products with less packaging wherever I can. I’m sure Blue Apron is working to improve their packaging, but their current model doesn’t align with my waste goals.

One thing that I won’t put in either the pro or con column is cost. At nearly $60 per week, Blue Apron more expensive than going to the store and buying everything yourself, but cheaper than ordering in or going out to eat. Given the fact that it’s also delivered to your door, the cost markup doesn’t seem terrible.  You’ll have to figure out for yourself if the pros outweigh the cons (and the price) for Blue Apron.

In the end, I think that Blue Apron is a great solution for cooks who have a small to moderate amount of cooking experience already. If you’ve never picked up a knife before, you might get a little lost in Blue Apron’s recipes, but if you have a basic understanding of getting around the kitchen you’ll probably enjoy their meals. The meal choices were solid and interesting, and if you’re stuck in a creativity rut cooking the same things over and over, Blue Apron might get you out of your comfort zone and introduce you to some new ingredients and ideas. If anyone else out there has tried and liked (or disliked) Blue Apron, I’d love to hear your thoughts!

Please note: I was not paid to review Blue Apron, although I did receive a free box via a friend’s referral code. My thoughts on my experience with their service and product are entirely my own. 

On Keeping a Cooking Journal

Follow my blog with Bloglovin

Keeping a cooking journal is a small but effective technique for improving your cooking practice. I’ve only started doing in the past year, but since I started I’ve found myself wishing I had begun years ago. It’s something I highly suggest that other home chefs do too because it can have a big positive impact on the learning process.

cooking journal with recipe

Why a Cooking Journal is Important

A cooking journal is simply a place for you to take notes about your cooking projects. And just like in school, the notes you take about cooking help you process and retain a lot more information than you would otherwise. As you cook more frequently, you likely find yourself pulling recipes from many different sources. You’ll probably mix together elements of different recipes to make your own version. You might even strike out and play with original concoctions. And when you do make that perfect pancake, or discover your new twist on an old childhood favorite, you’ll want to make sure that you can replicate it. Taking notes on where you find your inspiration, how you tweak recipes and what you liked (or disliked) about a dish helps ensure that good cooking isn’t a lucky chance, but a measured process that you can recreate next time. Keeping a cooking journal will save you time and energy down the line by helping to focus your cooking process and make you more conscious of past successes and failures.

How to Use a Cooking Journal

Get a cheap spiral notebook and leave it in your kitchen, or use an app like Evernote if you want to keep things digital. Don’t worry too much about using something too fancy or complicated; function is much more important than form in this case. If you’re using a paper notebook, it’s likely that at some point it’ll end up with a dusting of flour or a few rogue drops of olive oil on the cover, anyway.

cooking journal harissa

Write down what you cook– everything you cook. If possible, jot down notes as you go, or soon after you’re finished and your memory is fresh.

If you’re the organized type, it can be helpful to provide a bit of structure to your journal. If you’re using a notetaking app you might want to sort it into folders for different categories of dishes (meat, desserts, veggies, etc). If you’re using a hardcopy journal you can use Post-it notes to color code important pages.

What Do I Include in my Journal?

Just like a regular journal, you can put whatever you want into a cooking journal. If you want to draw diagrams of how to chop an onion, compose odes to the perfect cheeseburger, or write down the precise temperature and weight of every ingredient you use, you can. Sometimes I’ll even cut out and tape in recipes I find in magazines or the newspaper and want to try. Other times I’ll just write a few notes about ideas for different flavor combos for my next batch of cupcakes.

The key thing to remember is that the purpose of the journal is to help you improve in the future, so try to include notes that will help you the next time you make a dish. When you’re experimenting with a new mix of spices, keep track of what you’re putting in the mix so you can replicate or improve it the next time around. When you’re trying a new technique, write down what you did, where you messed up, and how you can do it better.

cooking journal two pages

The Secret to Good Journaling: Going Back!

The most important part of keeping a cooking journal is going back and reviewing what you’ve written. When you’re preparing to make a dish that you’ve already made before, refer to the notes you took the first time. Try to improve your process slightly (or significantly). Going back and making recipes again is a critical part of improving your skills, and having notes from the last time you made something is a great way to jump start your efforts.

It’s also fun to take time, every once in a while, to go back and flip through the early pages of your cooking journal. Looking back can help you realize how far you come, and help motivate you to be even more adventurous in the future. Happy journaling!

Kitchen Minimalism: How to Cultivate a More Minimalist Cooking Mindset

Right now there’s a very popular design trend towards minimalism, both online and offline. Designers and consumers are embracing clear, open spaces and light, neutral palettes. But instead of talking about how you should have a clean, streamlined-looking kitchen, I want to focus on the idea of cultivating a minimalist mindset in the kitchen.

By its nature, cooking is not a terribly minimalist endeavor. Even the most basic kitchen is likely to have a few dozen tools, serviceware and miscellaneous gadgets lying around– not to mention a vast and ever-changing stock of ingredients. But that doesn’t mean that the concept of minimalism doesn’t have a place in your kitchen. Kitchen minimalism should be more about what’s inside yours cupboard than what they look like, and more about action than aesthetic. It’s about cultivating a collection of cooking gear that you actually use, and creating an uncluttered flow for your cooking practice. Here are 5 ways to start bringing minimalist ideas into your kitchen.

Apex Modern Kitchen

1. Omit Needless Gear

The next time you watch a cooking show or get a sneak peek inside a chef’s kitchen, take note of the tools they use. Pro chefs generally don’t use a ton of gadgets and specialized gizmos to make great dishes. They rely on great technique and skills to do things the old-fashioned way. As a rule of thumb, try to steer clear from uni-tasking tools; they’re often bulky, hard to clean or let you cheat at actually learning good practices. Instead, focus on learning how to use basic tools better– knife skills and a few good pots and pans can take you a lot farther than a Slap Chop and a corn kerneler.

The core concept of minimalism is reducing a subject to its necessary elements. A kitchen reduced to its necessary elements is a kitchen where food, not the tools by which it is made, takes the focus.

When you build out your kitchen wishlist, focus on tools that help you make the dishes that fit your cooking style and needs. The ideal kitchen roll-call is going to look different for everyone — just because I use a wok all the time doesn’t mean you need one, and just because I don’t think a KitchenAid mixer is a necessity doesn’t mean you should toss yours. For a good list of basics, check out Tim Ferriss’ The 4-Hour Chef — he offers a great list of foundational pieces that I (mostly) agree with. The point is to curate your kitchen artillery to suit your needs; if you buy something and it’s a flop, it’s okay to let it go instead of saving it just in case. Keep only what you really need, and what you use often. If only I could apply this to my bookshelf…New Font: René Menue Symbols

2. Rotate Your Stock

Another source of mental and physical clutter in the kitchen is holding onto ingredients that get used once, then never see the light of day again. Since most things do eventually go bad or lose their luster, it’s good to do a periodic purge of your spices and sauces to keep things fresh. If you can’t bear to toss that turmeric, then use that time to hunt down some new recipes and expand your repertoire to use it up. Otherwise, hold a spice swap with a couple friends and go grocery shopping in each other’s cupboards. Moving forward, buy ingredients more intentionally to help keep edible clutter at bay.

3. Maintain a Clean Workspace

People tend to leave their appliances out on the counter, but if at all possible, try to cut down on your countertop clutter. Your counter should be like an artist’s palette: clear and ready to hold your working materials (ingredients and gear) during cooking, but not store them all the time. The more counter space you have, the less likely you are to spill, fumble, or forget something in the heat of the culinary moment.

While you’re cooking, practice keeping your workspace tight and organized. Use a trash bowl to consolidate peels and wrappers, set up your mise en place neatly, and generally try to keep things clean as you go. An orderly kitchen helps eliminate distraction and lets you focus on the task you’re working on, instead of thinking —  I really should find a place to that blender/clean the toaster/sort the mail.

mise-en-place

4. Create “Cupboard Whitespace”

This one is tricky because it actually requires is having less stuff (or more storage space). People tend to collect stuff to fill the space they have available, so chances are you’ve got more stuff than you need lurking on the shelves. Try to leave some breathing room in your cupboards and fridge. Having a little extra space makes finding things easier, and it minimizes the chance you’ll accidentally knock something over and break or spill it. Just because you can close all the drawers and cupboards and make your kitchen look neat, surface-level organization means little if there’s a storm of jumbled gadgetry hidden just out of sight.

5. Embrace Minimialism, But Keep (and Use!) What You Love

Your kitchen is a reflection of your cooking style, and oftentimes your personality. If you love your “World’s Greatest Intern” self-heating coffee mug, don’t get rid of it. Keep the things you use, and the things that bring you joy. Sure you might only pull out the waffle iron on special occasions, but if that’s your very favorite cooking object, keep it around. Better yet, identify the things you love in your kitchen and find ways to use them more frequently– maybe that novelty waffle iron could make a substitute panini press, or a hash brown-crisper.

keyboardwaffle

While true minimalism values stripping away the excess as much as possible, it’s important to remember that it has its roots as an aesthetic choice, not a culinary one. Getting rid of things for the sake of getting rid of things isn’t always the best way to approach cooking. Ultimately, minimalist cooking at home isn’t about having your kitchen look a certain way, or depriving yourself of stuff that you need. It’s about pushing yourself to think and work creatively, and to master the basics instead of getting caught up in the latest gadgetry.


Photo Credits
Featured Image: Steve Larkin via Flickr
Kitchen icons “René Menue Symbols” via Flickr
“Mise en place” by Jules Morgan via Wikimedia
Keyboard Waffle by KeyboardWaffleIron.com

Image by Jeff Kubina via Flickr

How to Be a Better Cook at Home: Learn Techniques, Not Recipes


One of the biggest mistakes made by fledgling home cooks is worrying too much about following recipes instead of learning techniques. They trudge through Step 1, Step 2, and Step 3, following the instructions to the letter, trying not to deviate from the recipe, but not really thinking about anything beyond exactly what’s written. Onions get chopped unevenly, stove top burners get cranked up too high, herbs get forgotten in the back of the fridge until the last possible minute. These cooks will finish the dish, and it might still be tasty , but cooking like this doesn’t teach you much, and poor practice doesn’t make perfect in the long run. If you’re cooking like this, you’re just following with recipes, when you should be working on improving the skills and techniques.

Learning the Key: Why Techniques Work Better

Of course, recipes and techniques aren’t really mutually exclusive; a recipe is just a combination of techniques and ingredients put together in a certain way to get a certain result. But here’s the difference: recipes can suck. Right now the internet is glutted with a huge range of recipes — some good, some bad, many in the middle — written by everyone from professional chefs to web-savvy grandmas. A theoretically delicious dish can be brought to its knees by a poorly written recipe in the hands of a novice cook.

Recipes can be unclear, confusing, poorly written, or simply written for more experienced cooks.

A technique can’t suck, in itself. A technique is just the action — searing, braising, chopping, mixing, etc. And improving your skills at performing a given technique can help overcome the strictures of a sub-par recipe.

Understanding what techniques you’re using and how to do them well opens up a whole world of variation to you that can correct for crappy recipe notes and allow you to improvise, experiment, and generally get better over time. It’s the difference between memorizing a specific piece of music in C minor, and understanding what playing in the key of C minor involves. Once you learn the key, then playing (and even composing) other songs in the same key becomes infinitely easier .

Mindful Cooking: Putting Techniques to Practice

Every time you make a new dish you’re probably going to encounter something new, or a new variation on the same concept. Next time you pull out the pots and pans to attempt a new recipe, ask yourself what techniques you’ll be using, step by step. By learning the basic concepts and practicing them, you can make a big difference in your cooking skills in the long run.

Figure out the techniques you use most frequently, and then try to perfect them.

Say you’ve decided to try your hand at beef bourguignon for dinner this Saturday night. While it’s can seem like a rather daunting dish for beginners, it’s a bit easier if you think of it terms of the building blocks of the dish: trimming the beef and vegetables before they’re added in turn; searing cubes of beef; sauteing onions to just the right level translucency. After you’ve finished your deliciously well-executed beef bourguignon, look for more recipes that use similar techniques to hone your skills even further. Mastering each of these is a small, manageable skill that can be applied to countless other recipes in the future.

The meta skills inherent to cooking are also good to think about. Keeping a clean, efficient work area and timing the stew so it’s ready at the same time as the other dishes you’re serving it with can be just as important to becoming a good chef as working with the ingredients themselves. Thinking about the different elements of a recipe’s process is key when it comes to cooking well.

Building Your Technical Cooking Repertoire

For a lot of people, especially those who are teaching themselves to cook and don’t have the benefit of an in-house mom, grandma or pro chef roommate to lean on, learning what’s going on at a chemical or physical level when you use given technique can be a useful method. Scientific chef-extraordinaire Alton Brown and Serious Eats’ J. Kenji Lopez-Alt both do a great job of walking through the specifics of different cooking techniques. Reading or watching some materials about general cooking processes and different methods can help you understand what to look for while you’re cooking — for instance, why you need to let a loaf of bread cool before you slice into it. Ultimately, knowing why and not just how can help improve your techniques through deeper understanding.

As with with any other technical skill, practicing is what makes you better. Practicing with technique in mind prevents you from getting stuck with the same old recipe over and over — instead of making a hundred batches of simple French bread to practice your kneading, you can find a new recipe every time (or every few times) to prevent yourself from getting taste bud burn out. So get out there and start practicing!

Image by Jeff Kubina via Flickr

Brown Butter Pancakes

Last Morning - Sierra Backpacking

Image by Scrubhiker via Flickr

Revisiting Jack Kerouac’s The Dharma Bums is bound to make the reader crave a hot, hearty breakfast of pancakes. Imagine the crisp morning air, the scent of trees and the damp earth, a sizzling pan over a campfire– and tell me your stomach isn’t rumbling at least a bit.

I gotta tell you about the romance of Northwest logging…those cold winter mornings with snow and your belly fulla pancakes and syrup and black coffee, boy, and you raise your doublebitted ax to your morning’s first log and there’s nothing like it.

This is a variation of my favorite basic pancake recipe, but with a few subtle changes to make perfectly fluffy and slightly complex pancakes. Brown butter and whole wheat flour add nuttiness and some tooth that makes these an incredibly satisfying, filling breakfast. Someday I will figure out a way to adapt it to be well-suited for campsite breakfast feasts, but for now it remains on the kitchen table (at least for me).

pancakes with butter

Brown Butter Pancakes Recipe

  • 1 1/4 cups AP flour
  • 3/4 cup whole wheat flour
  • 1 1/2 Tbsp sugar
  • 1/2 tsp salt
  • 1 tsp baking powder
  • 1/2 tsp baking soda
  • 4 Tbsp unsalted butter
  • 1 1/2 cup milk (preferably 1-2%)
  • 1/2 cup plain yogurt
  • 2 eggs
  • 1 tsp vanilla
  • More butter for frying (I usually use 2-3 tablespoons total)
  1. Melt the butter in a frying pan or saucepan over medium-low heat. Once it’s fully melted keep cooking for a few minutes, stirring occasionally, until the liquid has started to turn a nice golden brown. Once it’s browned remove to a small mixing bowl to cool slightly. Don’t leave the butter in the pan, as it might keep cooking and burn (Blackened butter won’t impart the same pleasant nuttiness as brown butter. Combine the milk and yogurt in a separate (small) bowl and whisk together until smooth.
  2. While the butter is cooling, whisk together the dry ingredients in a large mixing bowl.
  3. When the butter has cooled, whisk in the milk and yogurt mixture until incorporated. Add the eggs one at a time. Add the vanilla. The liquid mixture probably won’t be entirely homogeneous — bits of browned butter fat will probably float around, but don’t worry about it.
  4. Add the liquid mixture to the flour mixture and beat with a whisk for 30 seconds…and then stop. You want everything to just come together with no patches of flour or clumps of anything, but be careful not to overmix. Let the batter rest for up to 30 minutes.
  5. Prepare the pan by heating it over medium heat with a small pat of butter (maybe a teaspoon or so?). When the butter has melted, swirl it around the pan and then use a paper towel to gently wipe up most of it. You want a very thin layer of melted butter over the entire surface of the pan, but not too much.
  6. Using a 1/3 or 1/2 measuring cup (depending on how big you want your pancakes), scoop the batter into the pan. Now, you can eyeball them if you have some pancake-frying experience, but here’s a pretty foolproof method that I use: Set a timer for 2 minutes after you pour the batter, then flip the pancakes at the 1:30 mark. Continue cooking for another 30 seconds, then check the bottom to see if you’ve reached appropriate browning. My pancakes usually go for a full minute on the second side, but depending on your stove and preferences you might want to go more or less. The key is to not let the pan get too hot or too cold, and to watch the pancakes carefully.
  7. Serve immediately out of the pan, or stick the pancakes on a plate in a 200°F oven while you’re cooking the rest, and serve them in one big heaping pile to whomever is lucky enough to be breakfasting with you that morning. For the full Kerouac experience, serve brown butter pancakes with fresh black coffee and a view.

pancakes and coffee